Randomization settings in CDMS
Table of Contents
This tutorial outlines how to set up the randomization for your study. In our blog we provide a description of randomization in clinical trials and the method used by Castor.
Always consult a statistician before setting up your randomization, to ensure proper selection of the block sizes and strata.
To define the randomization settings for the study you need Manage Settings rights.
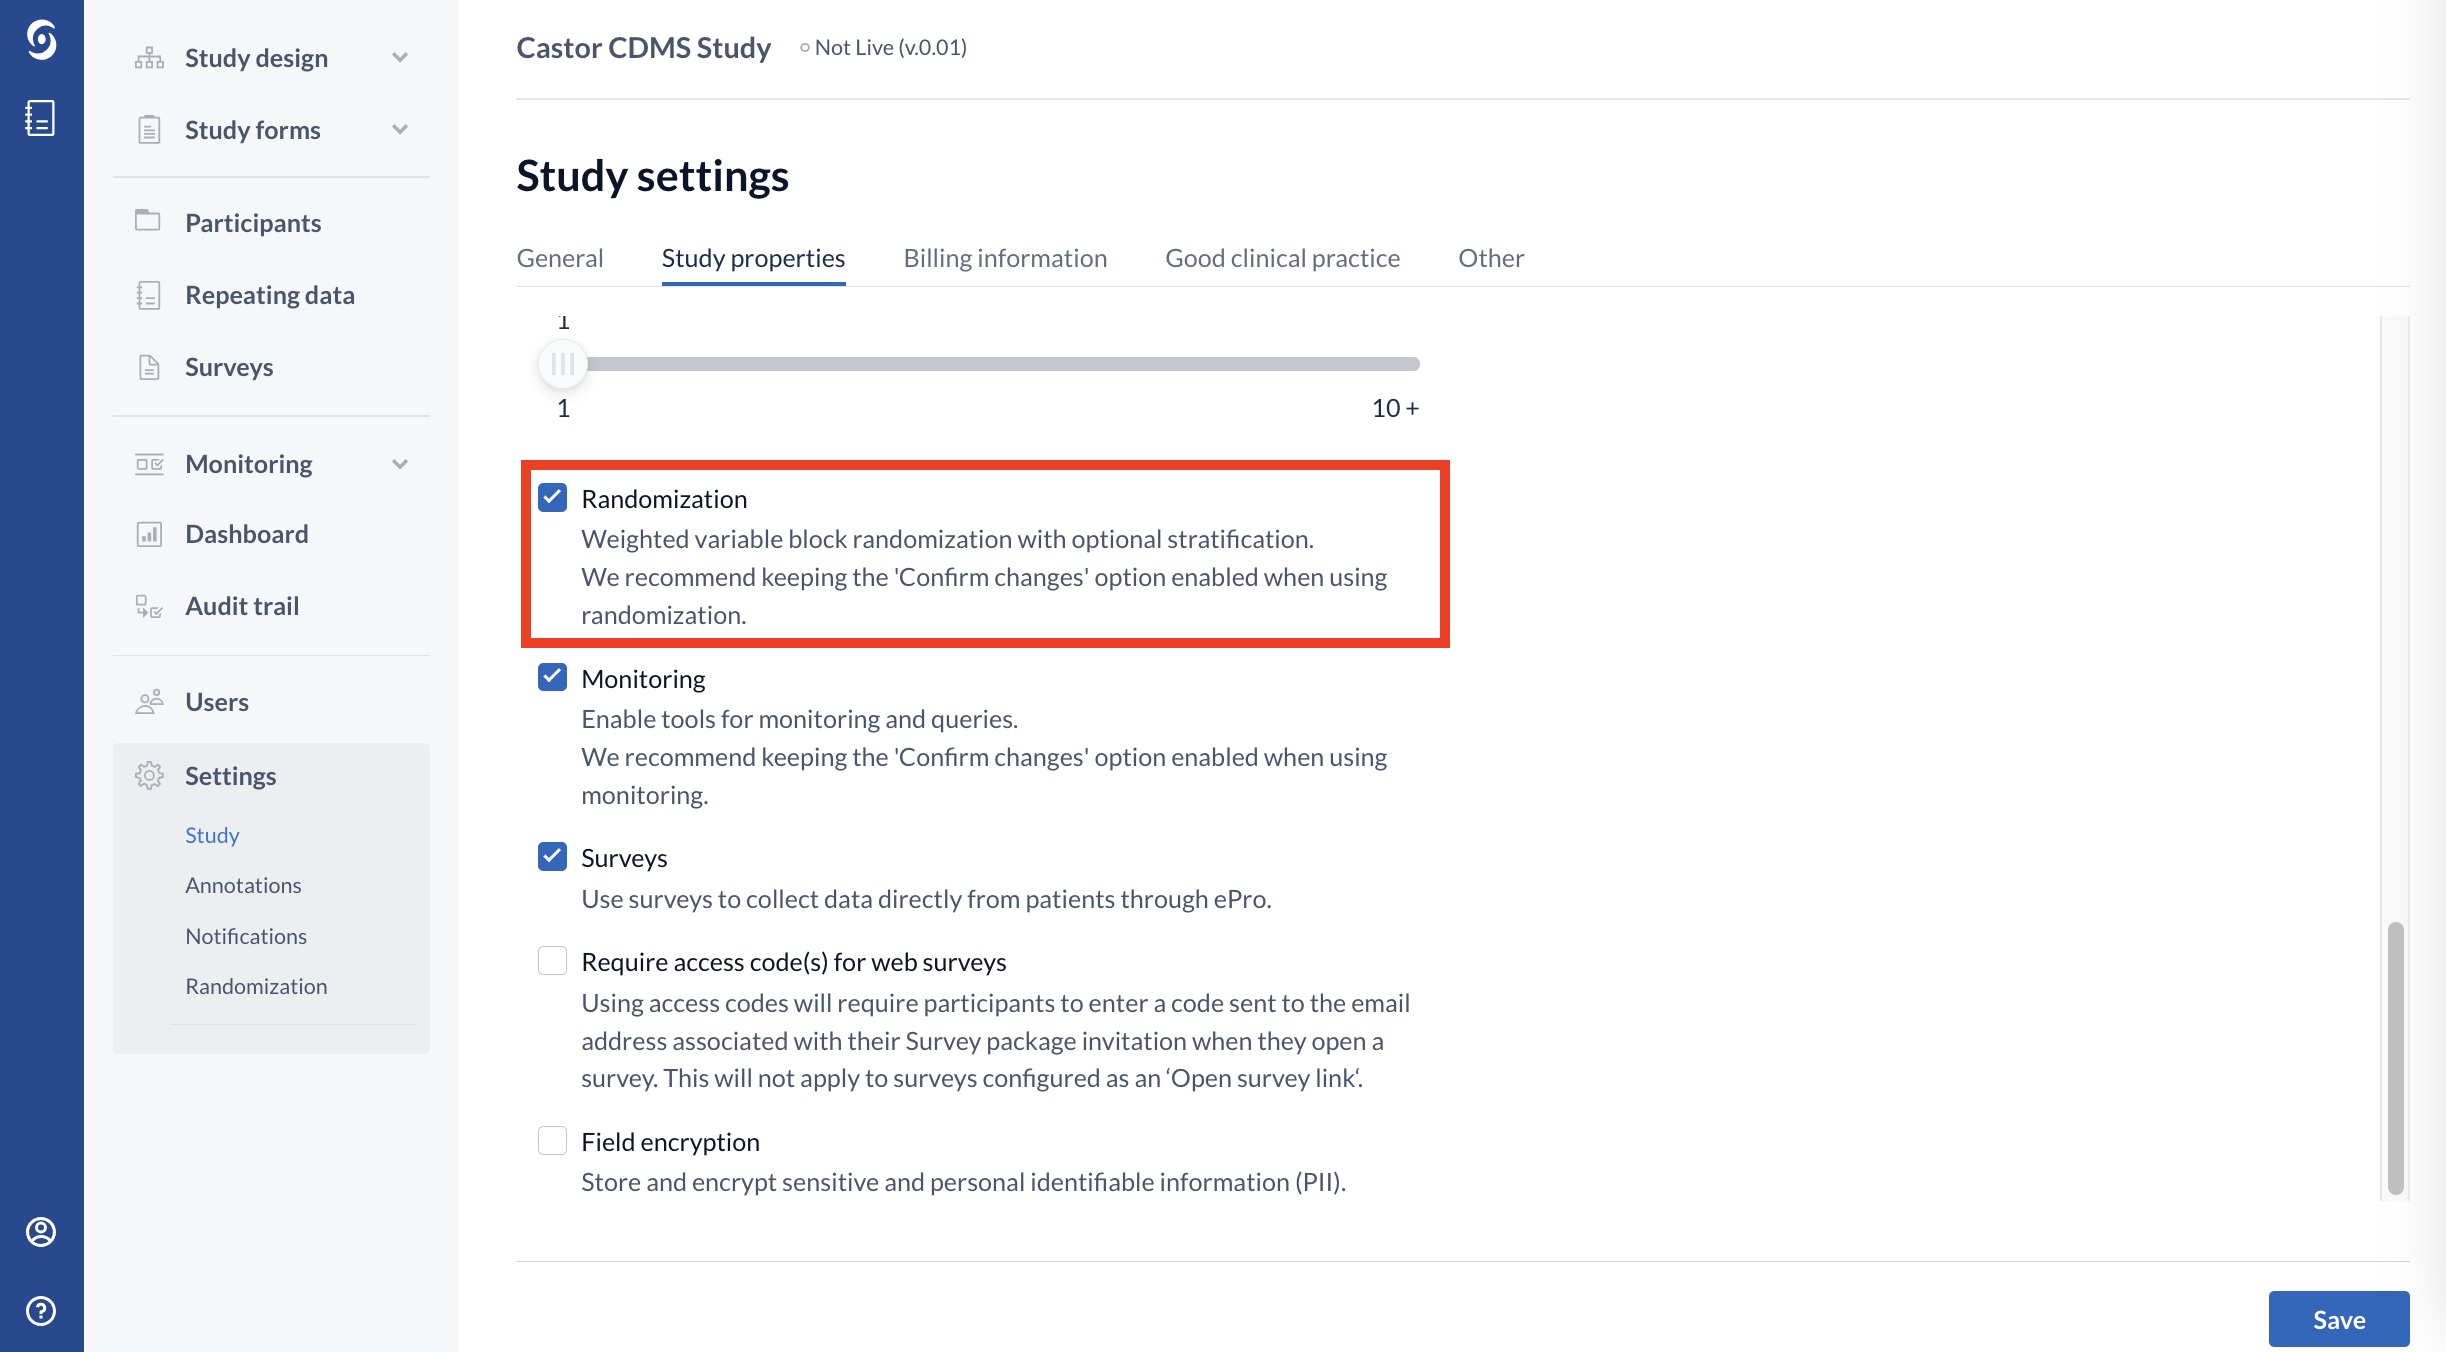
To enable randomization for your study, click on the checkbox next to "Randomization" to "Yes" in the Settings tab, Study properties sub-tab:
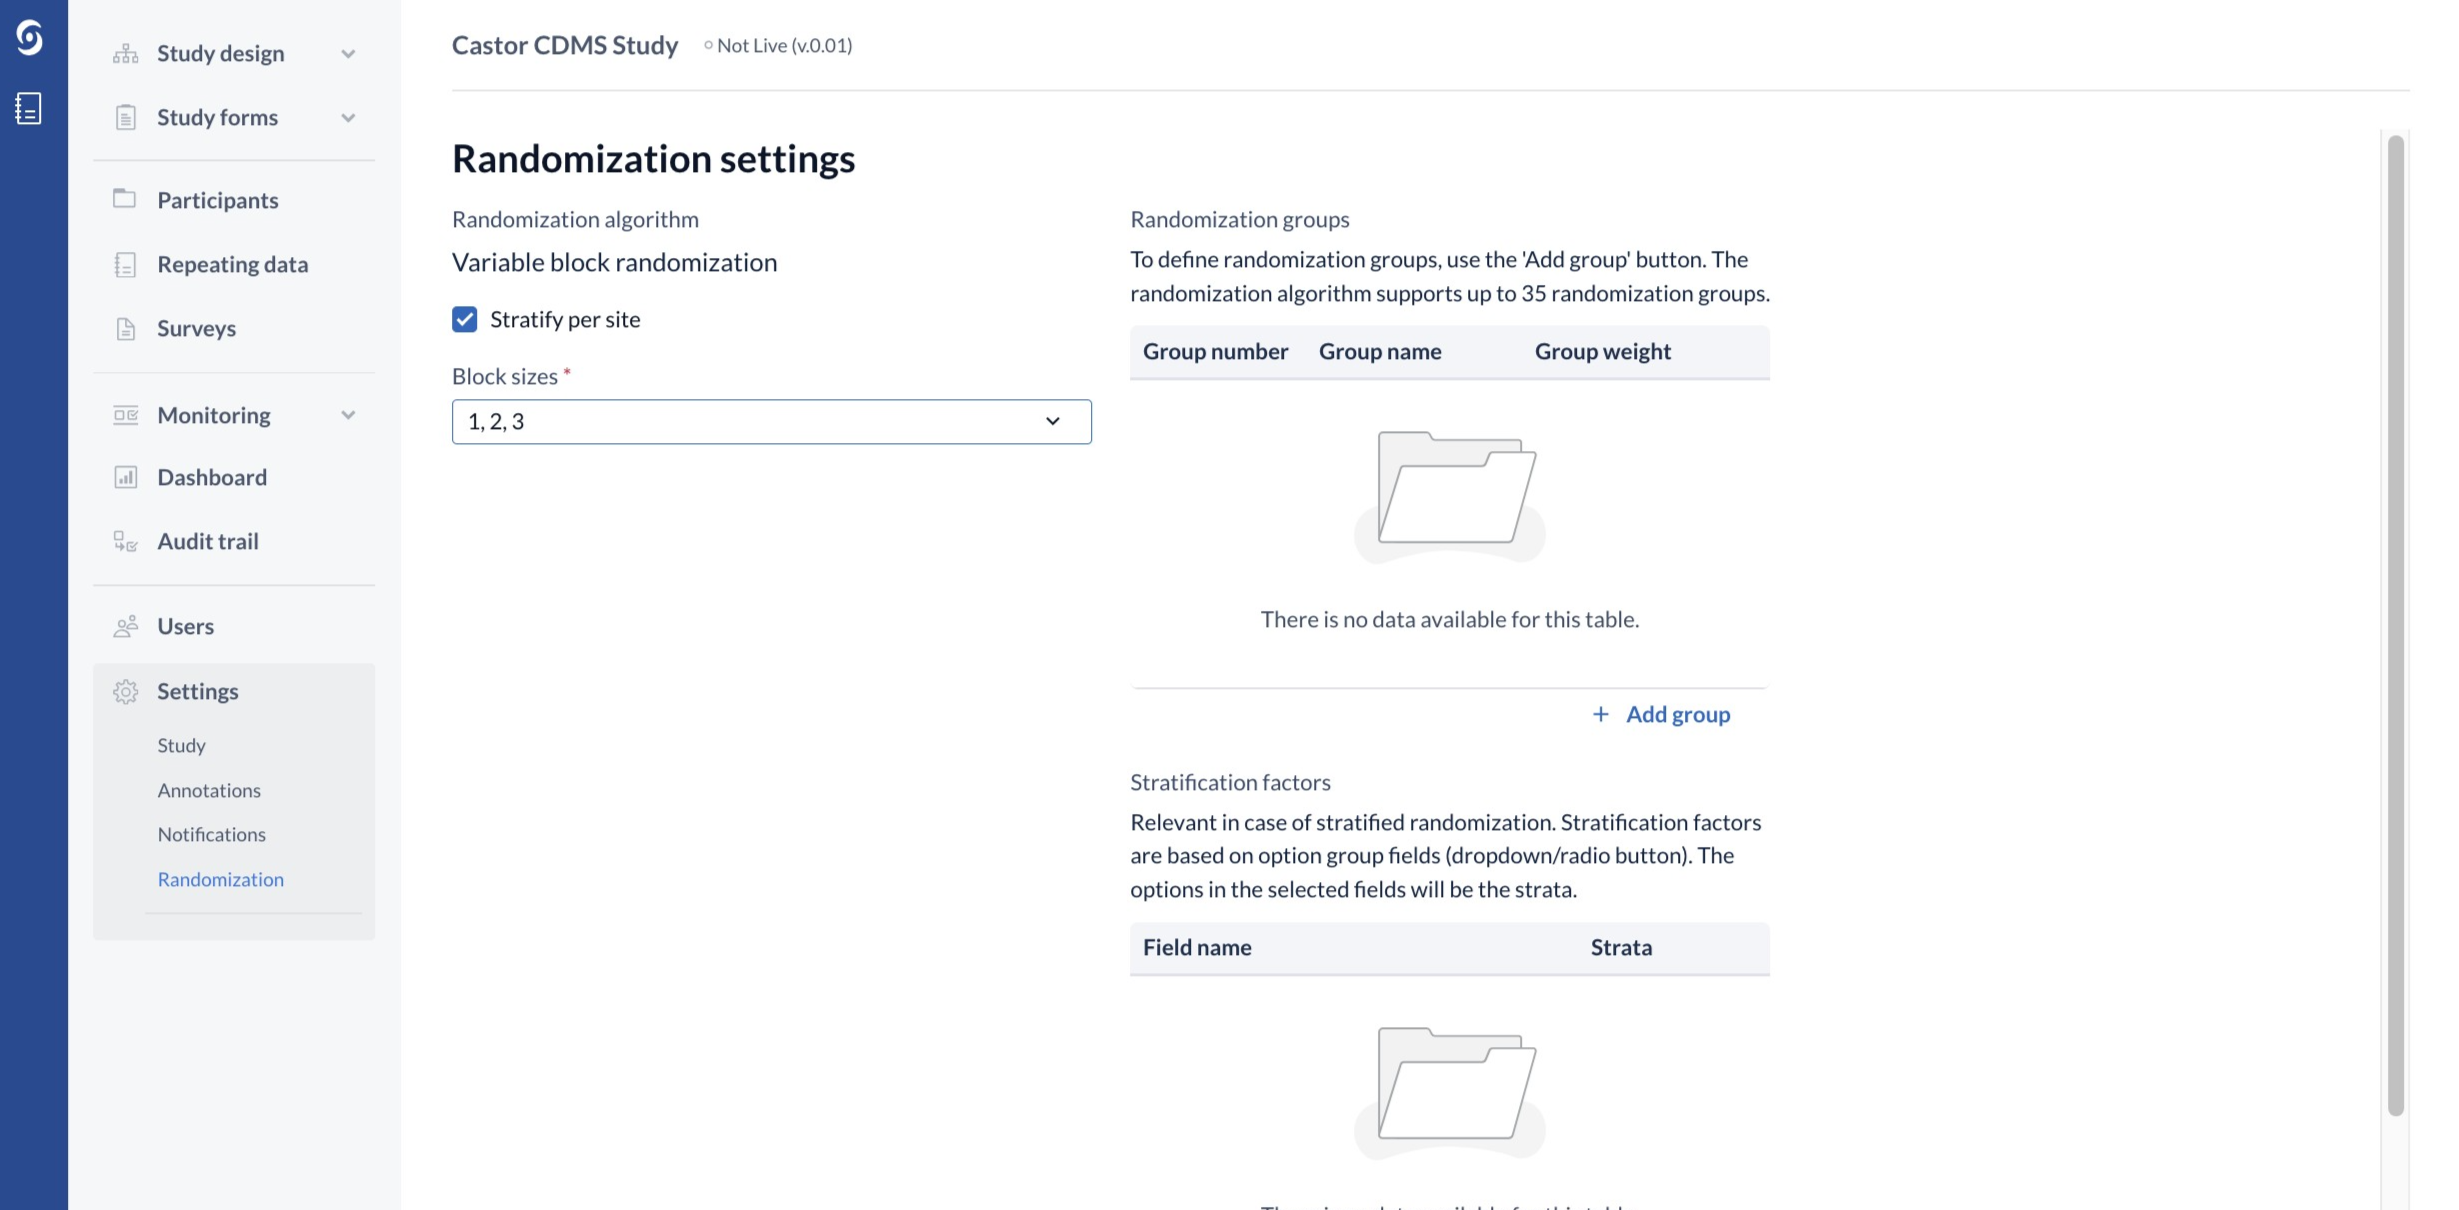
After saving the changes in the settings tab go to the randomization page to define the randomization settings:
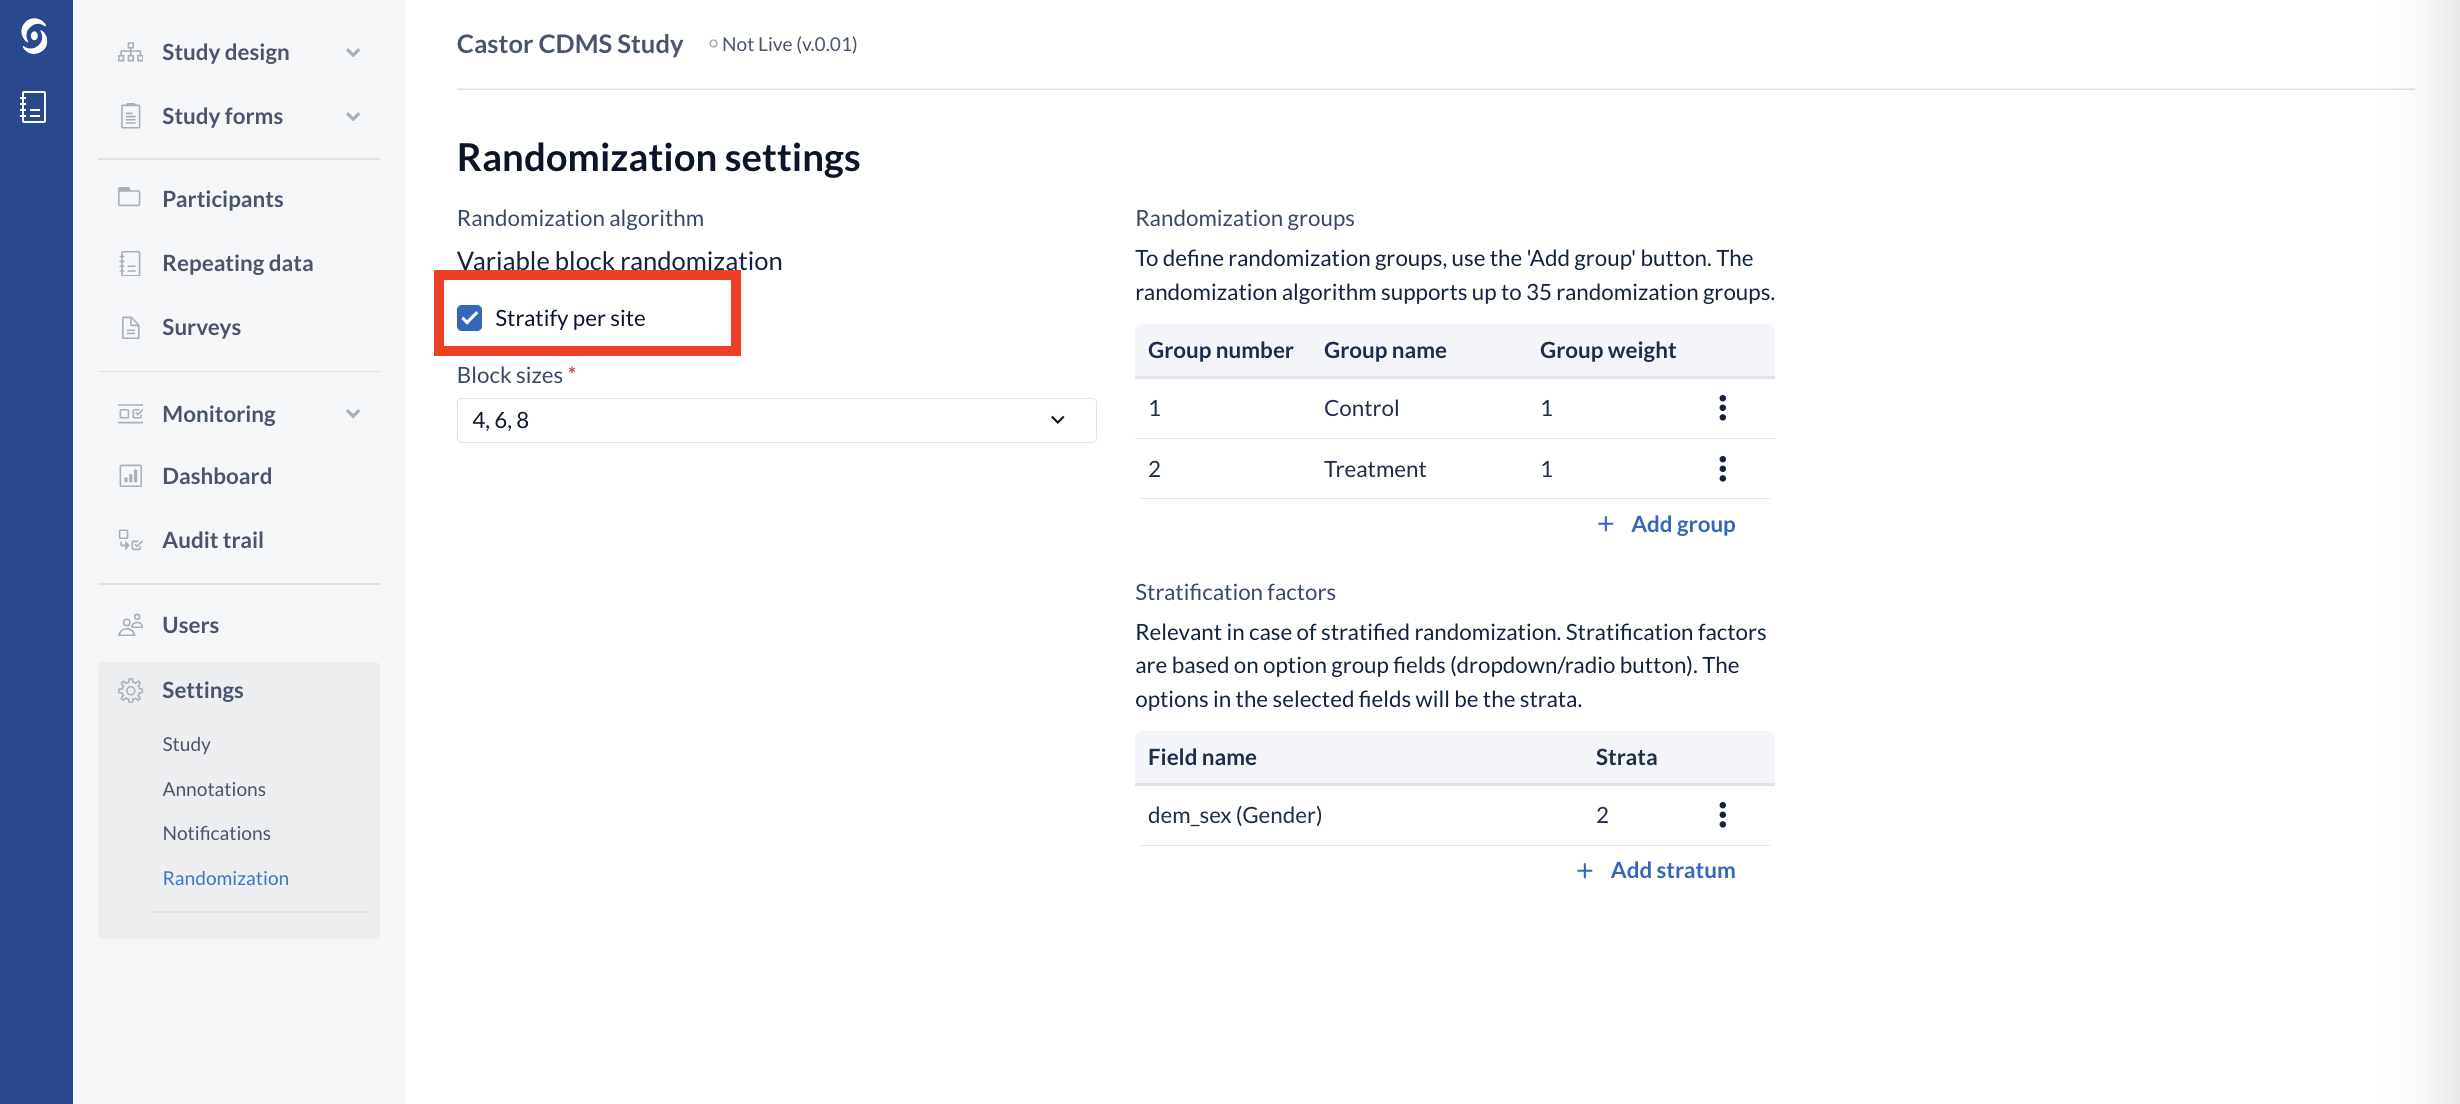
Select whether to stratify per site.
This is only applicable to multi-center studies. We recommend setting this to yes, as stratification per site is usually required for multi-center studies. However, if you are unsure, please discuss it with your project group.
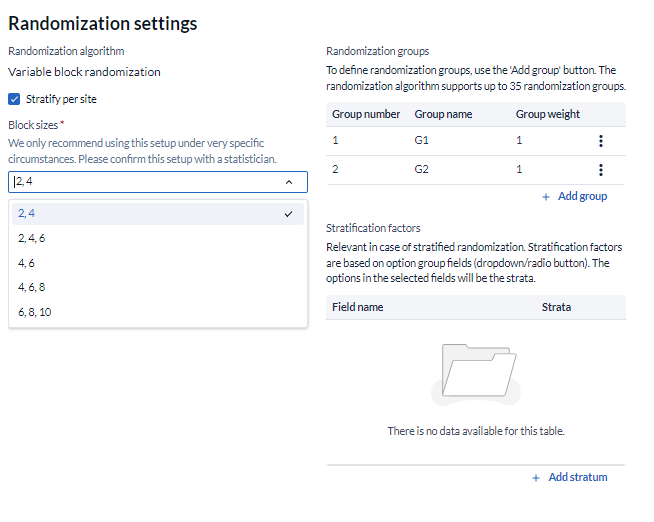
Define your block sizes.
You can choose different block sizes for your variable block randomization. The options in the dropdown menu will change depending on the amount of randomization groups and the weight of the groups. At every block generation moment, one of the block sizes will be randomly selected.
Read our blog to find out more about randomization blocks.
Define randomization groups.
To define groups, use the 'Add group' button. Define a group name and if applicable, choose a weight. The weight indicates the relative proportion of participants placed in each group. The standard randomization is 1:1 (weight = 1 for each group) and this should only be changed if you have a specific reason. Save the group once you have defined it. Your defined groups will appear in the 'Randomization groups panel', as shown below. Please note, the randomization algorithm supports up to 35 randomization groups.
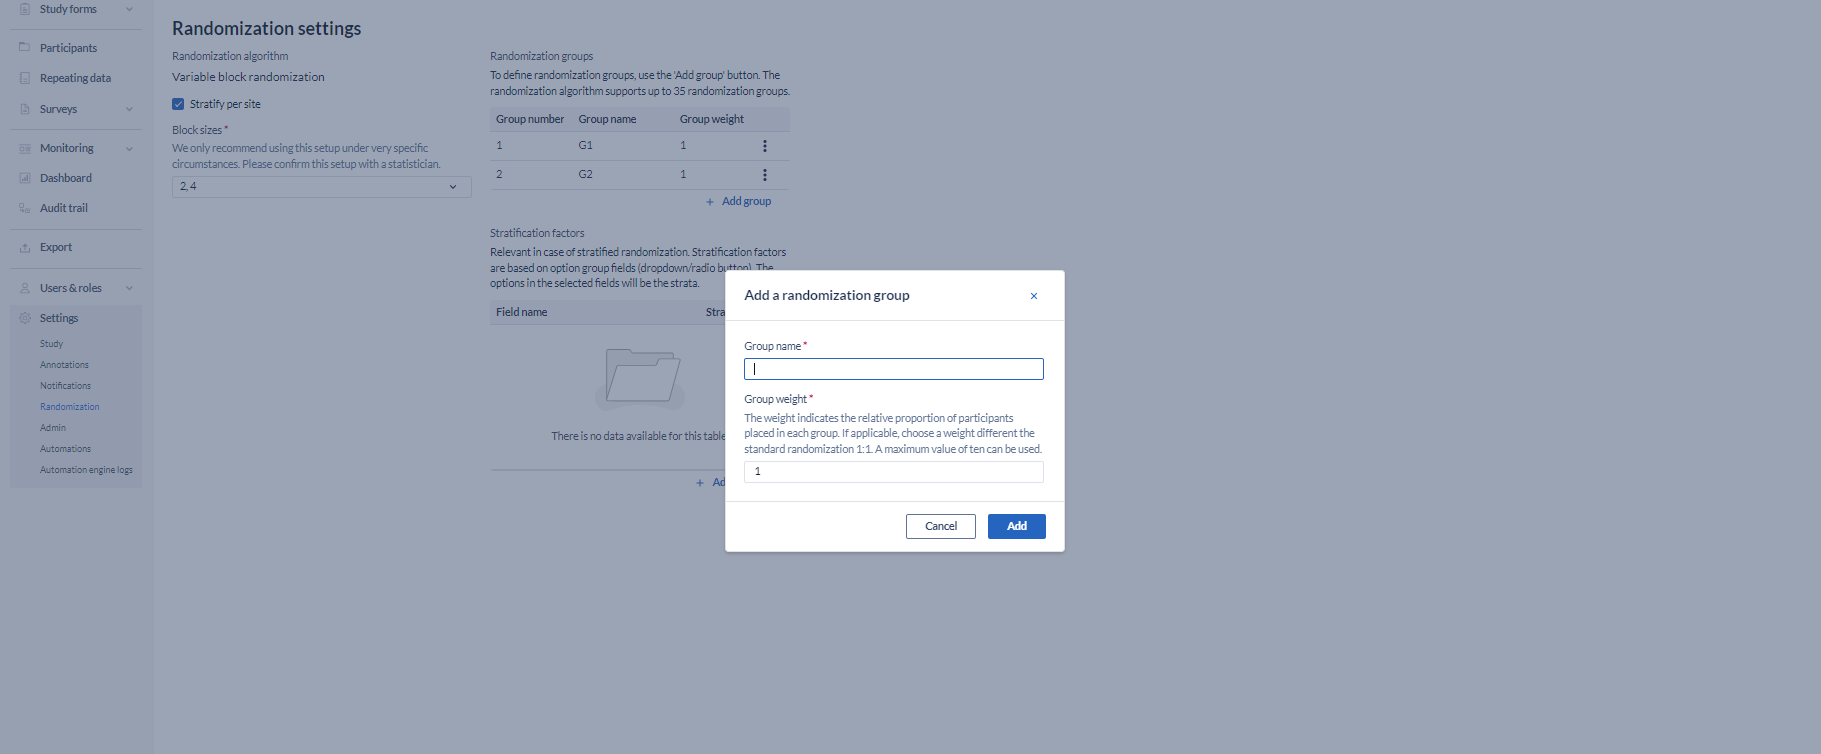
Define the stratification factors (in case of stratified randomization)
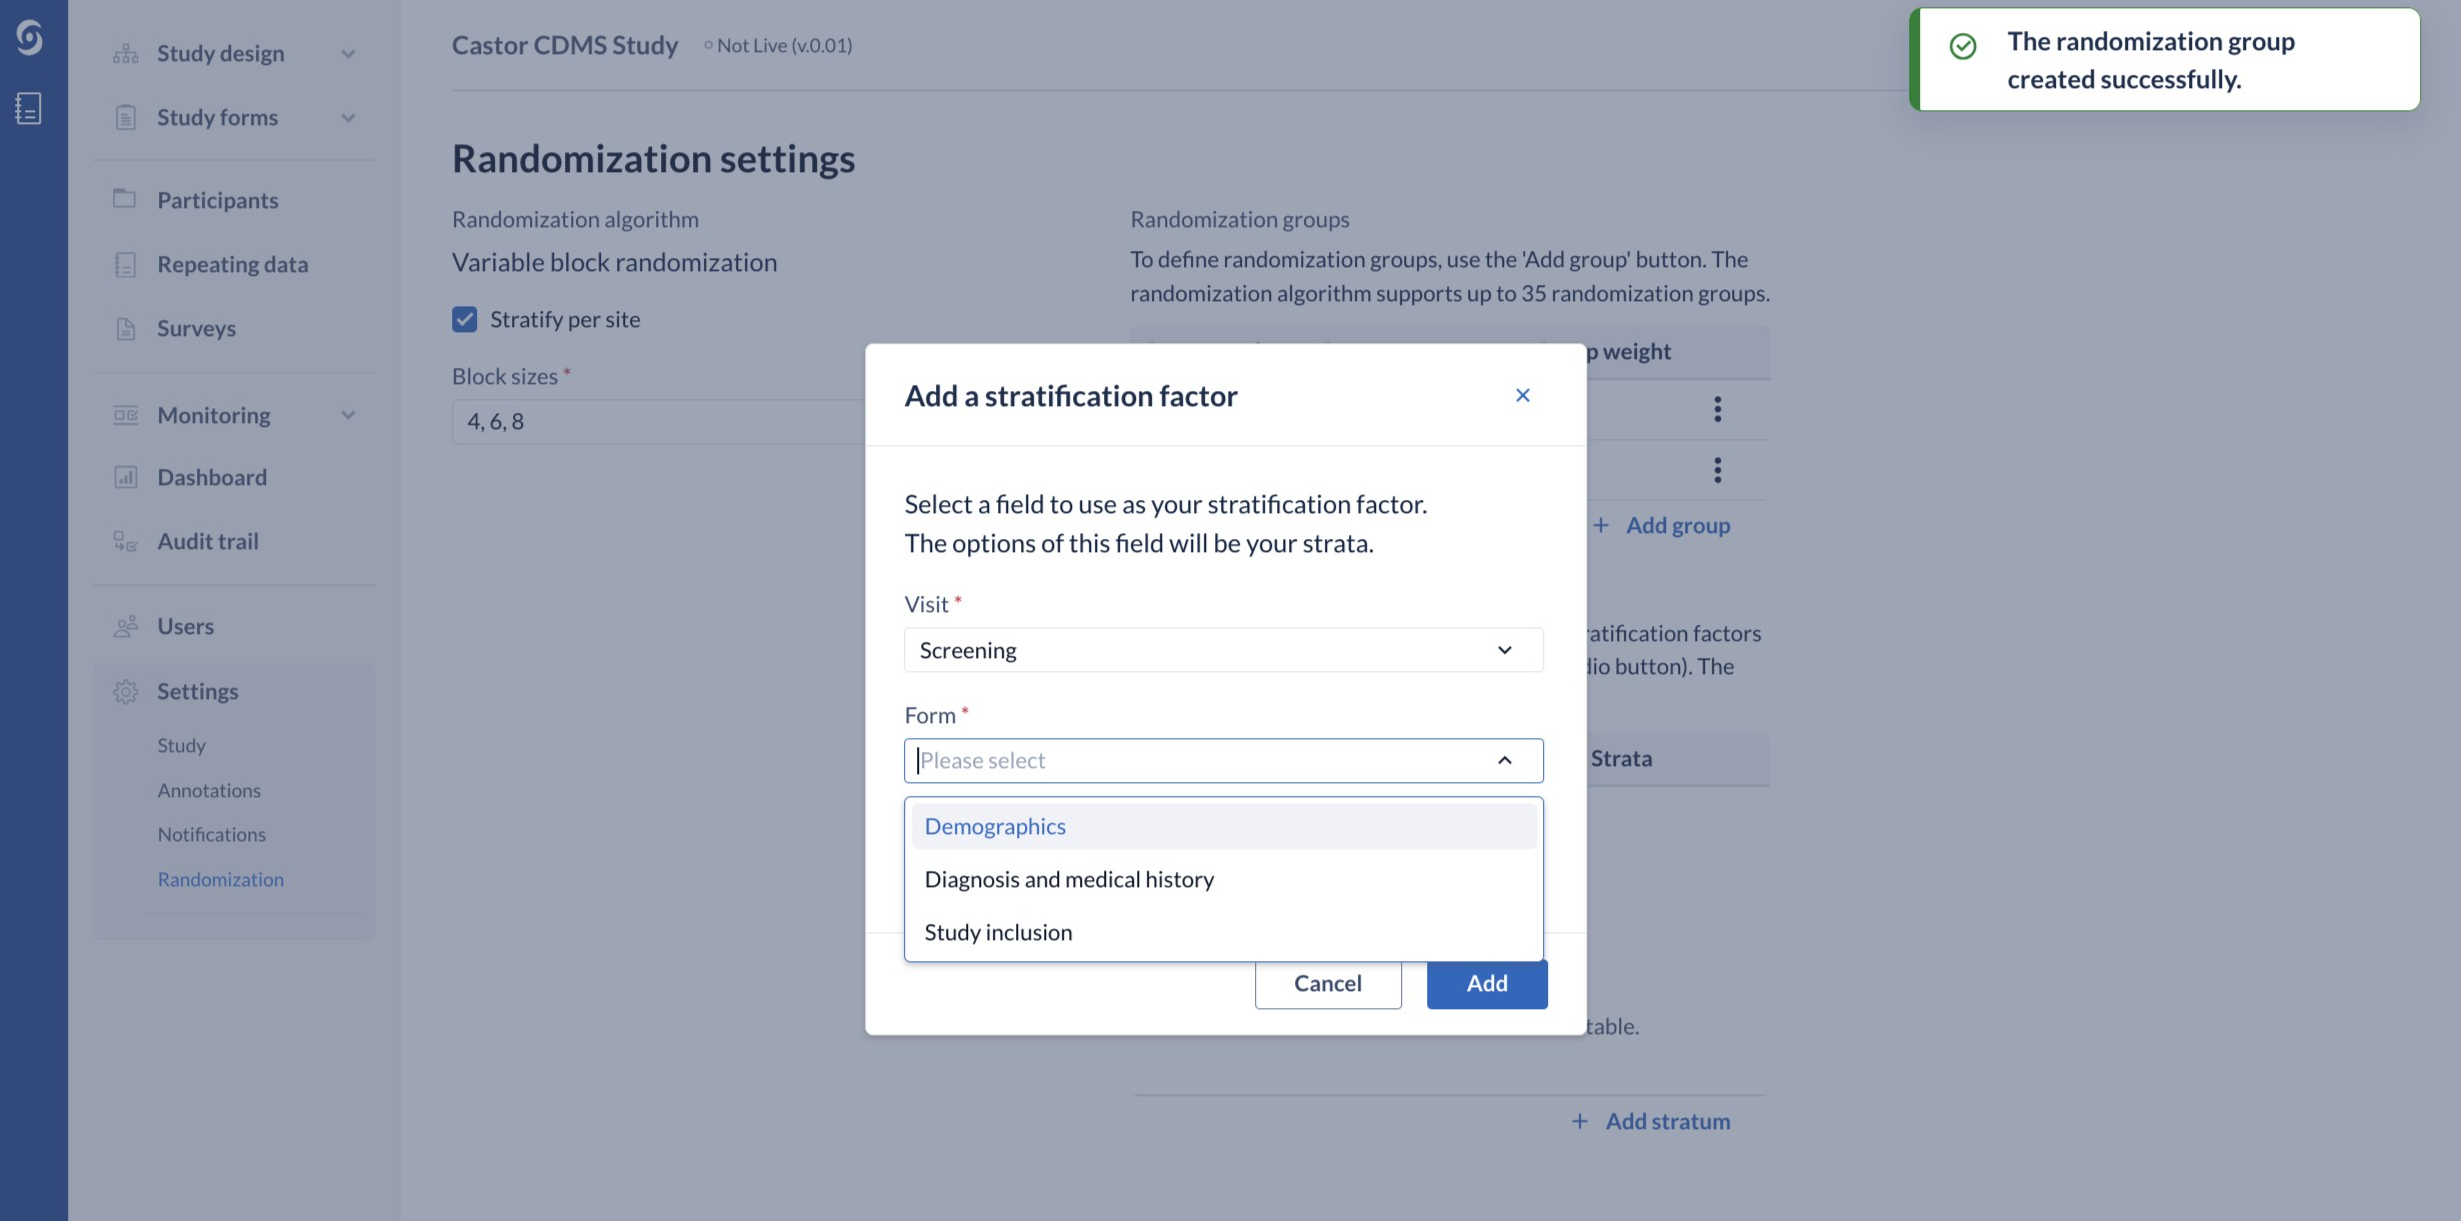
To define strata, use the 'Add stratum' button. You will be prompted to locate the field you want to use for stratification. Strata in Castor CDMS are based on option group fields (dropdown/radio button), so to add a stratum, you must first create the field you want to stratify based on, that will have the option values that are relevant to your stratification. Only use stratification if you are sure that this is required by your study design. When you select a stratum, it will appear in the 'Stratify by' panel, as shown above for the selected stratum gender.
Save the randomization settings. Once you have saved them, you can test your randomization with test participants.
When you decide to start collecting real data, you will be able to reset your randomization.
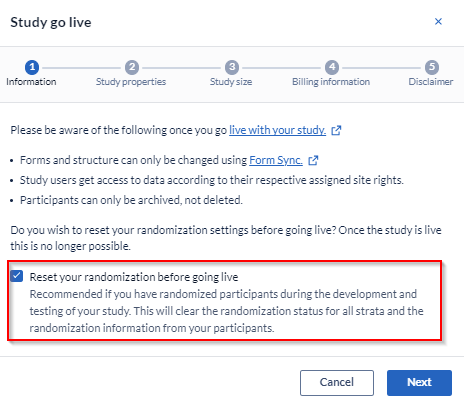
After going live it is no longer possible to change the Randomization settings.
If your study requires a change in the randomization settings after going live, please contact us.
Note:
- The users in your study who will be doing the randomization need to have Randomization permissions.
- If you want them to be able to see the randomization allocation, you need to also assign them View Randomization permission.
- In the case of a double-blinded study, users should be granted only Randomization permissions. (This ensures that they can perform randomization while remaining unaware of the actual allocation)
Find out more about defining user rights here.