Castor CDMS Tips & tricks - Beginners
Table of Contents
1. Creating fields
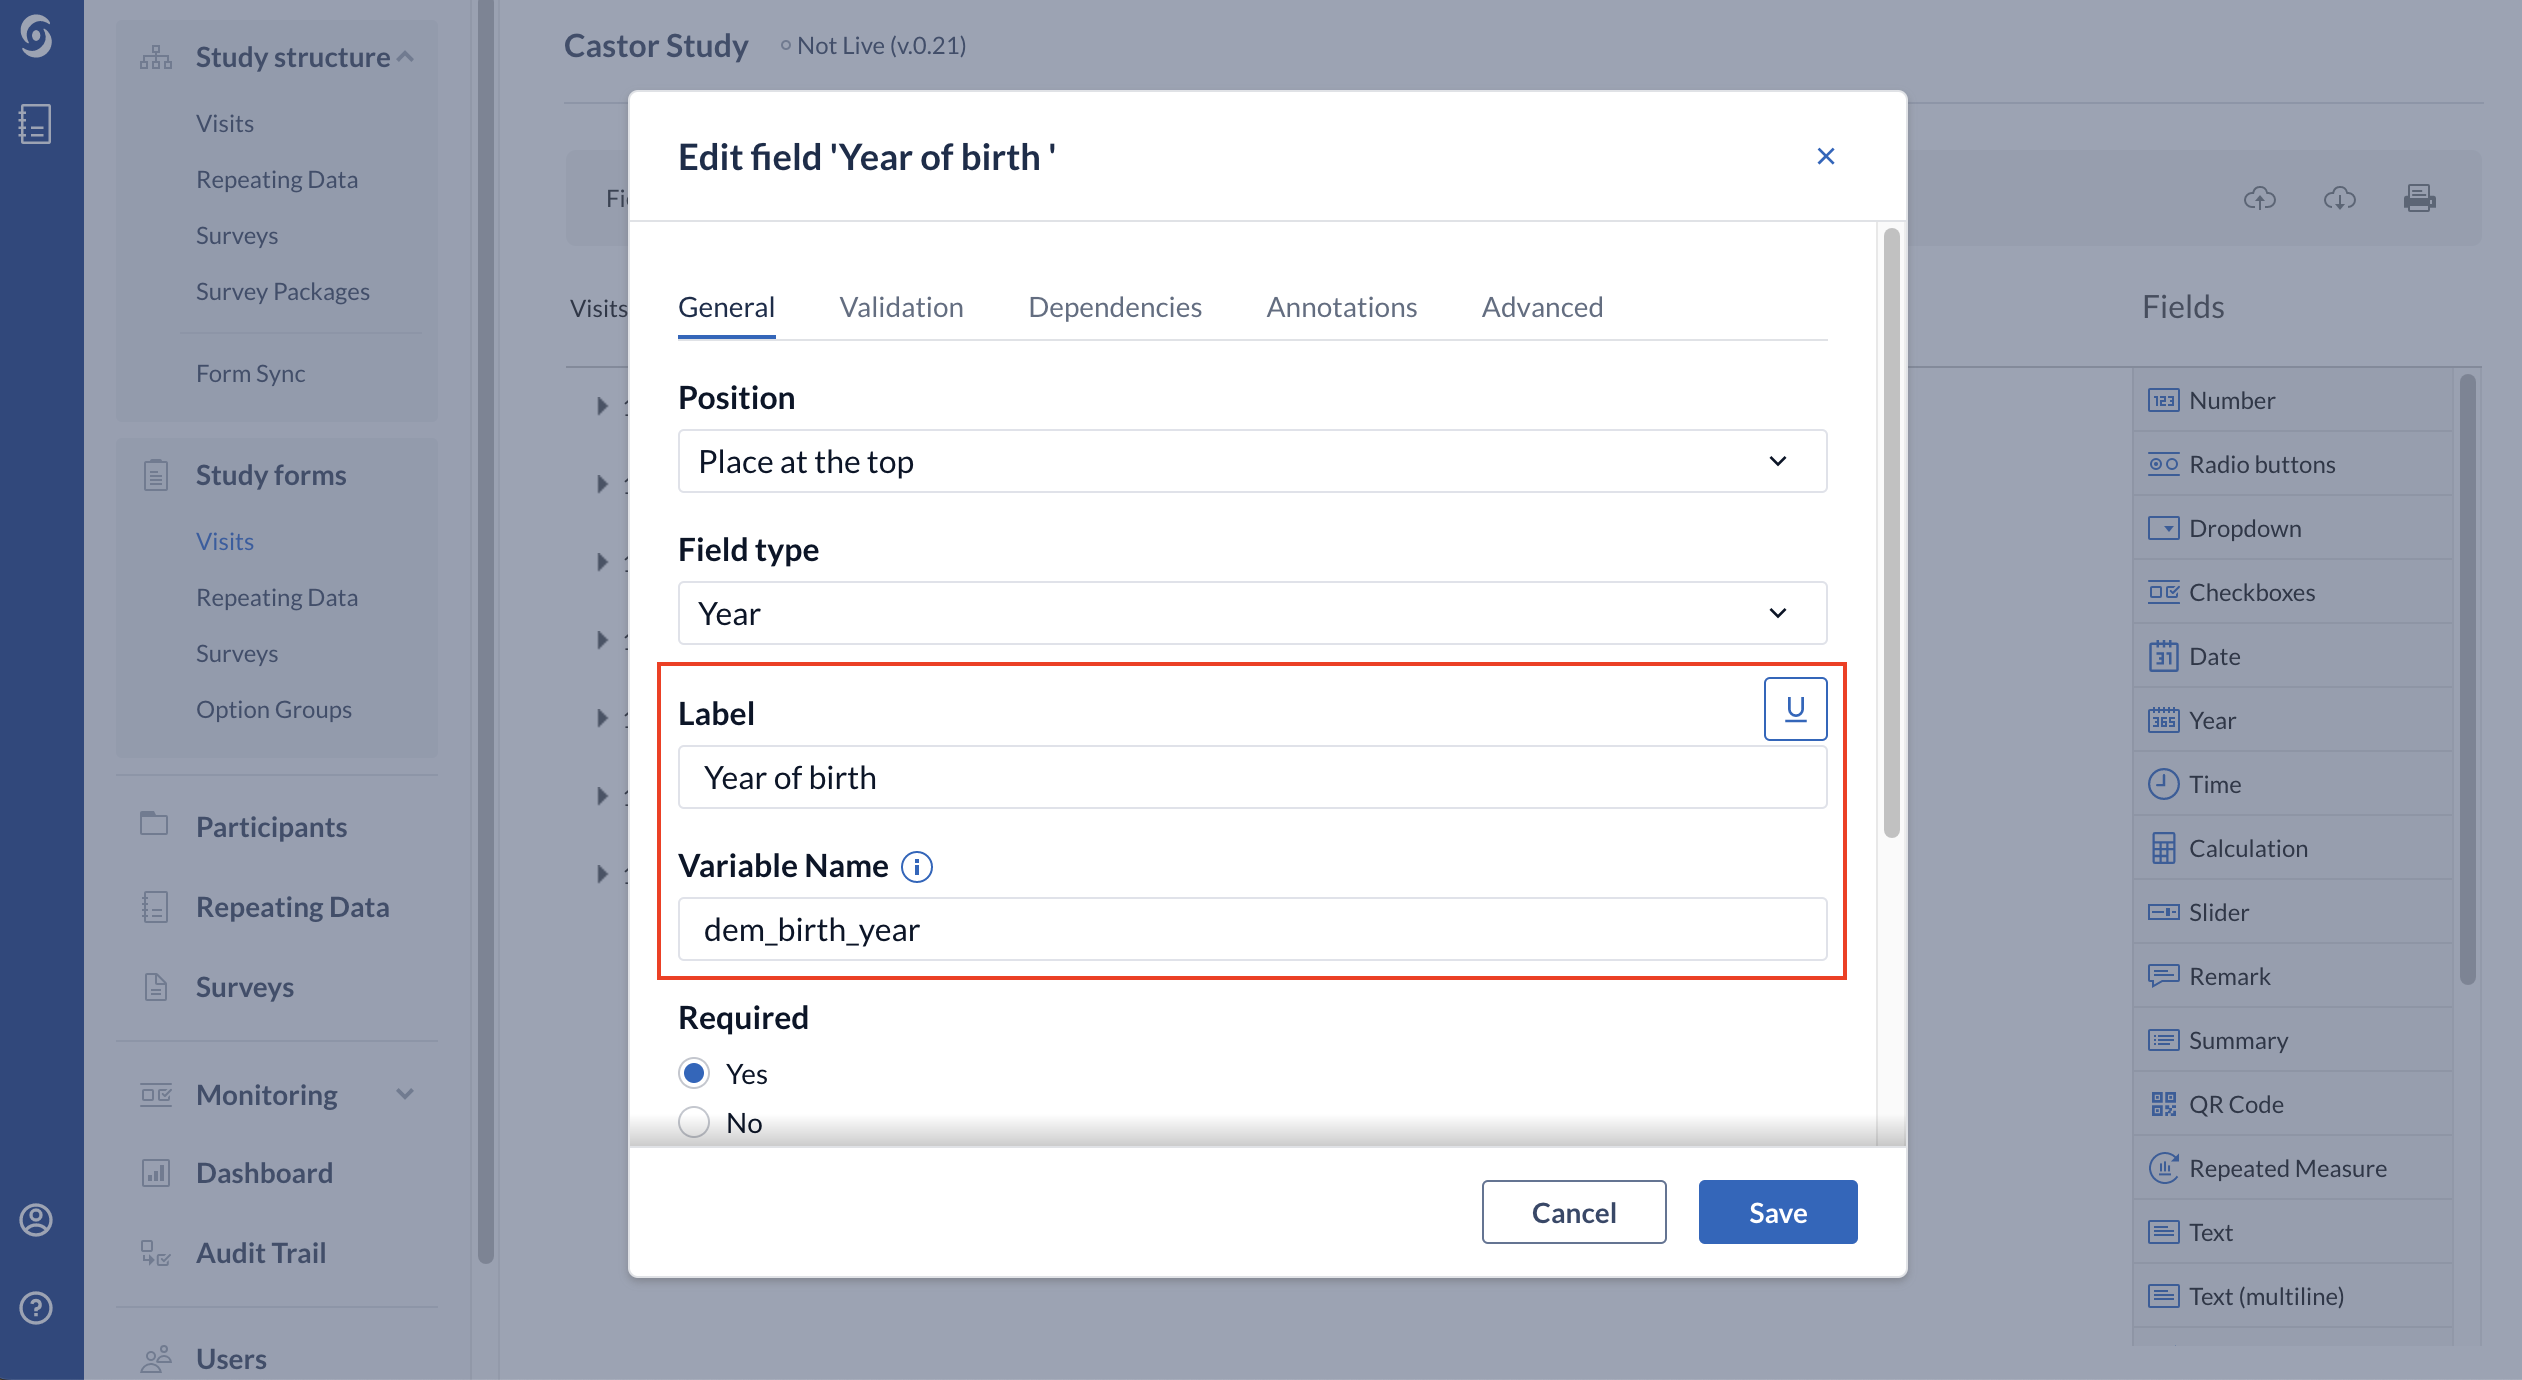
When creating new fields, the 'Label' field is the actual question that will be displayed in the eCRF. It is advised to also use the 'Variable name' field. The variable name will assume the value entered in the respective field for each subject and is important for the export of data and your final analysis, as well as for any calculation fields using that value.
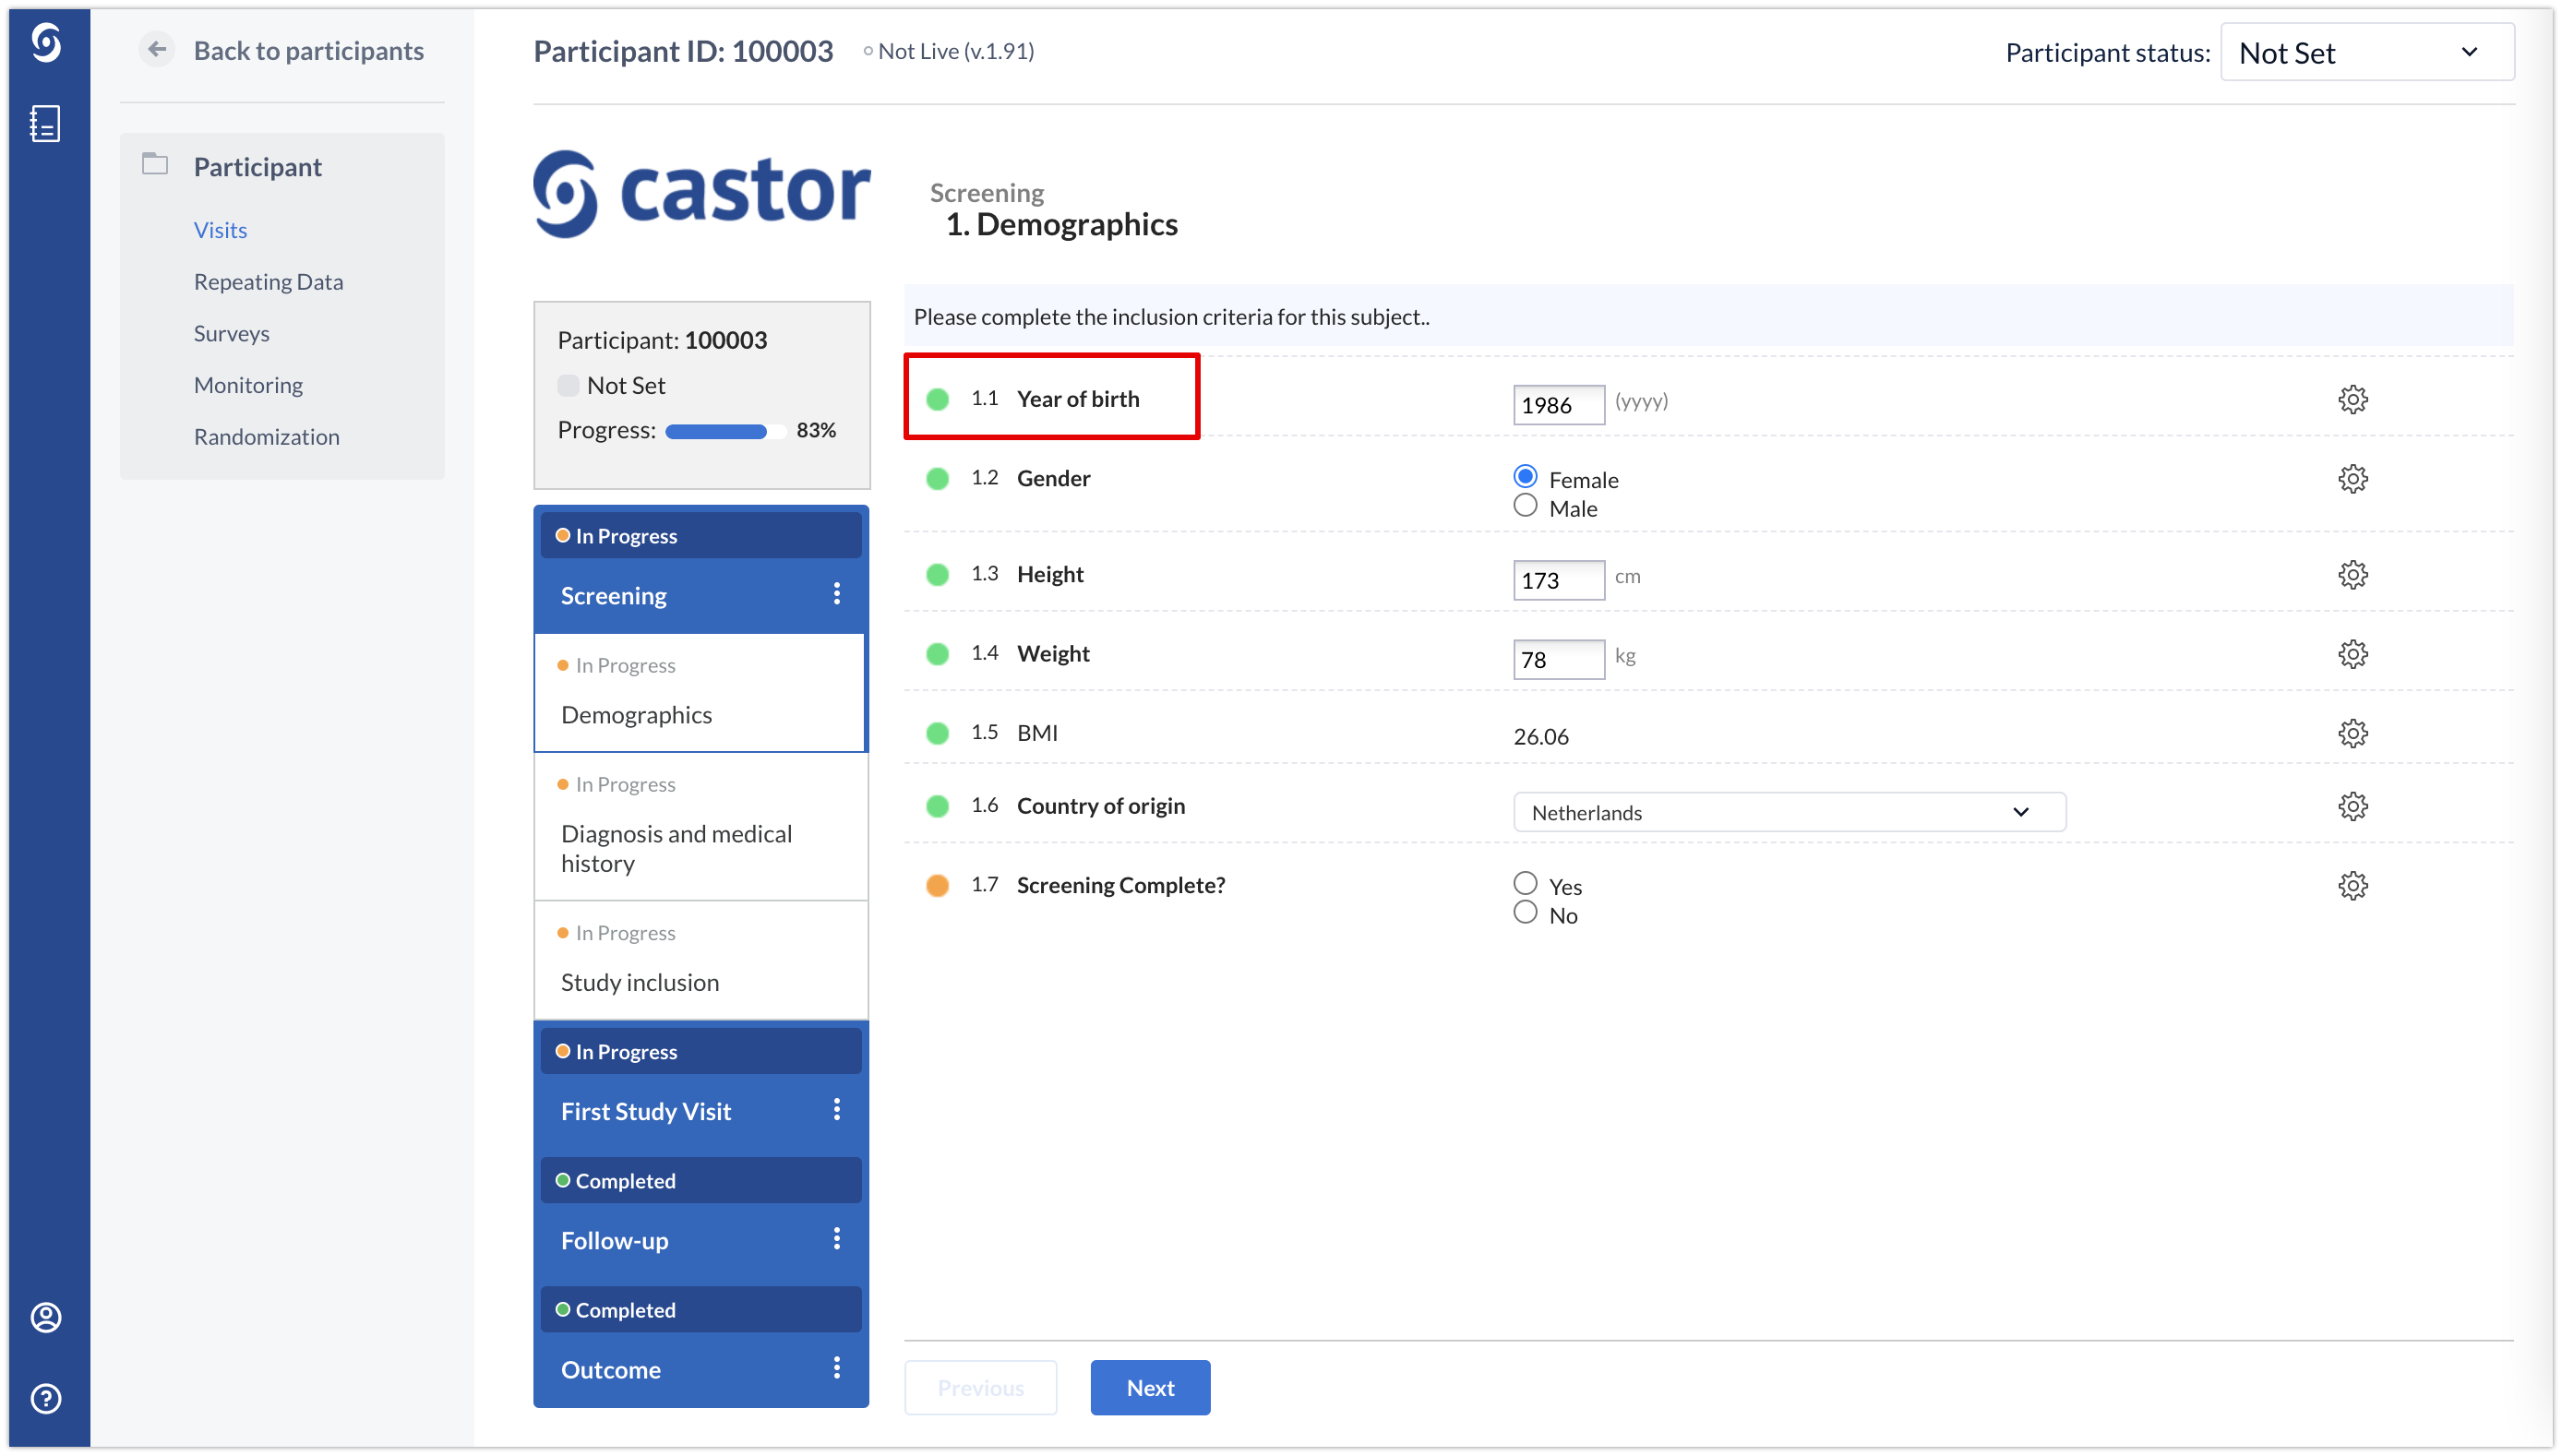
The label ‘Year of birth’ will be displayed in the data entry view when creating a participant:
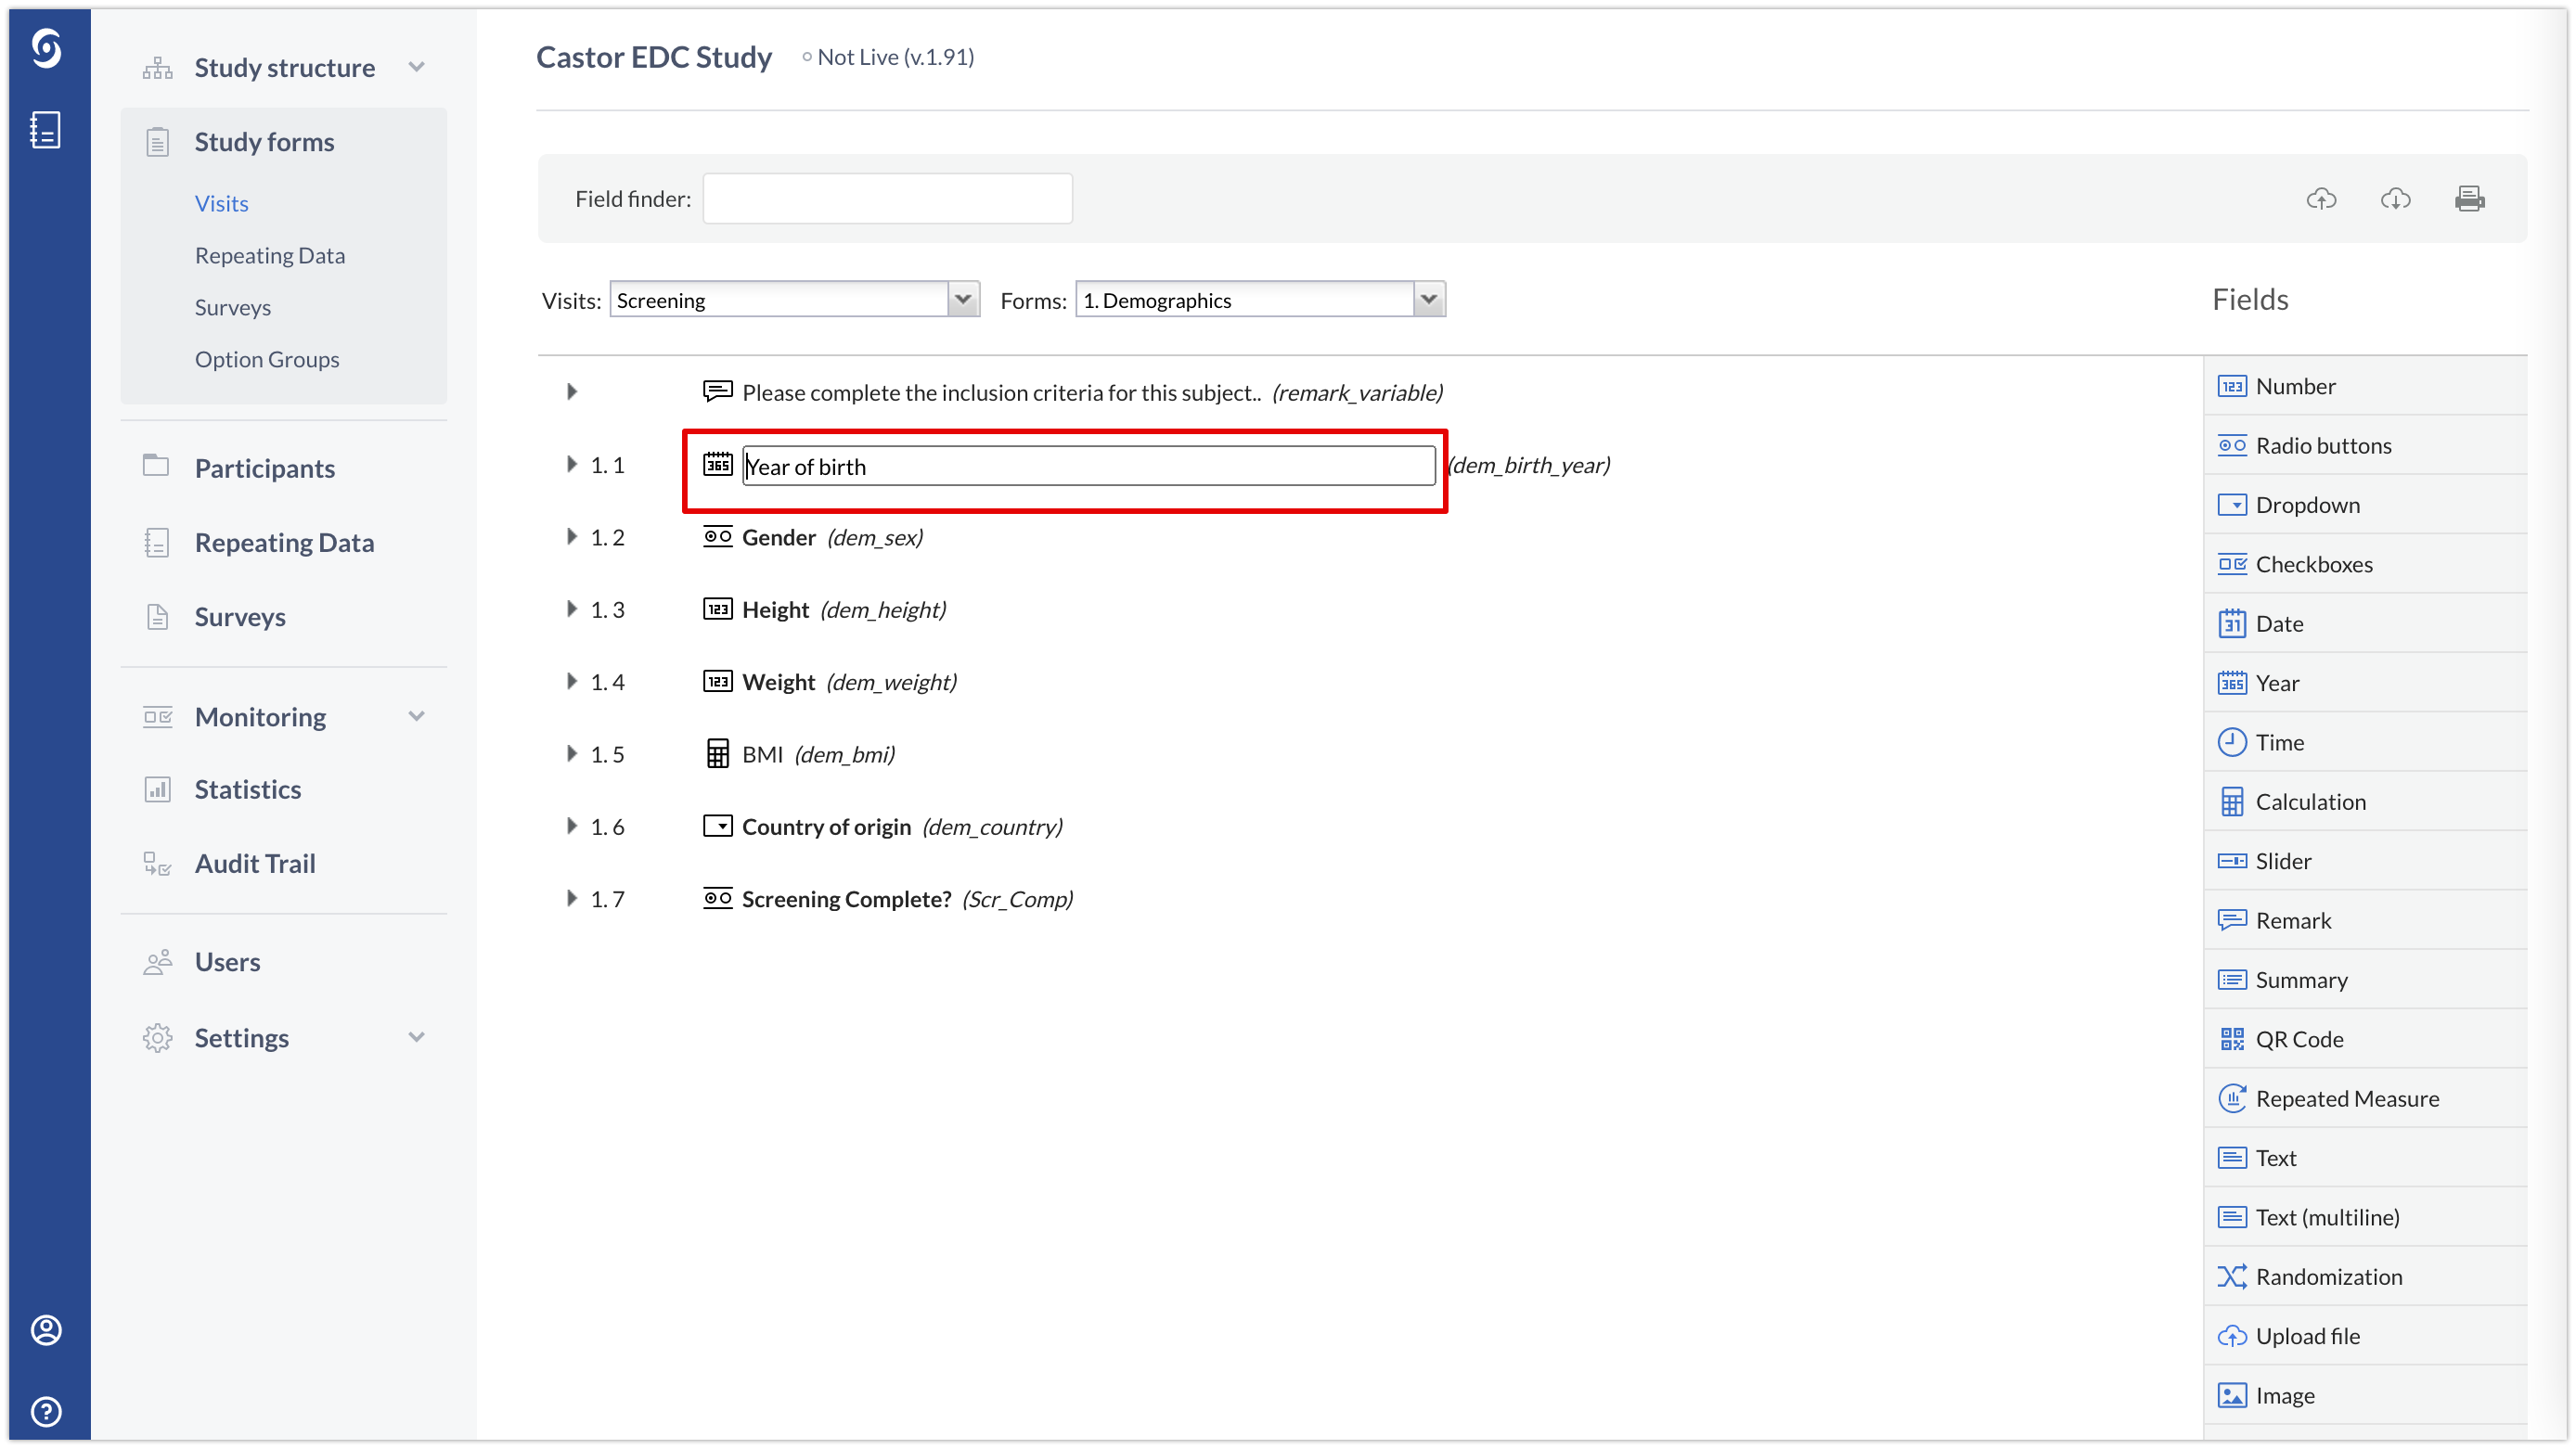
If you want to edit the field label or variable, you can double-click on it and directly edit.
If you want to edit other parts (e.g. variable name) you can click on the pencil icon next to the field to open the 'Edit field' dialog window.
If you use option groups (like radio button fields) make sure these are representative of the actual option values that will be used for analysis as this will be difficult to change once you start collecting data. You can use the same option group for multiple option group fields - for example, you only need to create the option group 'Yes/No' once and you can use it for all Yes/No questions.
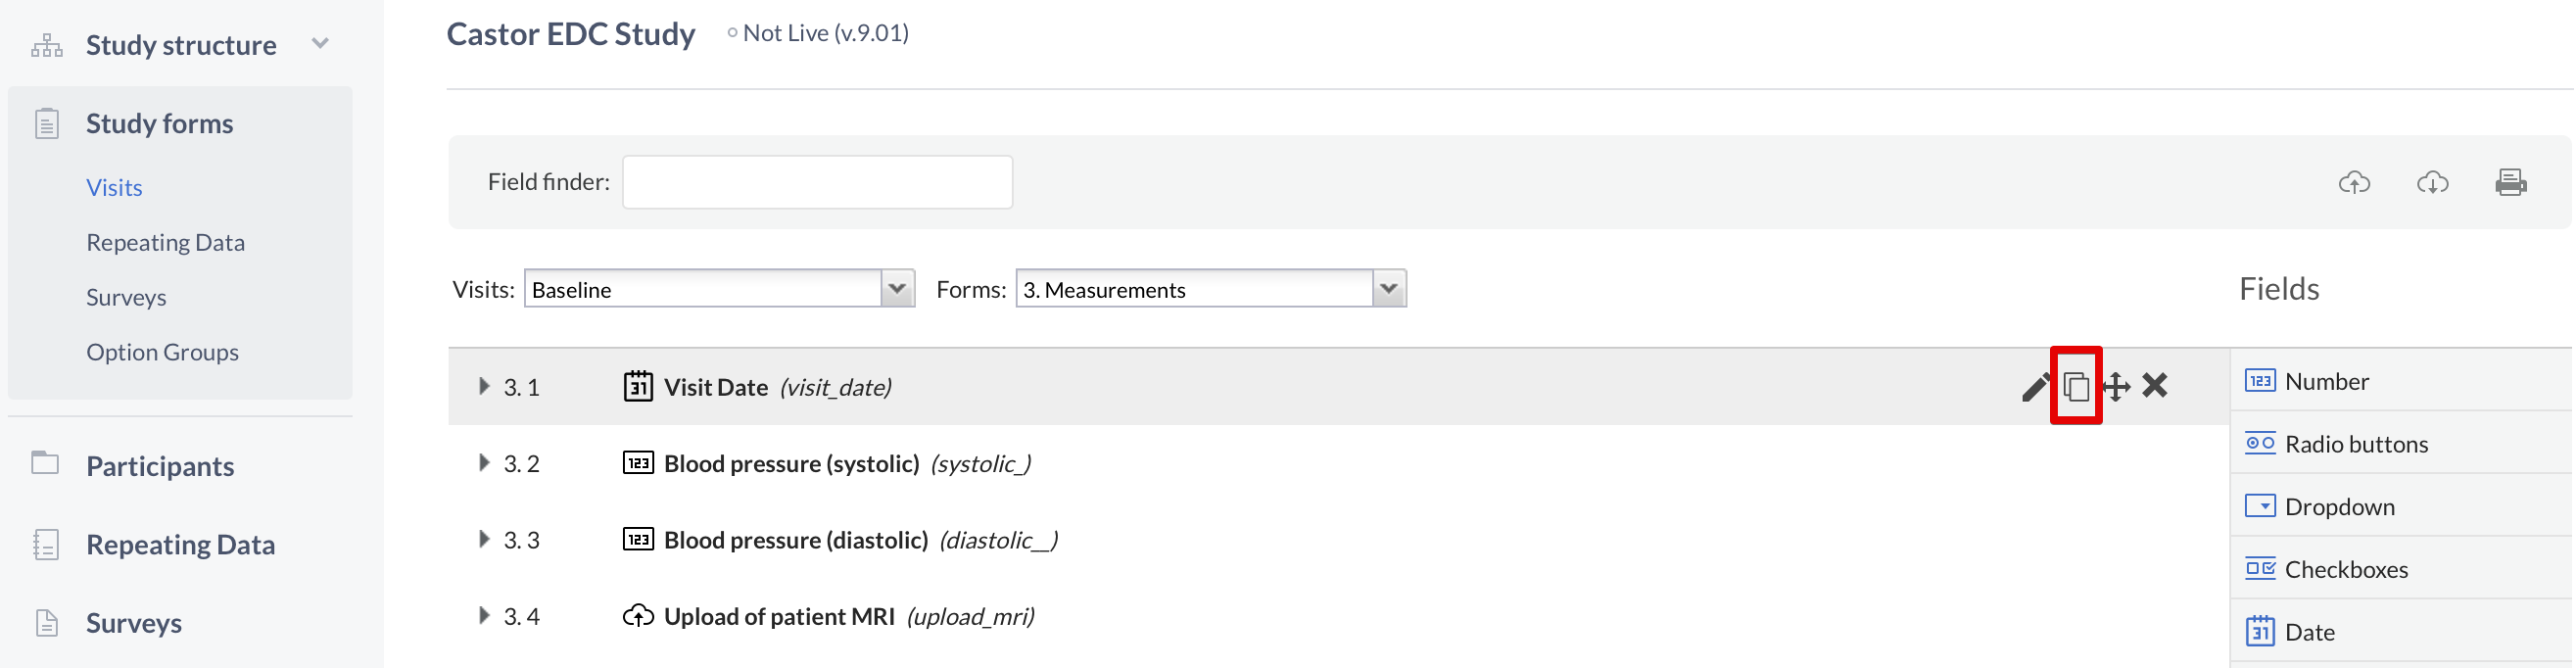
When creating a long list of fields, you can easily copy the fields. This is convenient if you have many fields of the same type or a group of fields that use the same option group. To copy a field, select the 'copy' icon next to the field of interest (you can then directly copy, or copy and edit):
You can also copy entire forms. However, make sure to test them thoroughly before you copy them, to avoid mistakes throughout your copied forms! You can test your forms by creating a test participant, entering data and exporting the data to make sure the format is in agreement with your study plan.
If you want to copy an entire visit of your study, you can use the Export Structure function. This will export the selected structure as a zip file, which can then be imported in the same study. You can also export the entire CRF and import it in another study, if you wish.
2. Hide (parts of) the form for certain users
Did you know that you can hide parts of the CRF for certain users? That way, you will only show the relevant parts of the CRF to different users. You need to first define user roles in the 'Users' tab of your study - for more information on hiding sections, see Hiding parts of the CRF for certain users.
3. User rights
Always double-check the user rights you have assigned before going live. Click here for more information about user rights. Here are some examples on the intended actions and the necessary rights:
| Data entry | Add, view and edit rights for the appropriate site |
| Monitoring | View and query rights for the appropriate site |
| Edit CRF | Manage forms rights |
| Assign users | Manage users rights |
| Randomize | View and randomize rights for the appropriate site |
| Send surveys | View and edit rights for the appropriate site |
| Principal investigator | Add, view, edit, sign, lock rights |
| Study admin | Can have all rights as necessary, including managing the study settings |
4. Notifications
You can create email notifications for events such as Participant created, Participant randomized, Repeating Data Instance created etc. You can set these up in the 'Notifications' sub-tab of your Settings tab. These emails can be sent to any user of your study and can be customised to contain required information, such as participant ID and site.
5. Participant IDs
Always think about what Participant IDs you want to use for your study before starting. Once you create a participant, you cannot change its ID. We recommend incremental IDs per site or a custom pattern that uses the site abbreviation. You can also use free text, for example if you want the participant ID to reflect your own database patient ID. Learn how to customize your Participant IDs.
6. Calculations
Calculation fields can be used for many things in Castor CDMS, such as calculating a subject's age based on year of birth, or calculating the difference between two dates. More complex calculations can also be programmed. Use the Calculation Helper tool when setting up calculations to check if your javascript syntax is correct. The Calculation Helper can also save your calculations under unique URLs in case you want to share them with others or save them for reference. Besides the calculation helper, there are many useful calculation templates with examples in our knowledge base. There is also a section in the Form Exchange where you can upload your own calculations for others to use.
7. Going live
Once you have created your study forms and want to start collecting actual data, you will need to set your study to 'live'. This indicates that your study is active and you are collecting real data. We recommend that you and your team test your eCRF thoroughly before going live. If you need to make further changes to your CRF, you will have to turn it back 'offline'. Be careful when you do this, as any changes you make will be reflected in existing participants and is likely to affect collected data.