Select an event for your automation
Table of Contents
An event is a data entry point within your study that will be checked by the system against the conditions you specify and trigger a certain action when the two match.
Add an event
After you navigate to the Automation Engine user interface, click on the "Event" button:

Define your event
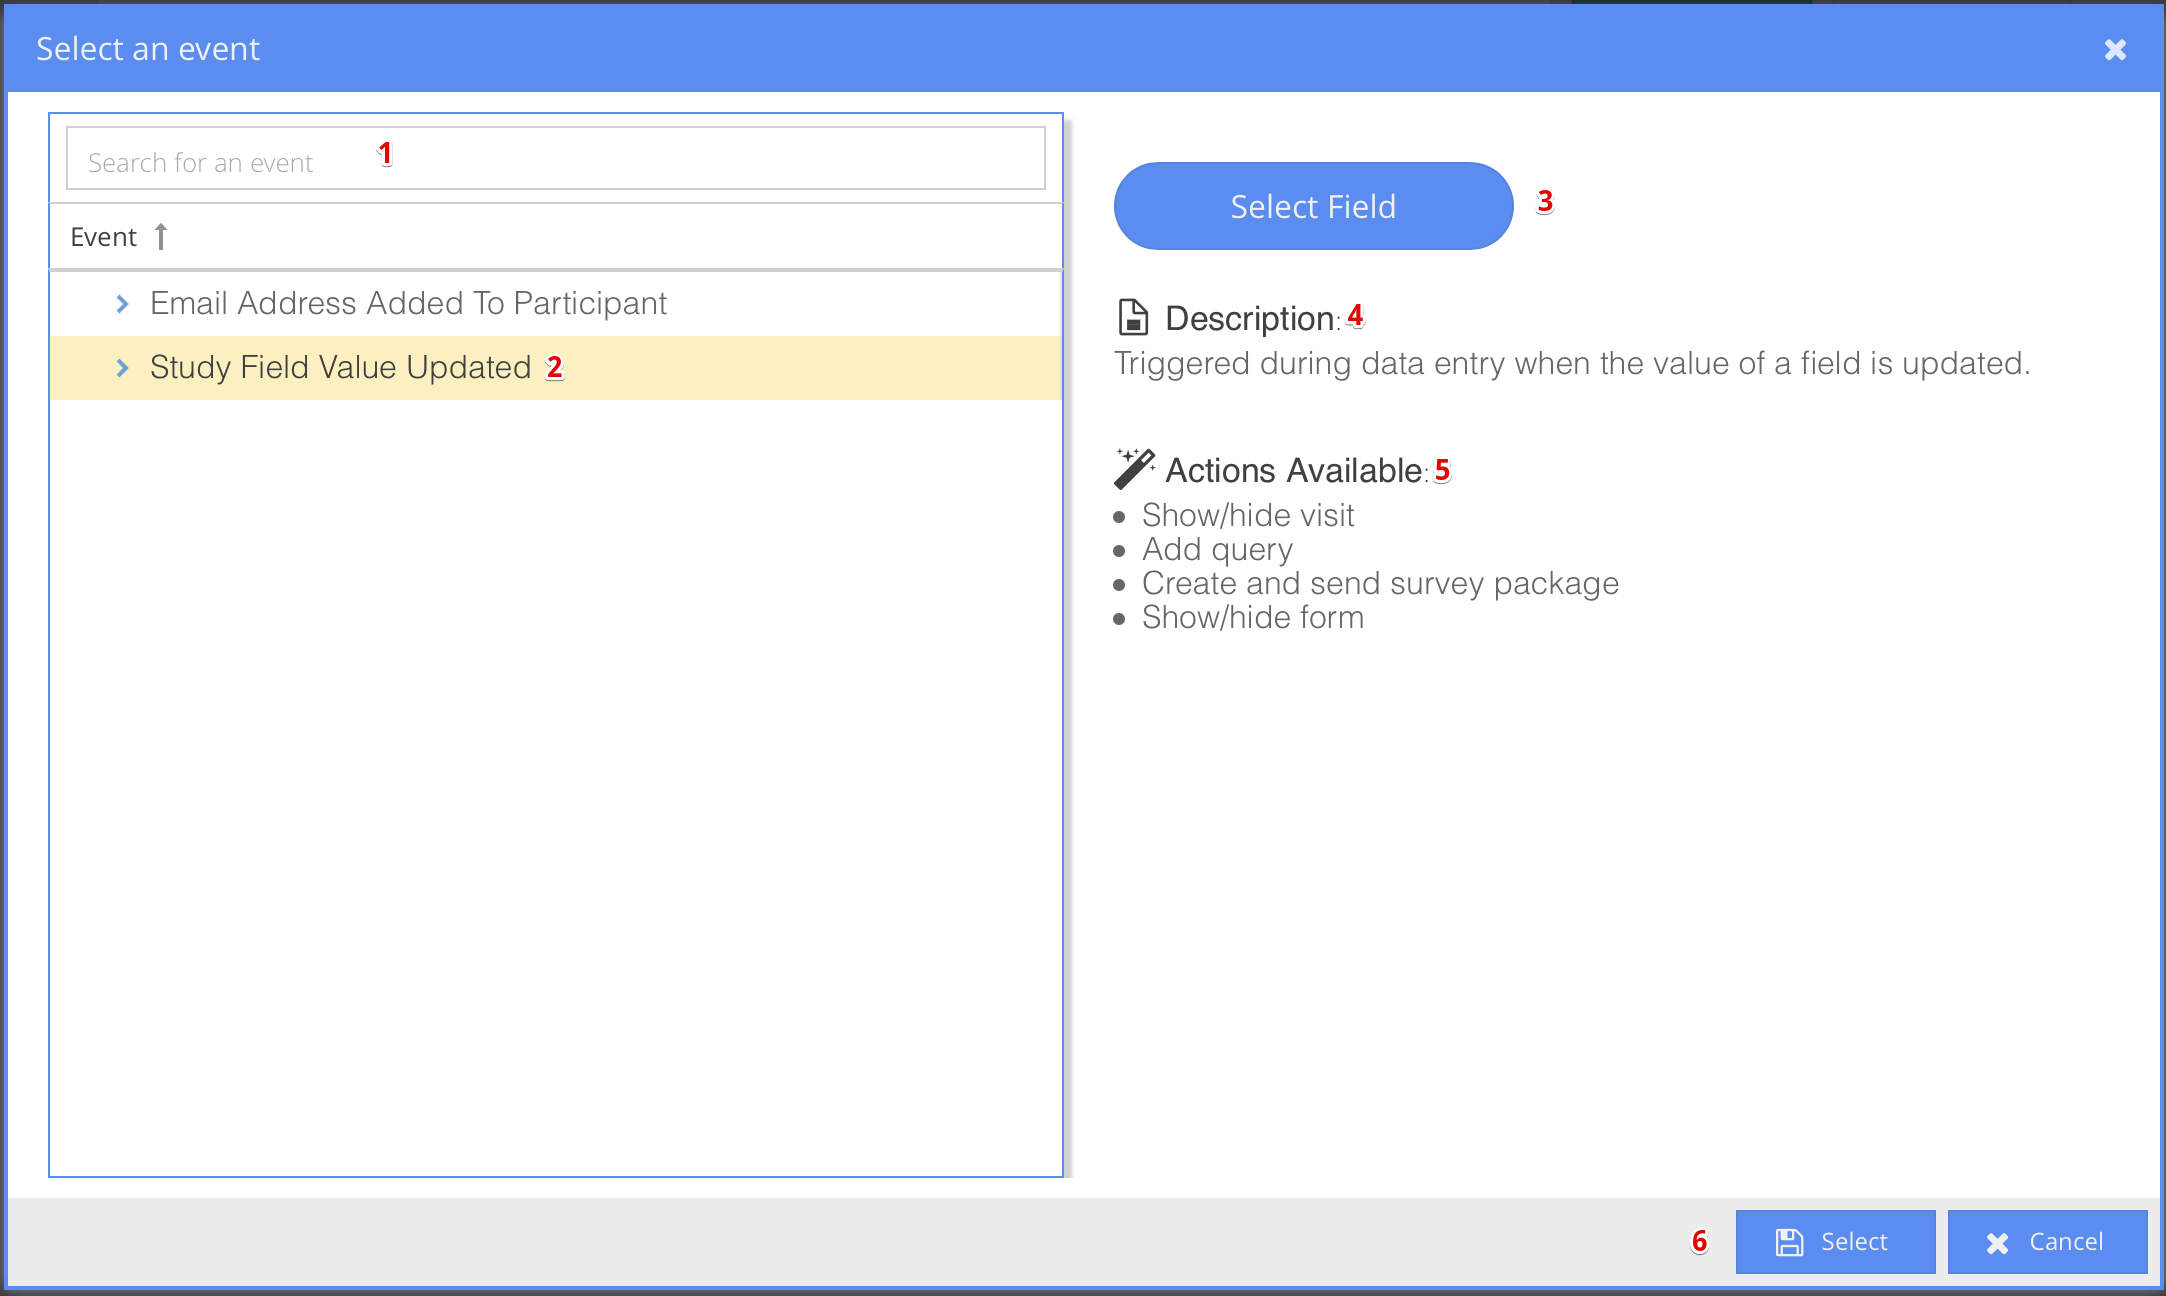
An popup dialog will appear. This is where you can define your event:

- Search for an event: As additional events will be supported by our system, you will be able to search for your desired trigger event using the search box at the top left side of the popup dialog.
- Event: A list of all currently supported events appears on the left side of the popup dialog. An event must be selected to continue with building your automation.
- Select Field: If you have chosen Field Value Updated as event, click on Select Field to select the field that you want your automation to check before triggering an action. If you have chosen Email Address Added to Participant as event, you can skip this step.
- Description: A description of the event appears at the top of the right side of the popup dialog.
- Actions available: A list of all of Actions Available for the event are shown below the event description. You will need to select an action in the following step - selecting your Action.
- Save/Cancel: Press Save to save your event or Cancel to return to the Automation Engine without saving your event.
Now that you have selected an event, you can go ahead and add conditions and actions to complete your automation so you can get to testing your automation.