Select a condition for your automation
Table of Contents
Once you have selected the event that will trigger the automation, you can add conditions to the automation. These conditions will be checked by the system in order for the action to be triggered. For example, you want to add a query only when the field value is updated such that the participant weight is greater than 150 kg, or you want to only send surveys to male participants.
Note: Conditions must be met before the event occurs in order for the Action to trigger. This means if you have an automation that will send a survey invitation when an email address is added and the patient is male, the patient must be marked as male before the email address is added to the participant.
After you navigate to the Automation Engine user interface and you have selected the Event, add an condition.
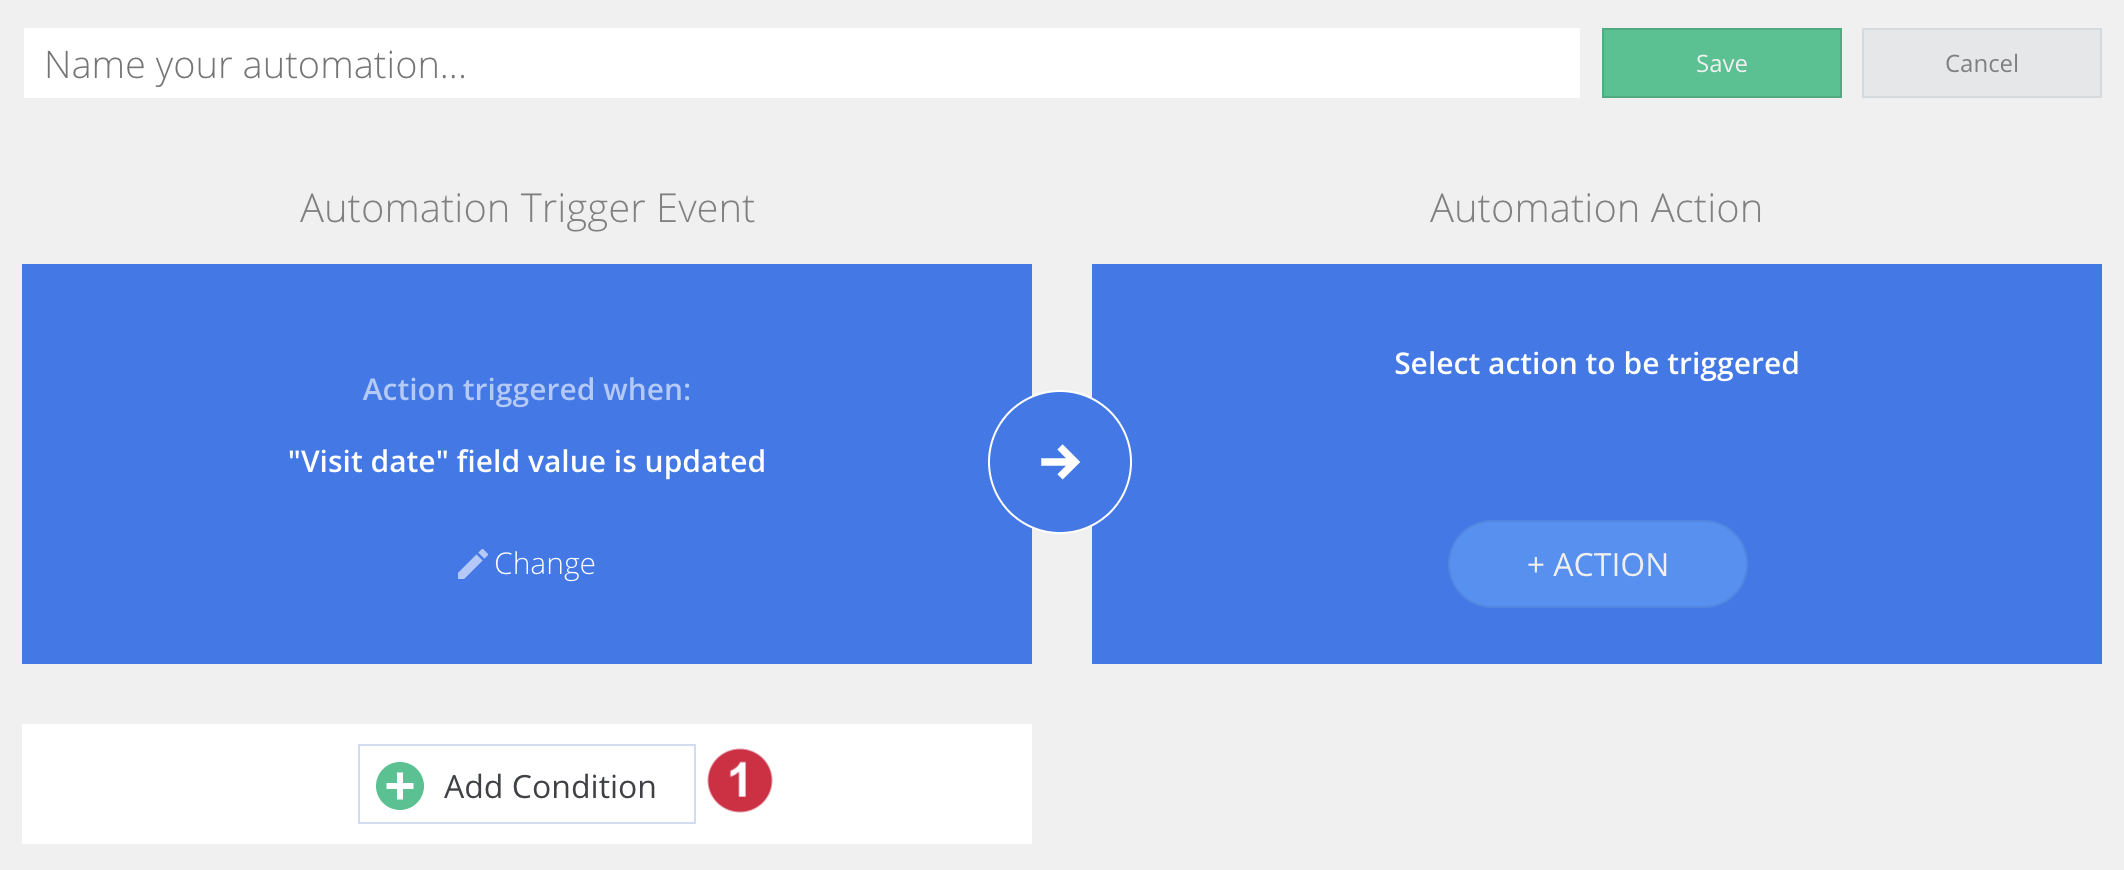
1. Click on "Add condition".
Define a condition
The "Define a Condition" popup will show up, where you can select the field which should be checked.
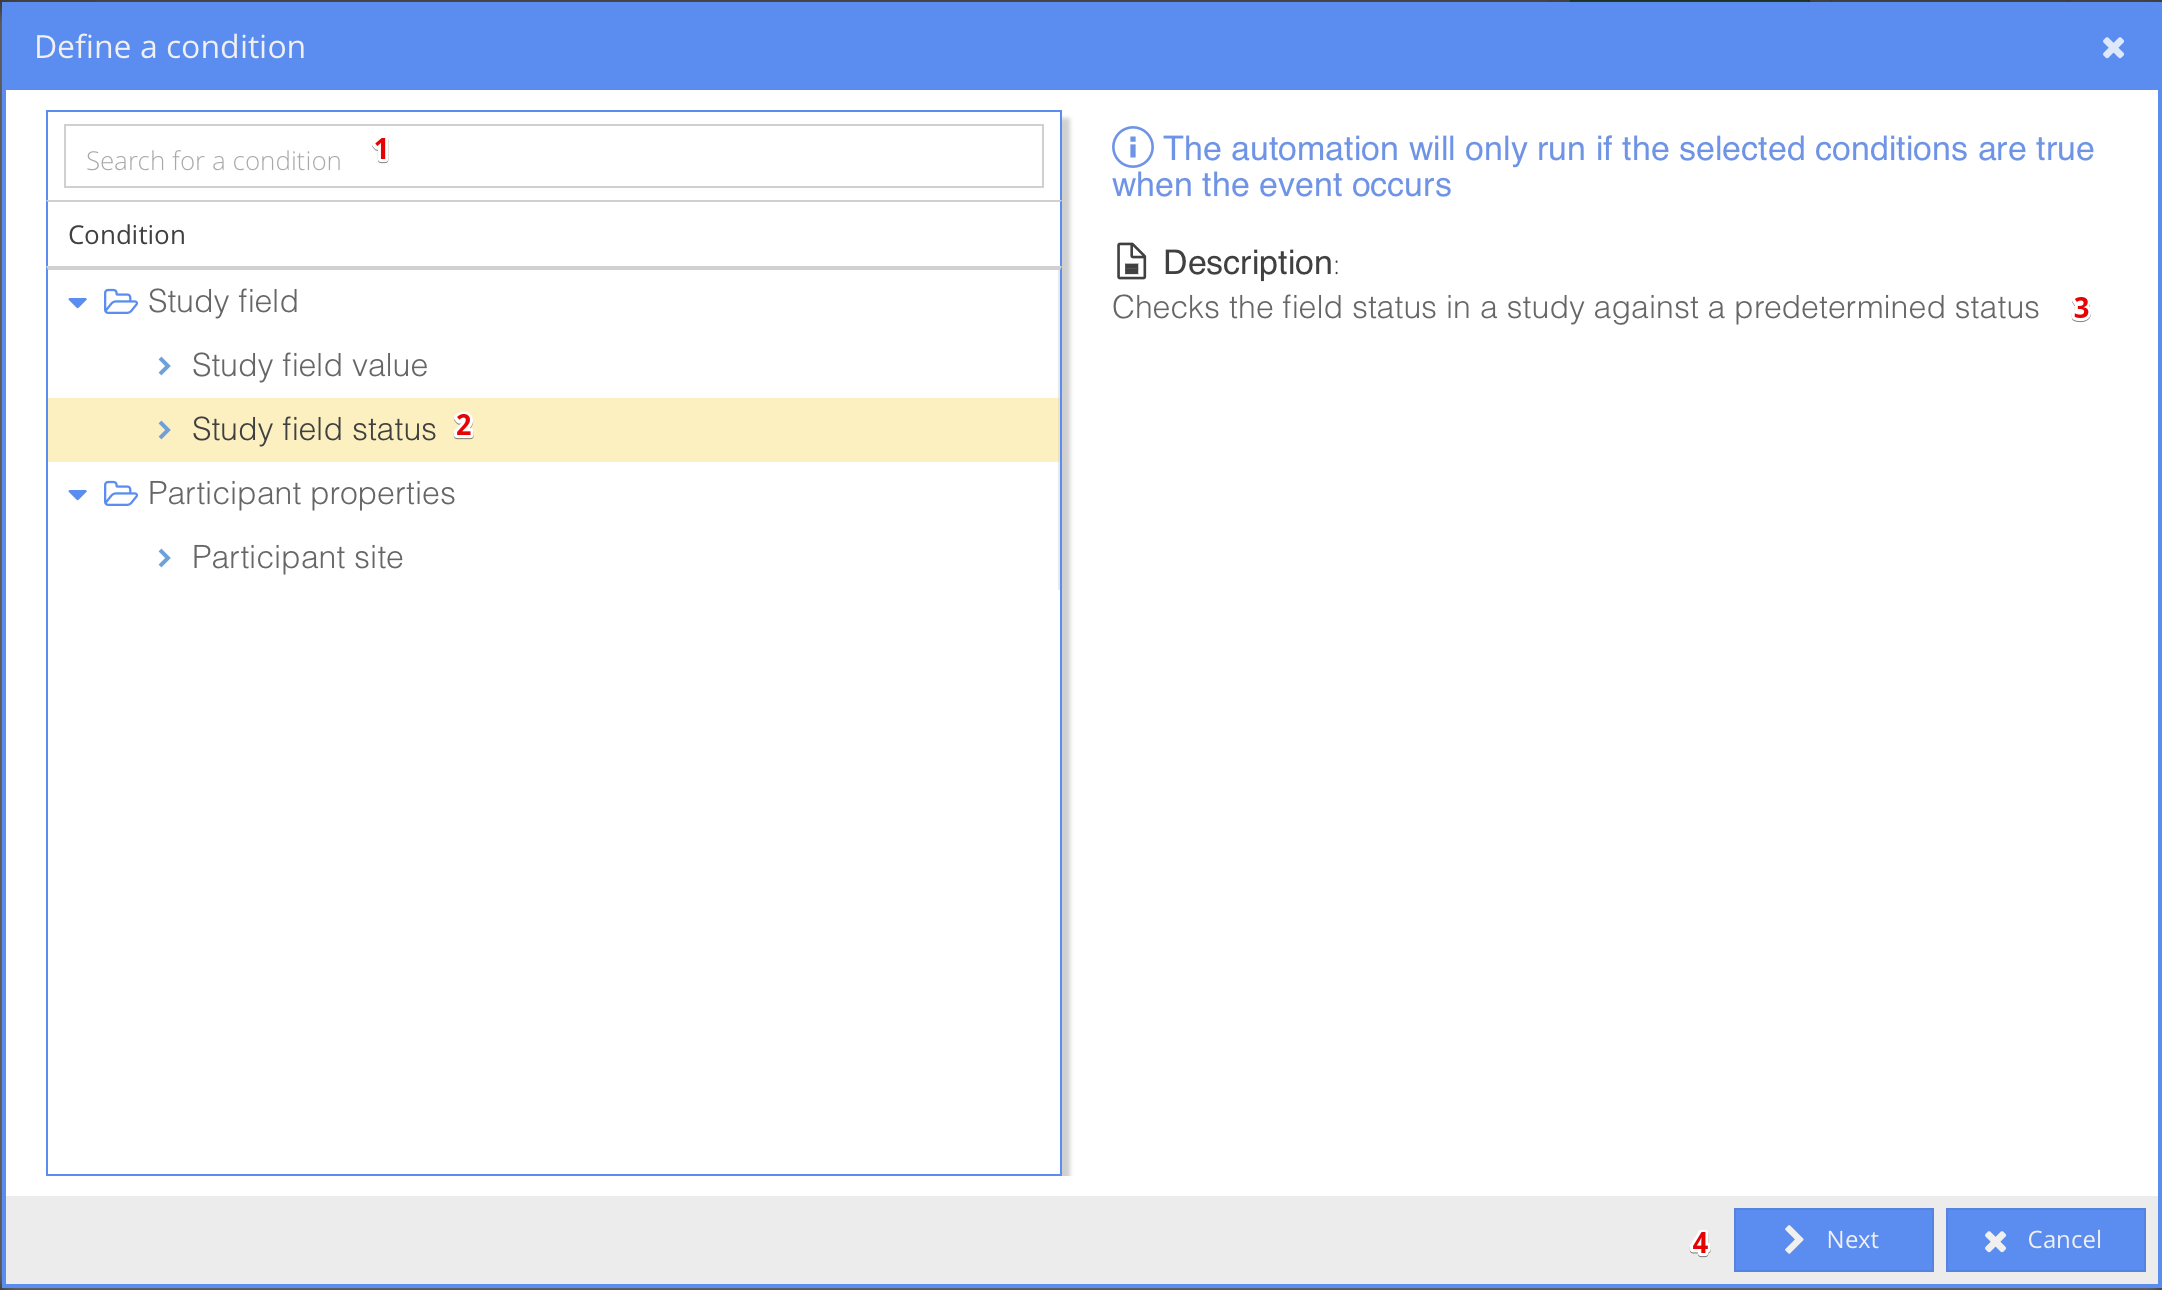
- As more Conditions are supported by our system, you will be able to search for your desired condition using the search box at the top left side of the popup dialog.
- A list of all currently supported Conditions appears in the left panel:
- Study Field Value: Checks the value of a field against a predetermined value (e.g. Male selected for Gender).
- Study Field Status: Checks the status of a field as such;
Complete (a valid field value has been entered).
Incomplete (the “clear field” action was triggered).
User missing (the “user missing” button was triggered).
- Participant Site: Checks the site of the participant.
- A description of the Condition appears on the right side of the popup dialog.
- Once you select your Condition, click the "Next" button at the bottom right of the dialog box to continue further specifying the details of your Condition. If you want to quit without saving your Condition, click "Cancel".
You will be taken to an additional set-up screen, which will vary depending on the Condition you selected in the previous screen.
Select a field
From here you can select a field which should be checked on its value or status. The fields are ordered per visit and form.
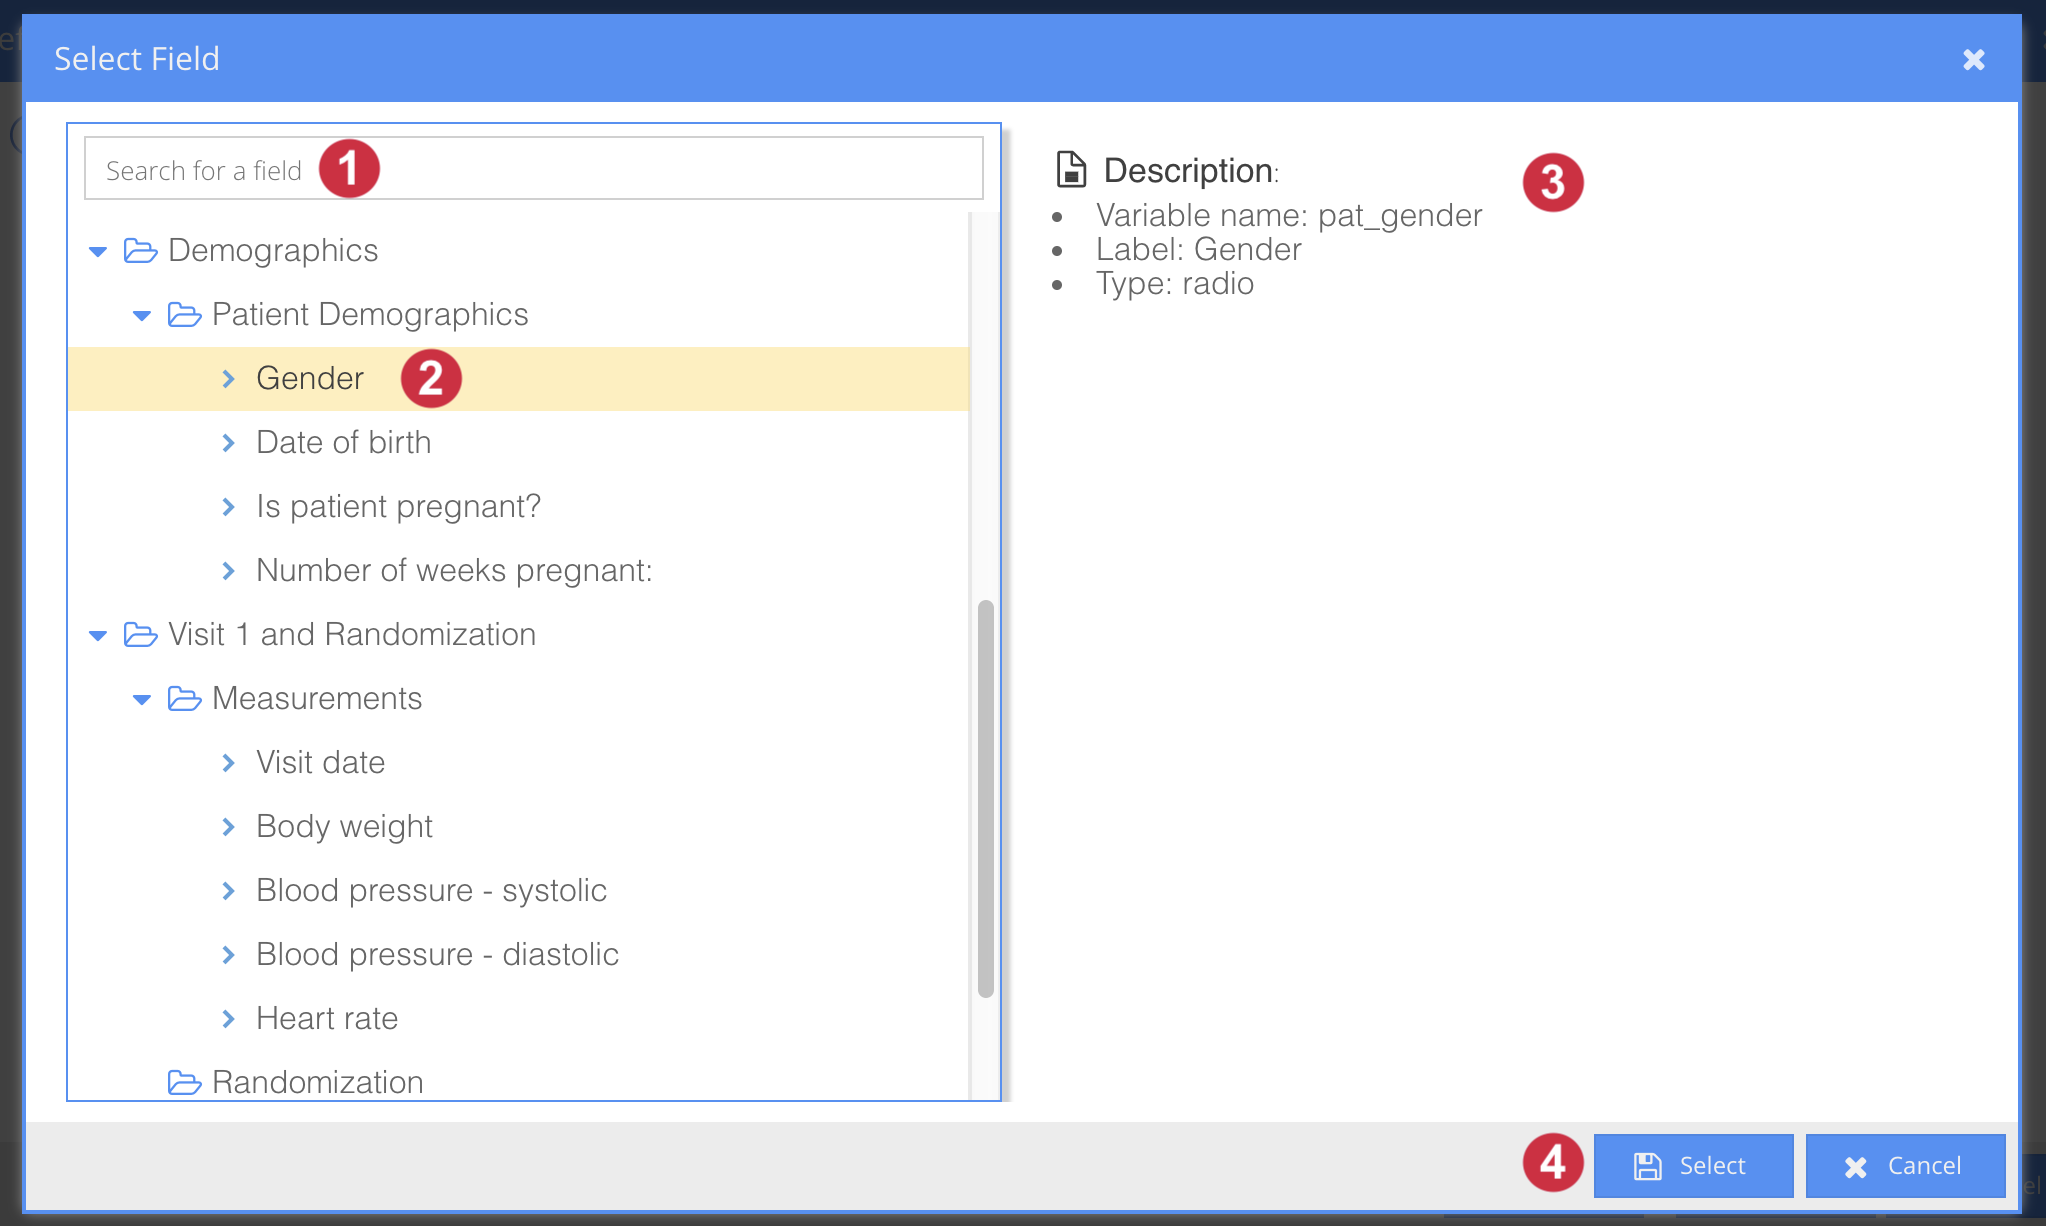
- Search for your specific desired field using the search box at the top left side of the popup dialog.
- A list of all available fields in your study appears on the left side of the popup dialog. Note that only valid field types will appear. This includes:
- Number fields
- Radio button fields
- Dropdown fields
- Checkbox fields
- Date fields
- Year fields
- Time fields
- Calculation fields
- Slider fields
- Text fields (both single line and multi-line)
- Date and time fields
- Number and date fields
- The description of the highlighted field will appear on the right side of the popup dialog. Information such as the variable name, the label and the field type are displayed.
- When you have selected the field you would like to apply the condition to, click Select in the bottom right corner of the popup dialog. If you would like to exit, click Cancel.
Define the value of the field
You will now see options to define the specific value of your selected variable that you would like the automation to check against. Below we have defined the Condition "When Gender equals Male". When this is satisfied and the event we specified earlier occurs, the action will be triggered.
Note: if you select both Male AND Female, the second selection will be grayed out, since it is a radio button field that cannot have two values specified. If this were a checkbox field and you selected multiple options, all of the selected values would have to be selected at the same time for the action to trigger.
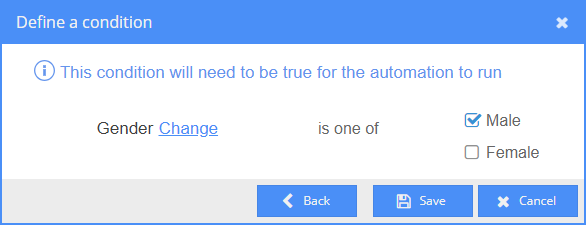
Next, click Save. You will be taken back to the main screen of the Automation Engine. Your newly created condition will appear below the event description. To add another Condition, simply click Add Condition again to go through the process outlined above again. Note that if you add multiple conditions in the same automation, all of the conditions must be satisfied in order for the action to occur.
To complete your automation, you must next select your action.