Create automations with the Automation Engine
Table of Contents
Enable Automation Engine
In order to be able to access automations, you should first enable the Automation Engine in your Settings tab.

- Go to the 'Settings' tab, 'Study' sub tab.
- Select 'Other' tab.
- Select checkbox next to ‘Enable the Automation Engine’
Remember to click 'Save changes'.
Go to the Automation Engine interface
In order to create automations, you should first navigate to the Automation Engine interface.
- Go to the Settings tab.
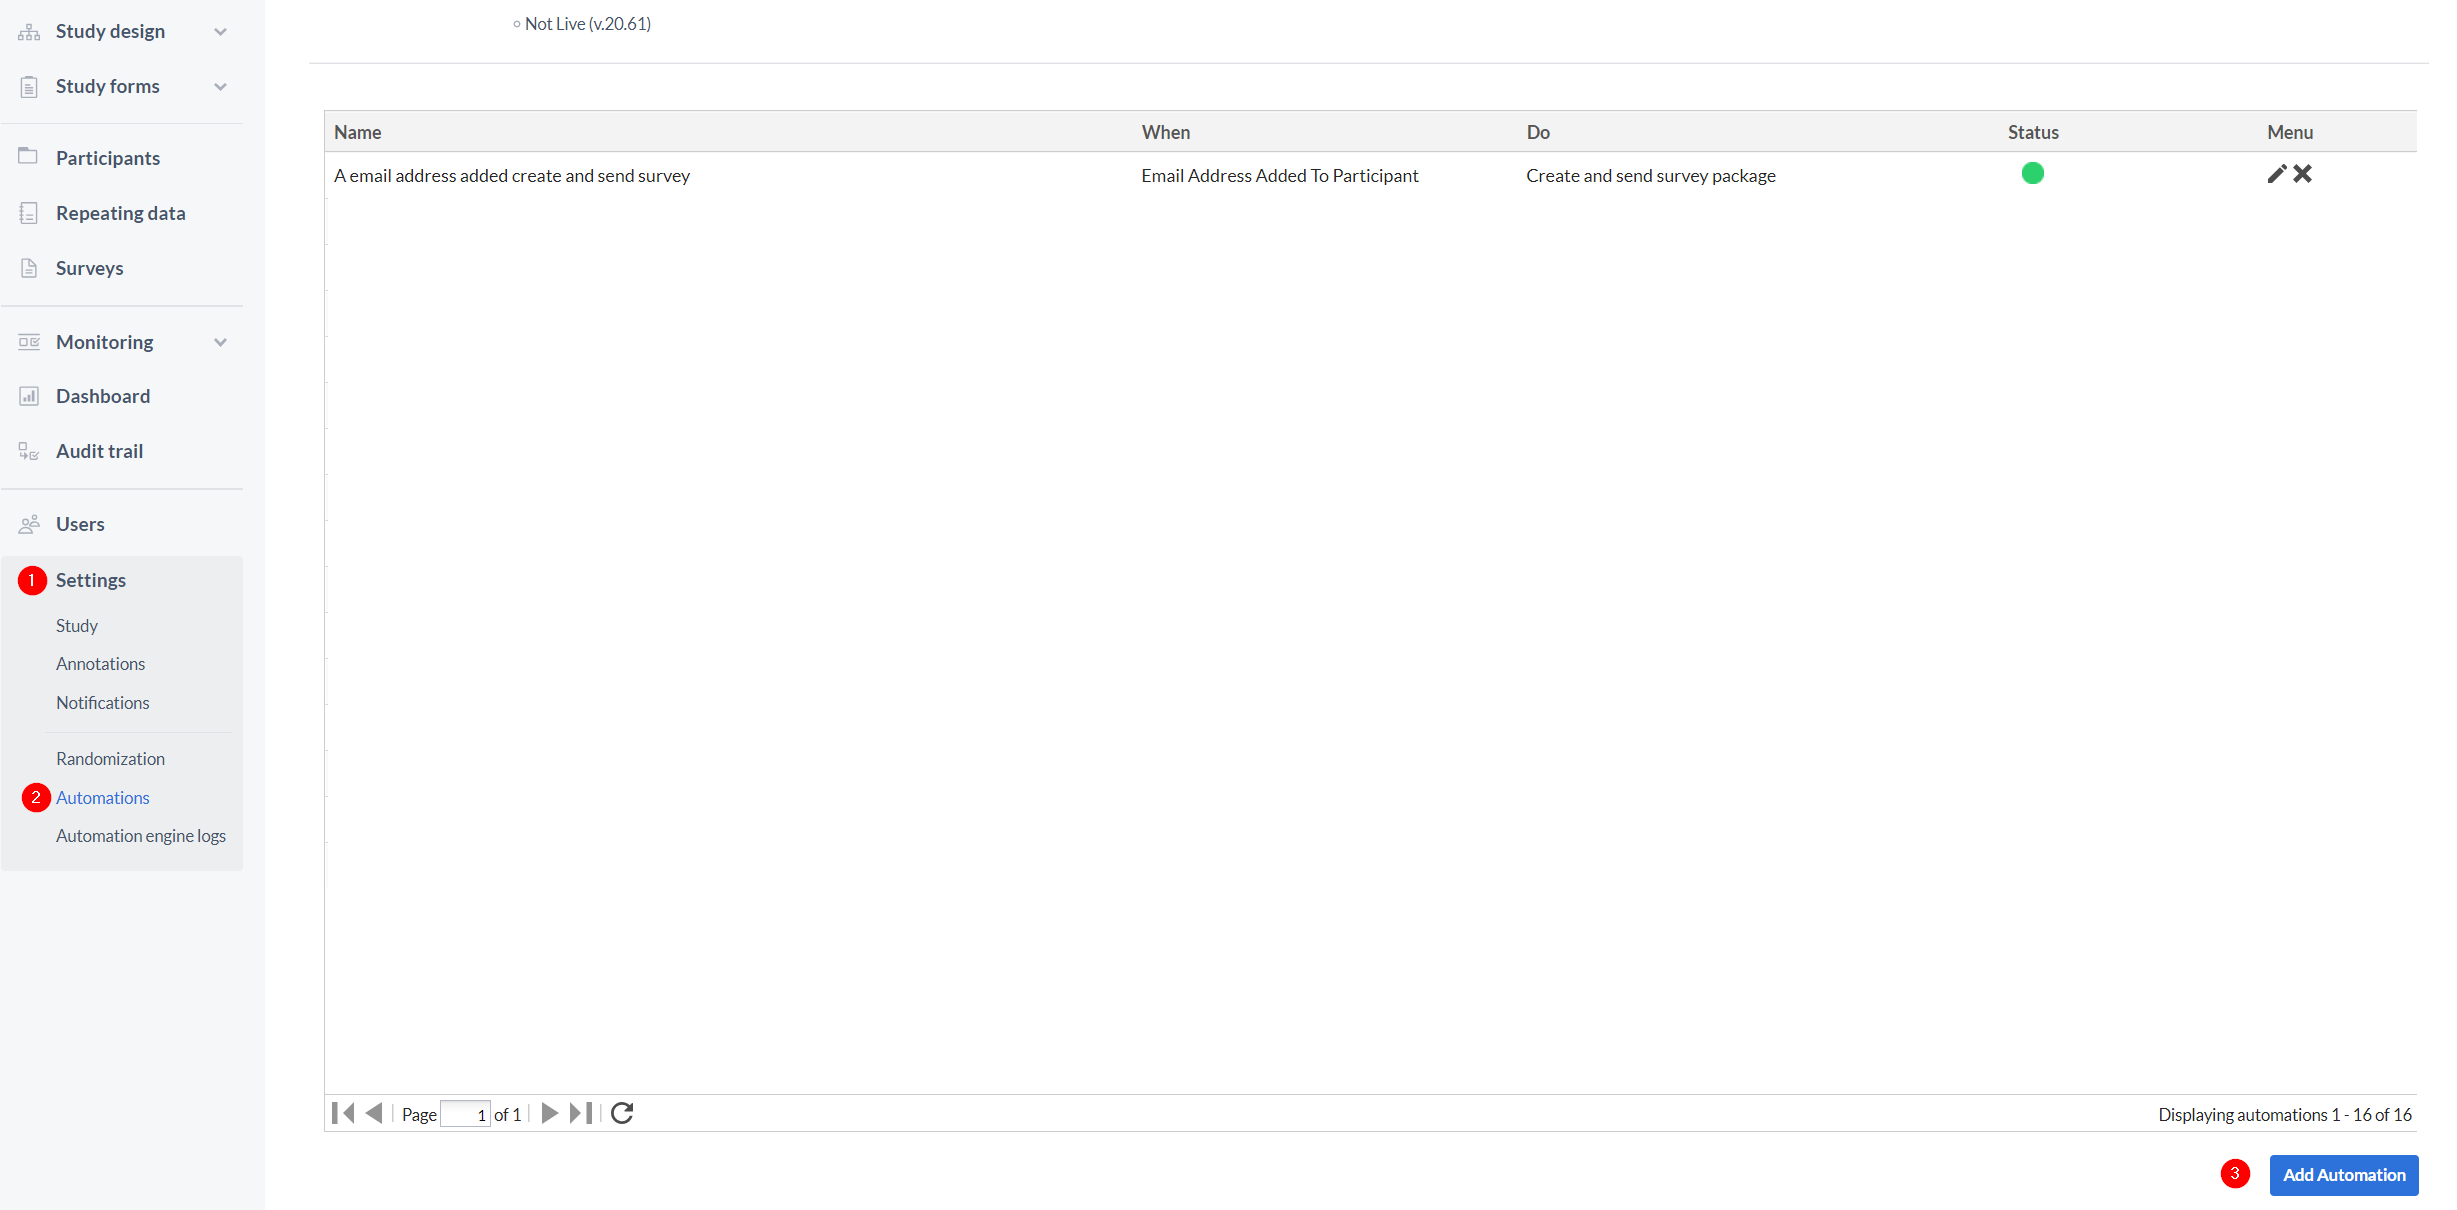
- Go to the Automations sub-tab, which will only be visible if you have beta features enabled in your study. All automations you create will appear in this tab, indicating the automation name, the event when the automation is triggered and the final action. In addition the status of the automation is shown - green if active and gray if inactive. You can change the status by clicking on the circle in the status column. You can also edit or delete your automations in this tab by using the icons on the far right.
- Click "Add Automation" in the bottom right of the page to create a new automation.
Create a new automation
You have entered the Automation Engine Interface! You can now start creating your automations.
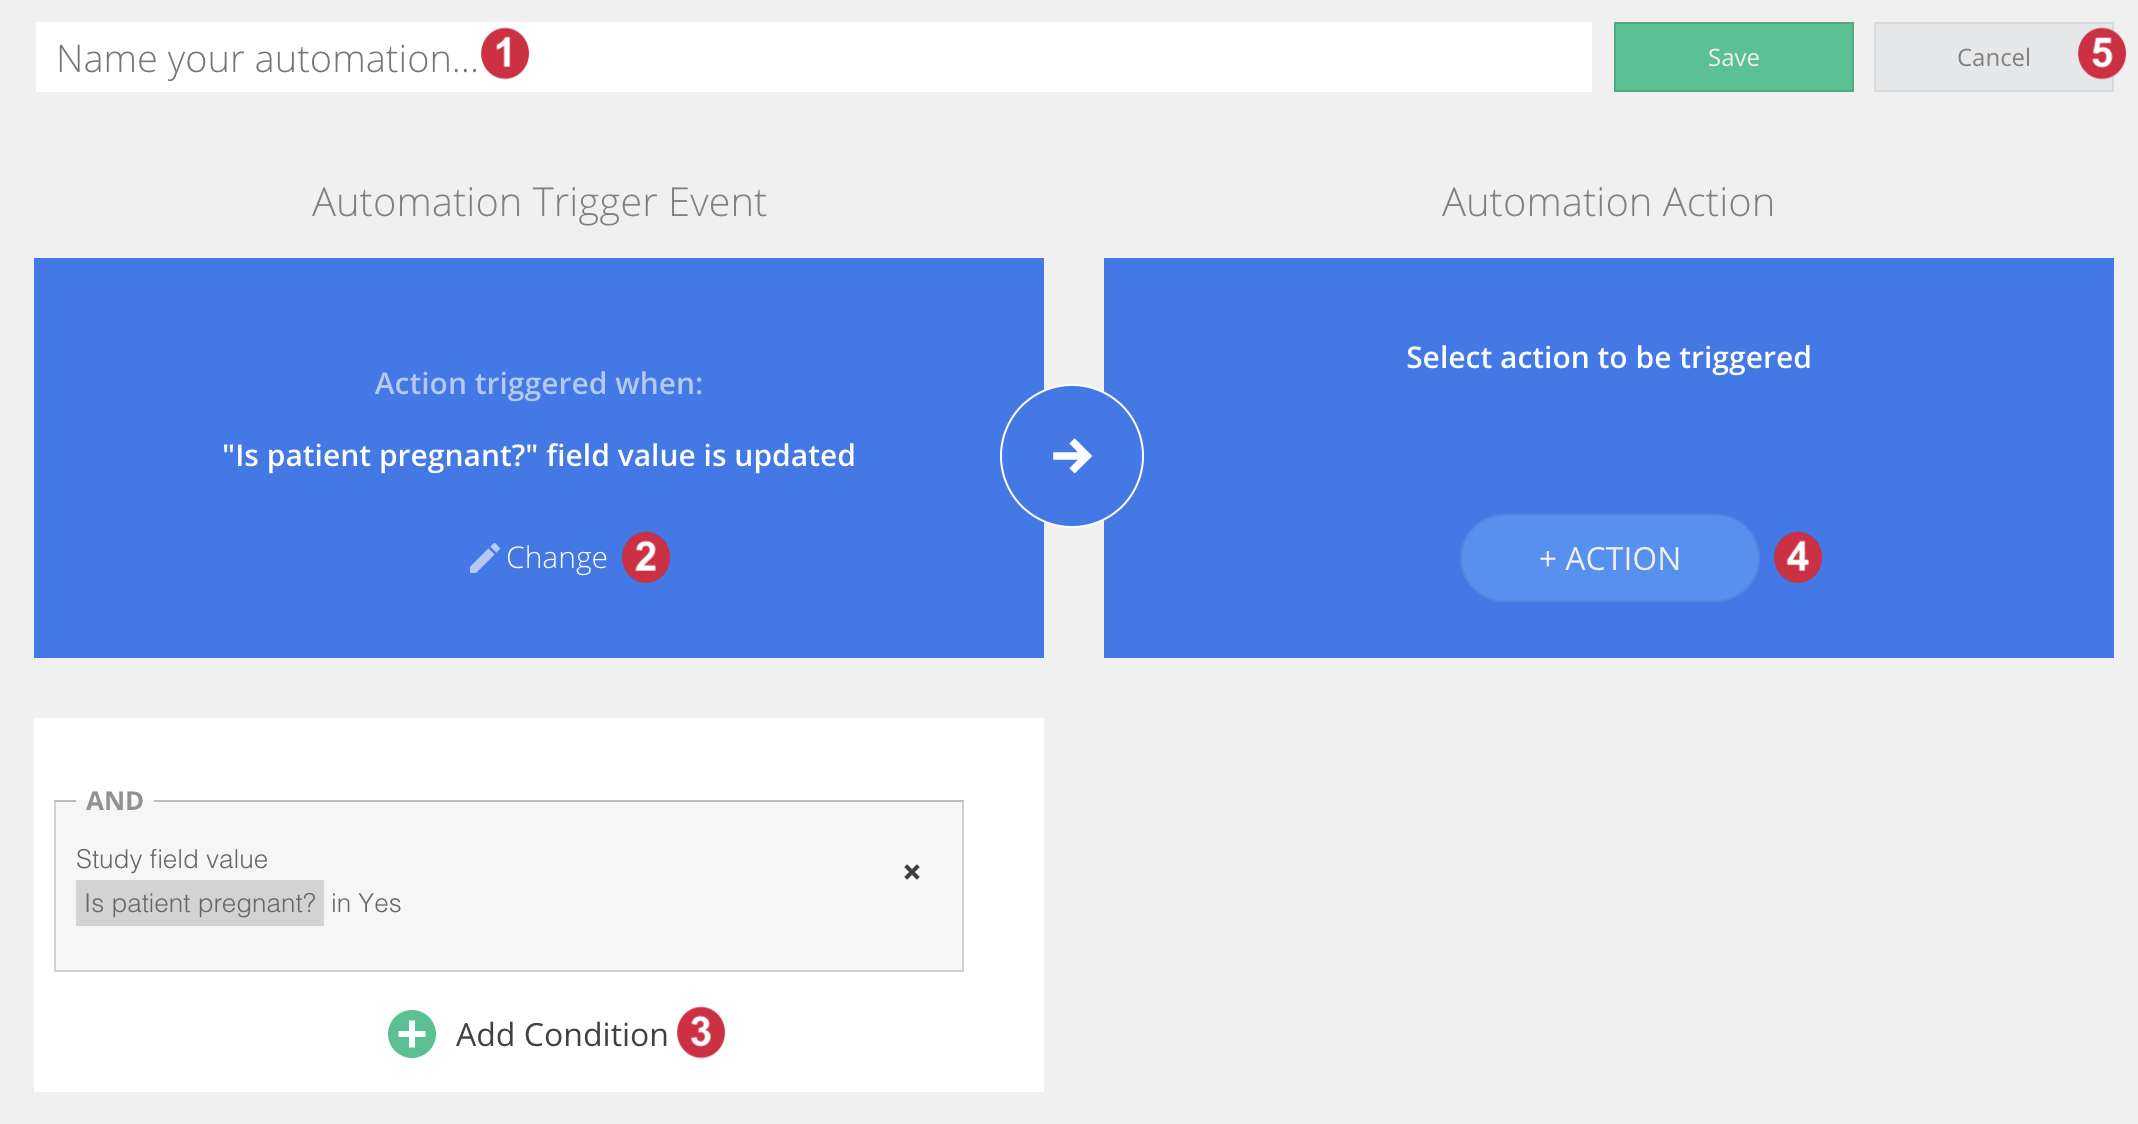
- Name your automation using the input box at the top of the Automation Engine's user interface. (NOTE: the max length accepted for the automation name is 208 characters)
- Select the Event that will trigger your automation. Click on the Event button to bring up the Select an event popup dialog. In the image above, the event 'Field value updated' was selected, the system will check if a defined field value is input, in which case the action will be triggered. Learn more about selecting an Event here.
- Select the conditions that must be true using the Add condition button. This will bring up the Define a condition popup dialog. In the above image, the Action will only be triggered if the participant has the gender specified to be female and the pregnancy being set to Yes. Learn more about selecting a Condition here.
- Select the action that will trigger when all conditions are met and the Event occurs. Click on the Select an Action button to bring up the Select an action popup dialog. In the image below, the Create and send a survey package invitation action was selected. Learn more about selecting your Action here.
- Click the "Save" button in the top right-hand side of the Automation Engine to save your automation or use the “Cancel” button to exit the user interface without saving your automation settings.
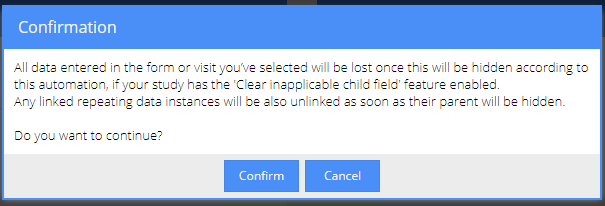
Upon saving the automation, you will be notified about the implications of the changes:
More on this can be found in the following documentation: The study 'Settings' tab in CDMS