Contact Us

If you still have questions or prefer to get help directly from an agent, please submit a request.
We’ll get back to you as soon as possible.

Please fill out the contact form below and we will reply as soon as possible.

  • Contact Us
  • Home
  • CDMS
  • Castor CDMS Manual
  • Create and manage participants

Create a new participant in CDMS

Contact Us

If you still have questions or prefer to get help directly from an agent, please submit a request.
We’ll get back to you as soon as possible.

Please fill out the contact form below and we will reply as soon as possible.

  • CDMS
    Castor CDMS Manual Castor CDMS Calculations Manual Frequently Asked Questions Articles for Data Managers Castor CDMS Compliance Release Documents
  • eConsent
    Castor eConsent Manual Castor eConsent Compliance Release Documents
  • SMS
    Castor SMS Manual Castor SMS Compliance Release Documents
  • Castor Connect
    Castor Connect Compliance Release Documents Castor Connect Manual Castor Connect - Participant Quick Start Guide
  • Helpdesk
    News Other Resources Castor products knowledge resources
  • Status page
  • Completing a Study
+ More

To create your first participant, you must have at least one form created. To start adding fields to your forms, it is necessary to create a visit and form in the study structure.

To create a new participant, follow the instructions provided below:


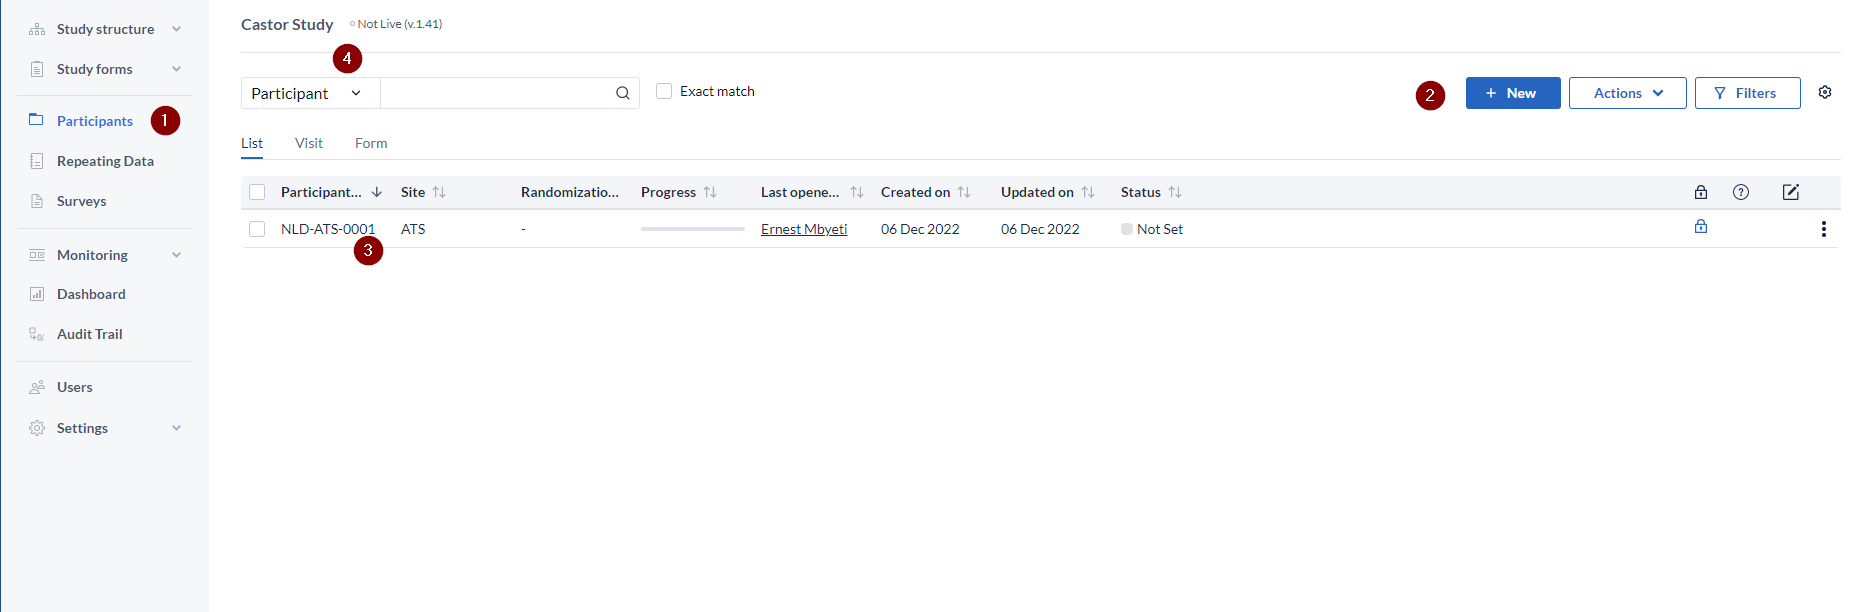
  1. Click on the Participants (1) page
  2. Click on + New button (2). You will be prompted to select the site to which the participant is linked. 
    If you can't find your site listed, you can follow these instructions to add it to your study. 
    By default, Castor CRF will generate incremental IDs per site. There are however other ways to set up custom IDs. See Customize participant IDs for more details.

    Users with permissions to create participants can directly enter the participant's email address and associate it with that  upon the creation of the participants.
     
  3. Once you click on Create, your participant will be created and will appear in the 'Participants' tab overview.
  4. Enable the option Create another to proceed with creating another participant right away. 
  5. After creating your participant, you can search for participant in the search bar.
  6. When creating a participant with the ‘Create another’ option disabled, you will be immediately forwarded to the data entry view for this participant.

Please note that when creating a new participant with the participant ID generation being set to ‘Patient Study ID (free text) from the settings tab, adding the characters ‘[ARCHIVED-]’ in the field is not allowed to prevent possible errors upon archiving participants, as this prefix assigned automatically upon archiving participants.

enroll generate

Was this article helpful?

Yes
No
Give feedback about this article

Related Articles

  • The Participants tab in CDMS
  • Responding to Queries in CDMS
  • Add or update an email address in a participant in CDMS
ISO 27001
FDA - 21 CFR part 11
ICH GCP compliant
HIPAA compliant
CDISC
ISO 9001
gdpr compliant

Products & Industries

  • Electronic Data Capture (EDC)
  • ePRO
  • eConsent
  • Decentralized Clinical Trials (DCT)
  • Clinical Data Management
  • Medical Device & Diagnostics
  • Biotech & Pharma
  • CROs
  • Academic Research

Resources

  • Thought Leadership
  • Blog
  • Castor Academy
  • Knowledge Base


Company

  • About Us
  • Careers
  • News
  • Contact Support
  • Contact Us

Legal & Compliance

  • Terms of Use
  • Privacy & Cookie Statement
  • Responsible Disclosure Policy
  • Good Clinical Practice (GCP)
  • ISO Compliance Certificates
  • GDPR & HIPAA Compliance
  • Security Statement

© 2022, Castor. All Rights Reserved.

Follow us on social media


Knowledge Base Software powered by Helpjuice

Definition by Author

0
0
Expand