Define user roles in CDMS
Table of Contents
User roles are in essence a set of rights.
You can use roles (predefined or custom) to easily define all the rights you want for each user. You also need user roles if you want to hide parts of the eCRF for certain users.
The study admins will need the manage 'Users’ permission to be able to manage roles.
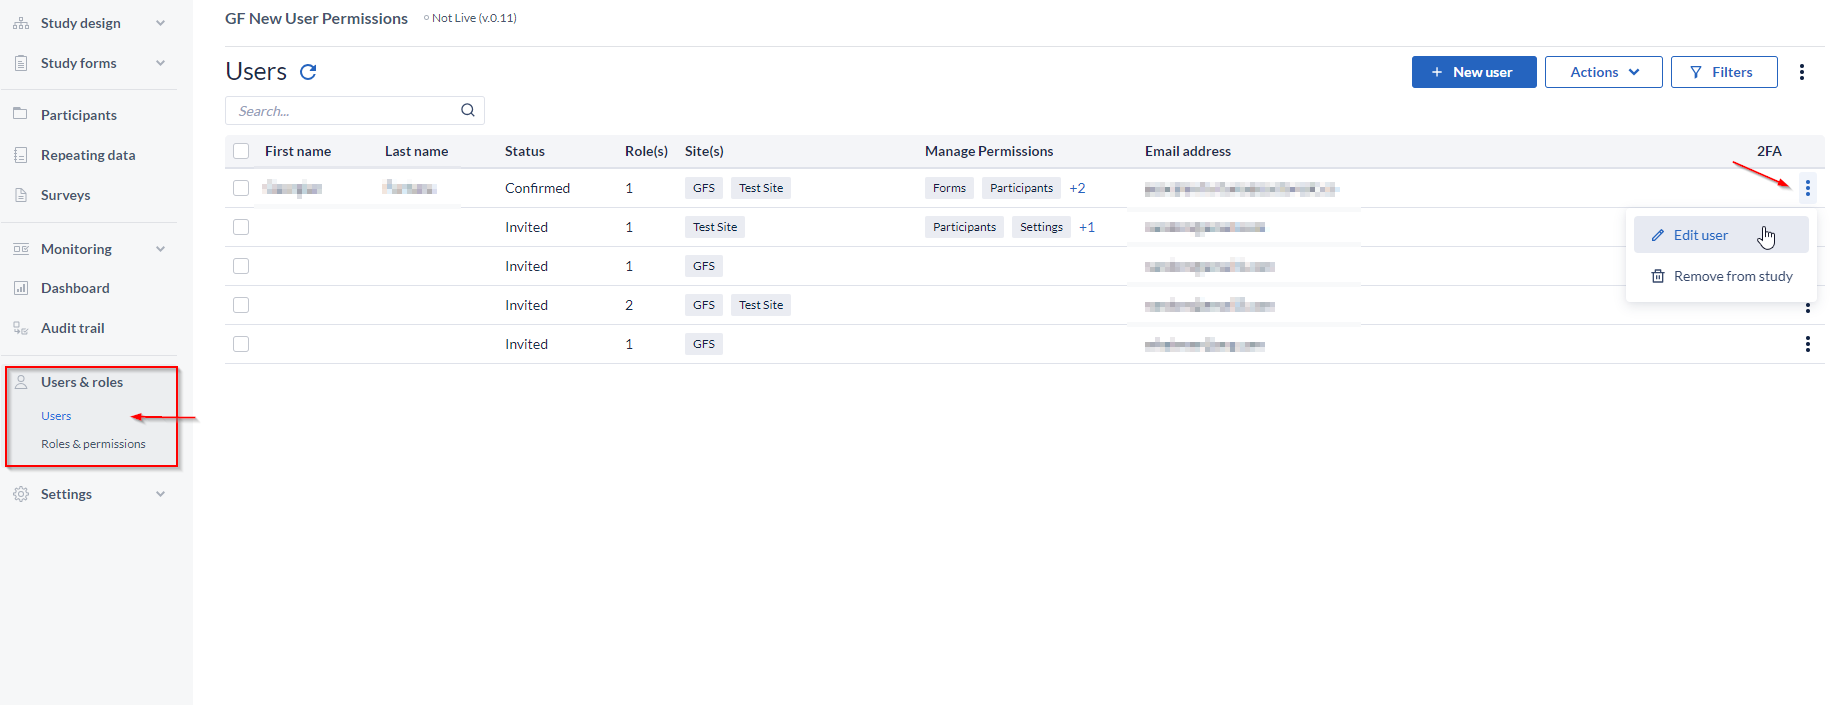
In the ‘Users’ page, any invited user can be reviewed/edited from the three dot menu icon, at the far right side of the table
Site rights
Rights in Castor are assigned as roles, which means that a user can have different roles in multiple sites.
More on how to add/edit/delete a user, can be found in the following documentation:
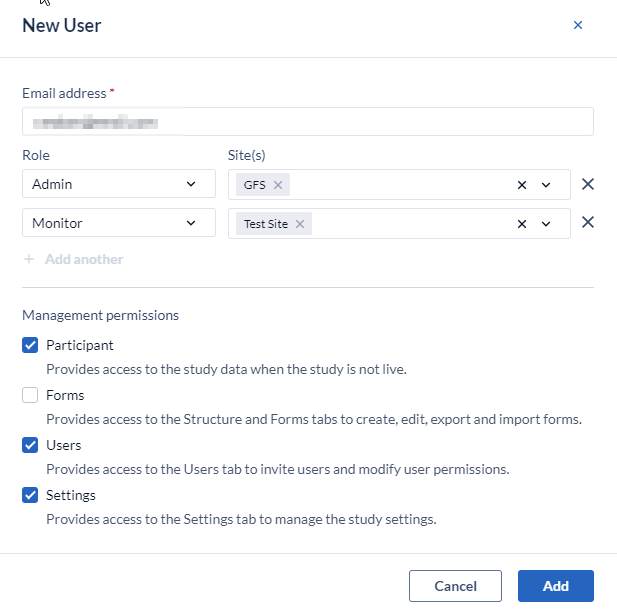
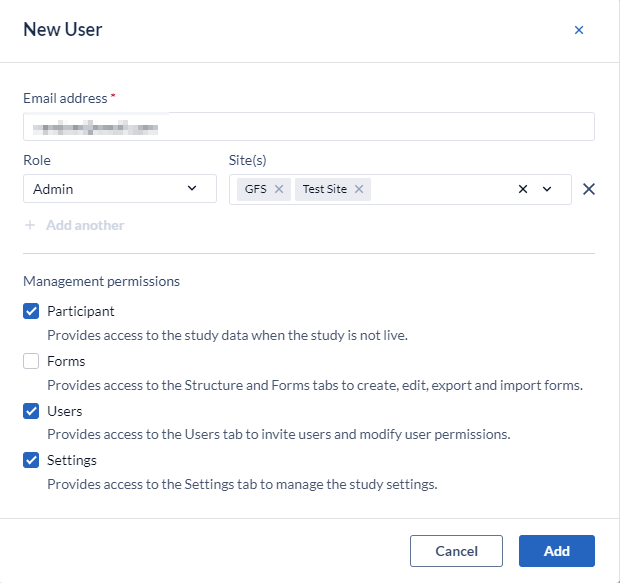
For each user, roles can be assigned:
- Per site:
- Or in bulk for all of the available sites:
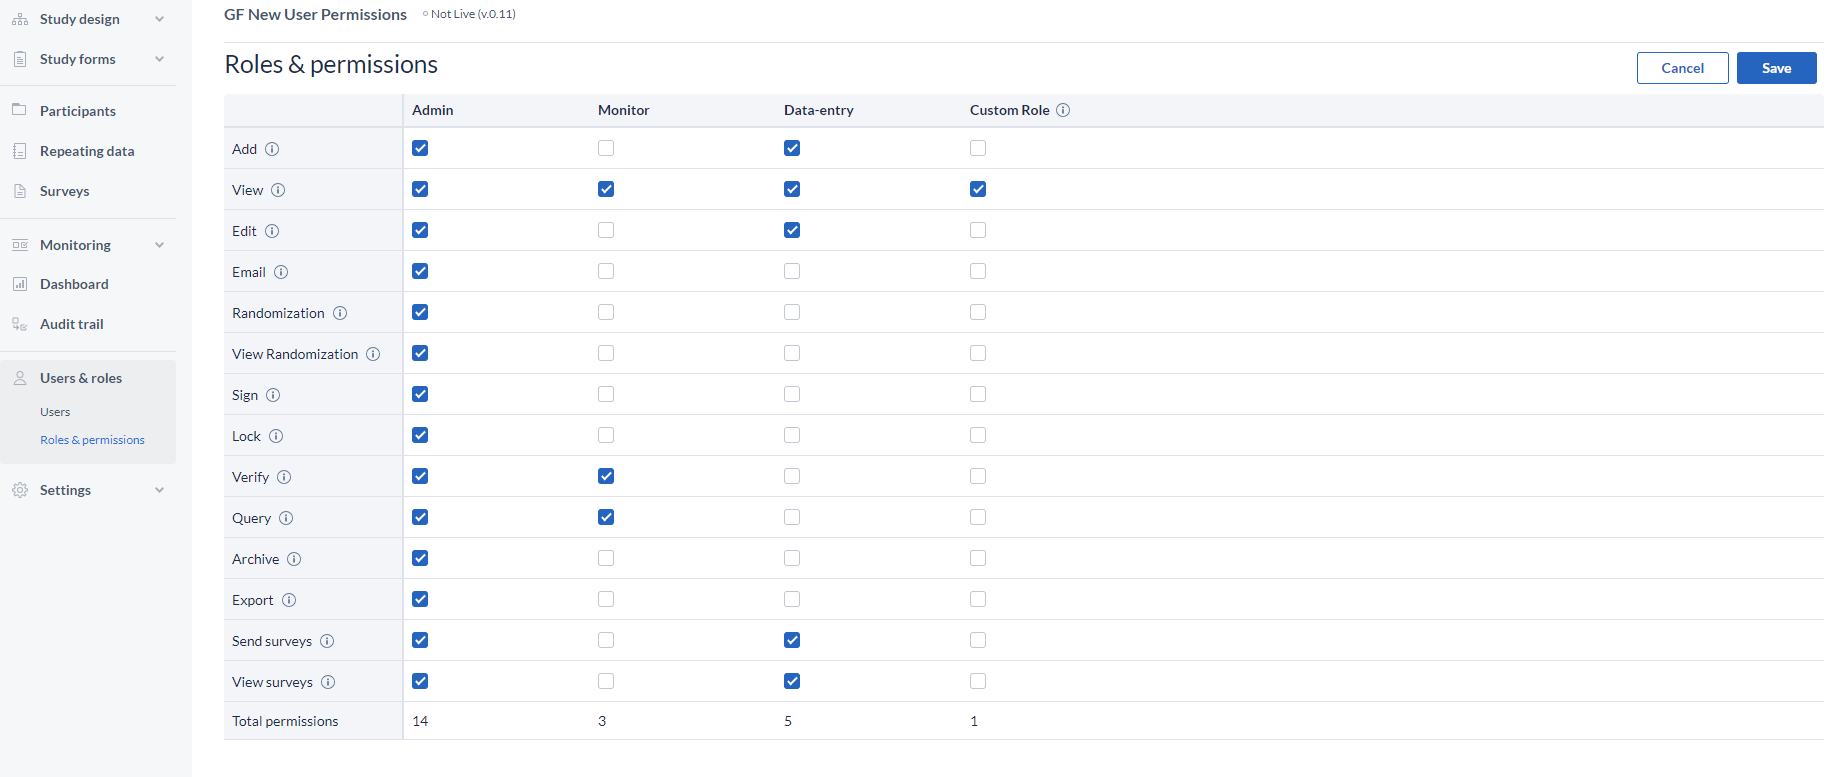
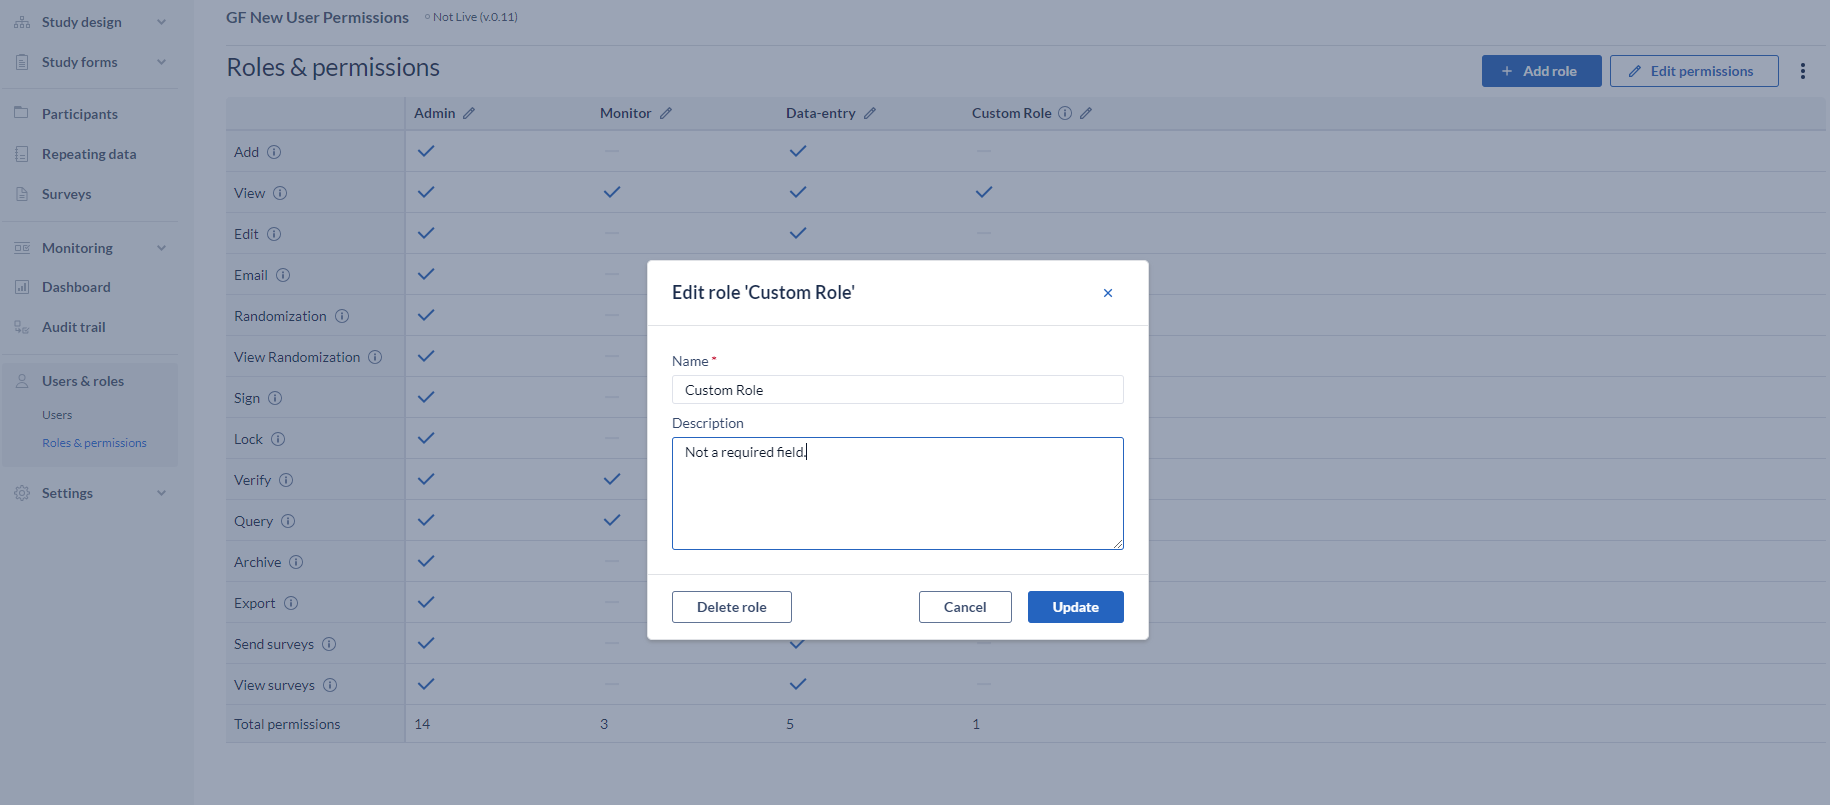
The Roles & permissions page:
It provides a complete overview of the current roles, but also it gives the possibility to the admins to create Custom Roles, which they can assign to users.
Three pre-existing roles are defined in Castor that reflect the common rights assigned to users:
- Admin: has rights for most actions.
- Data-entry: only has rights to add participants, view them, and edit data.
- Monitor: only has rights to view data and create queries.
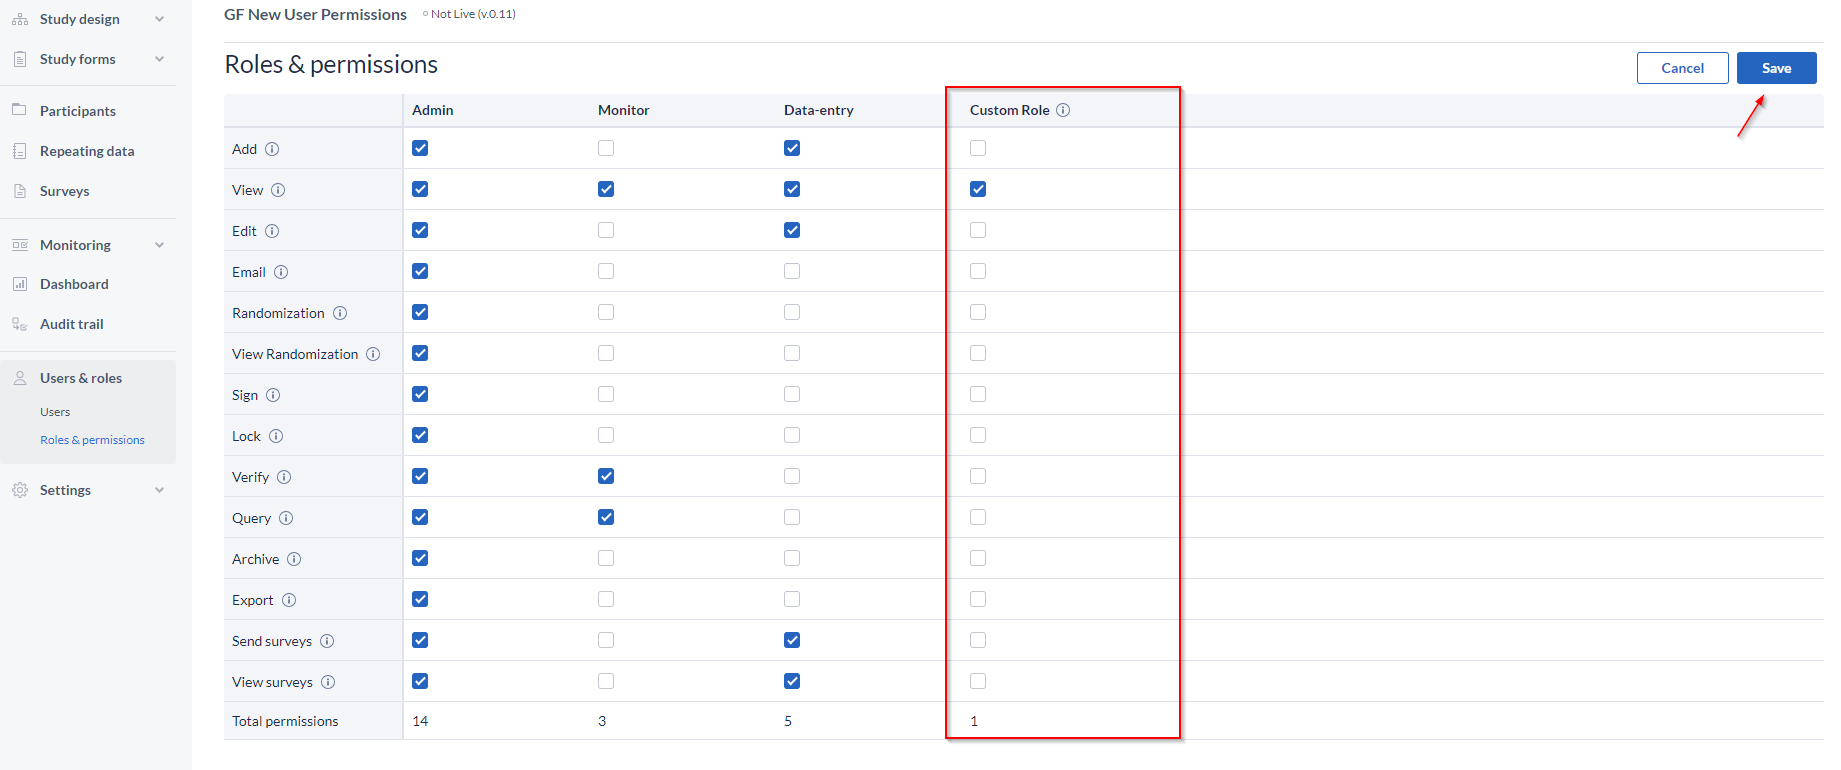
You can edit these existing roles by selecting the option to Edit permission (top-right corner) and checking or un-checking the right that you want to give or remove for one of the roles.
Save the changes, or discard.
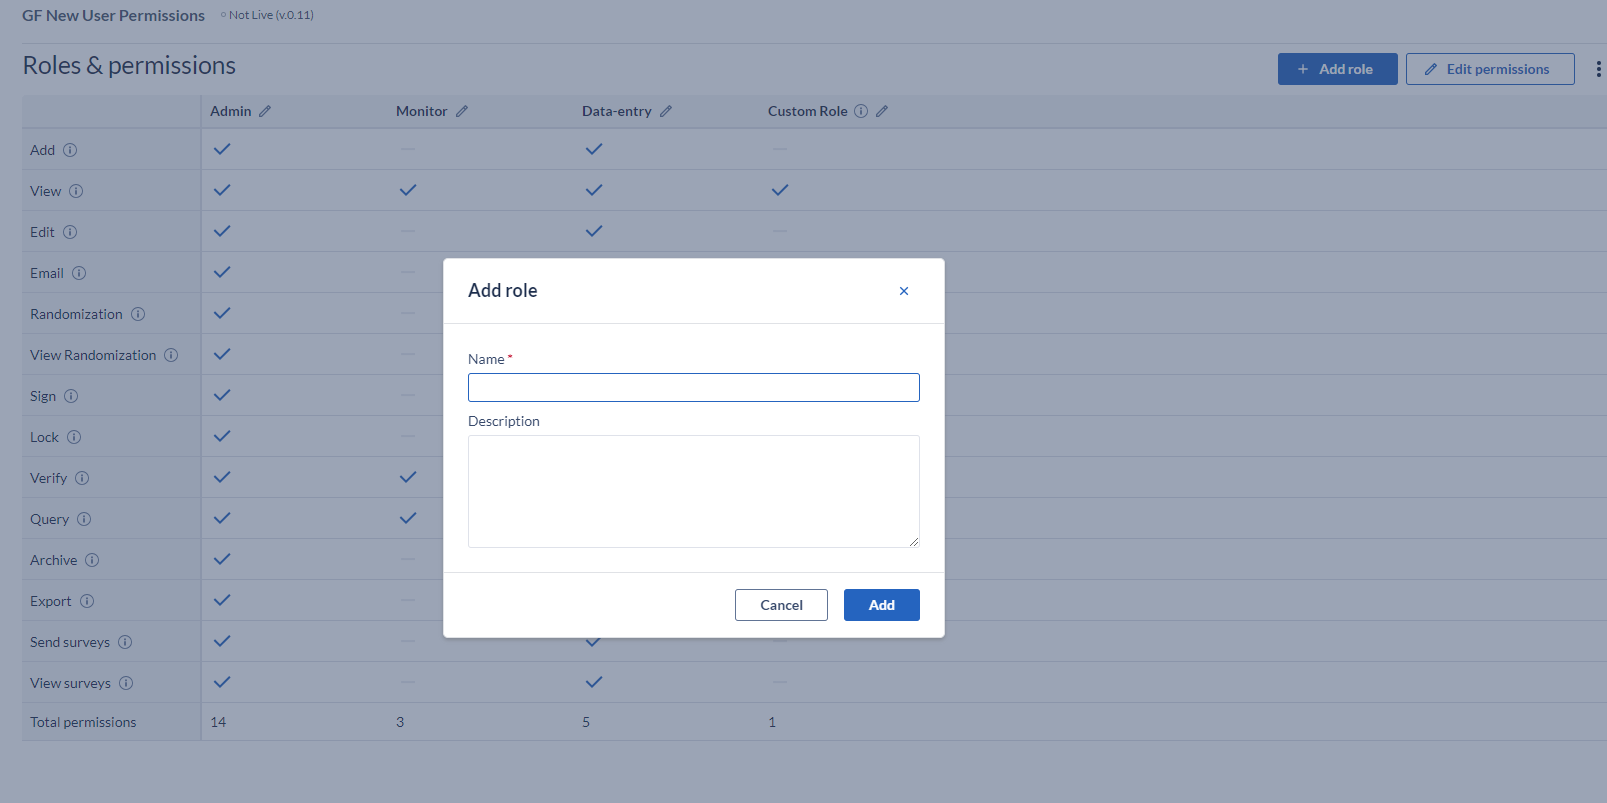
You can also create new user roles by clicking on the '+ Add Role' button.

Specify a name in the popup and press 'Add' to create the role, but be aware that you need to assign the rights to your newly created role by selecting the rights.
If your study has never been live and you would like to delete participants, you need a role with 'Archive' and 'Edit' rights.
Users with site rights only can enter a study if it is live.
Management permissions
Represent advanced permission for users that are managing the study, in contrast to only performing data entry.
These rights provide access to the study management related tabs and can be assigned when inviting an user within the study, or can be assigned at a later stage.
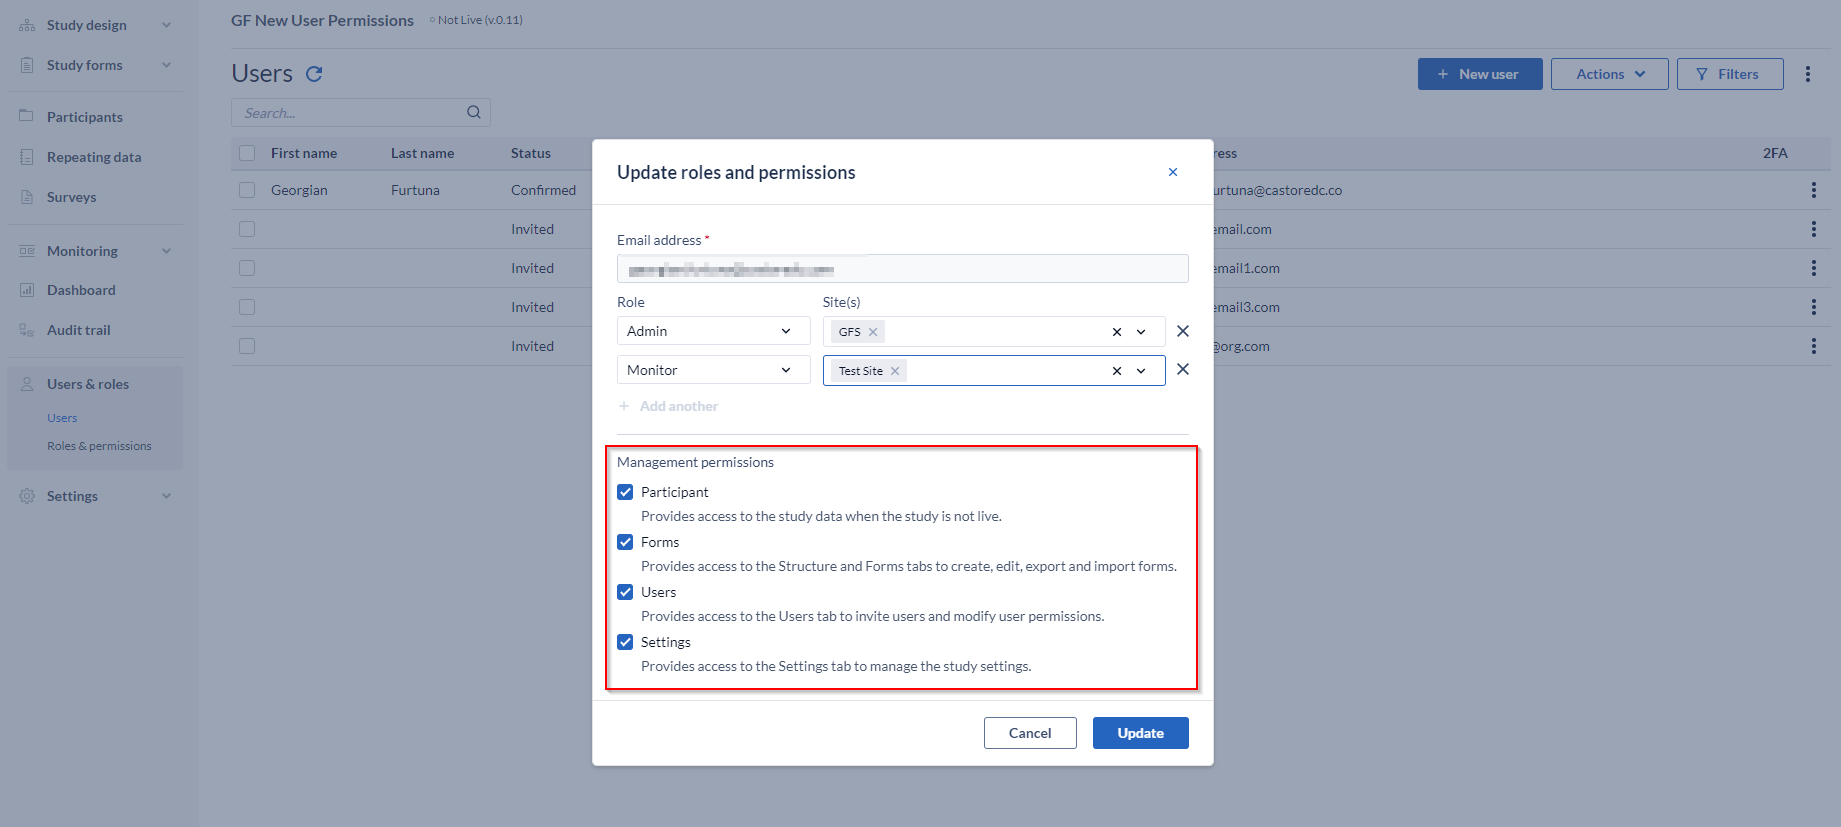
Management permission can be changed by checking each box accordingly next to the specific management right.
These are as follows:
- Participants: If a user has the 'Manage participants' right, they will see the 'Participants', ‘Repeating Data’ and 'Surveys' tab while the study is not live. The exact data the user can access depends on the specific site rights. For example, a user who needs to view the participants for 'site X' will need to have 'Manage participants' and 'View' rights for 'site X'. To create and modify participant groups (for the survey bulk invitations) the 'Manage participants' right is needed.
- Forms: Allows the user access to study management tab 'Structure' and 'Form' (the Form Builder) to create, edit and export/import forms.
- Users: Allows the user access to study management tab 'Users'.
- Settings: Allows the user access to study management tab 'Settings'.
To view the Audit Trail, all management rights must be enabled.
How to add a role:
- Navigate to the “+Add role”
- Add name (and description, if applicable)
- Click “Add” (by default, the permissions are 0)
- Click “Edit Permissions”
- Check each box, as needed
- Save the change
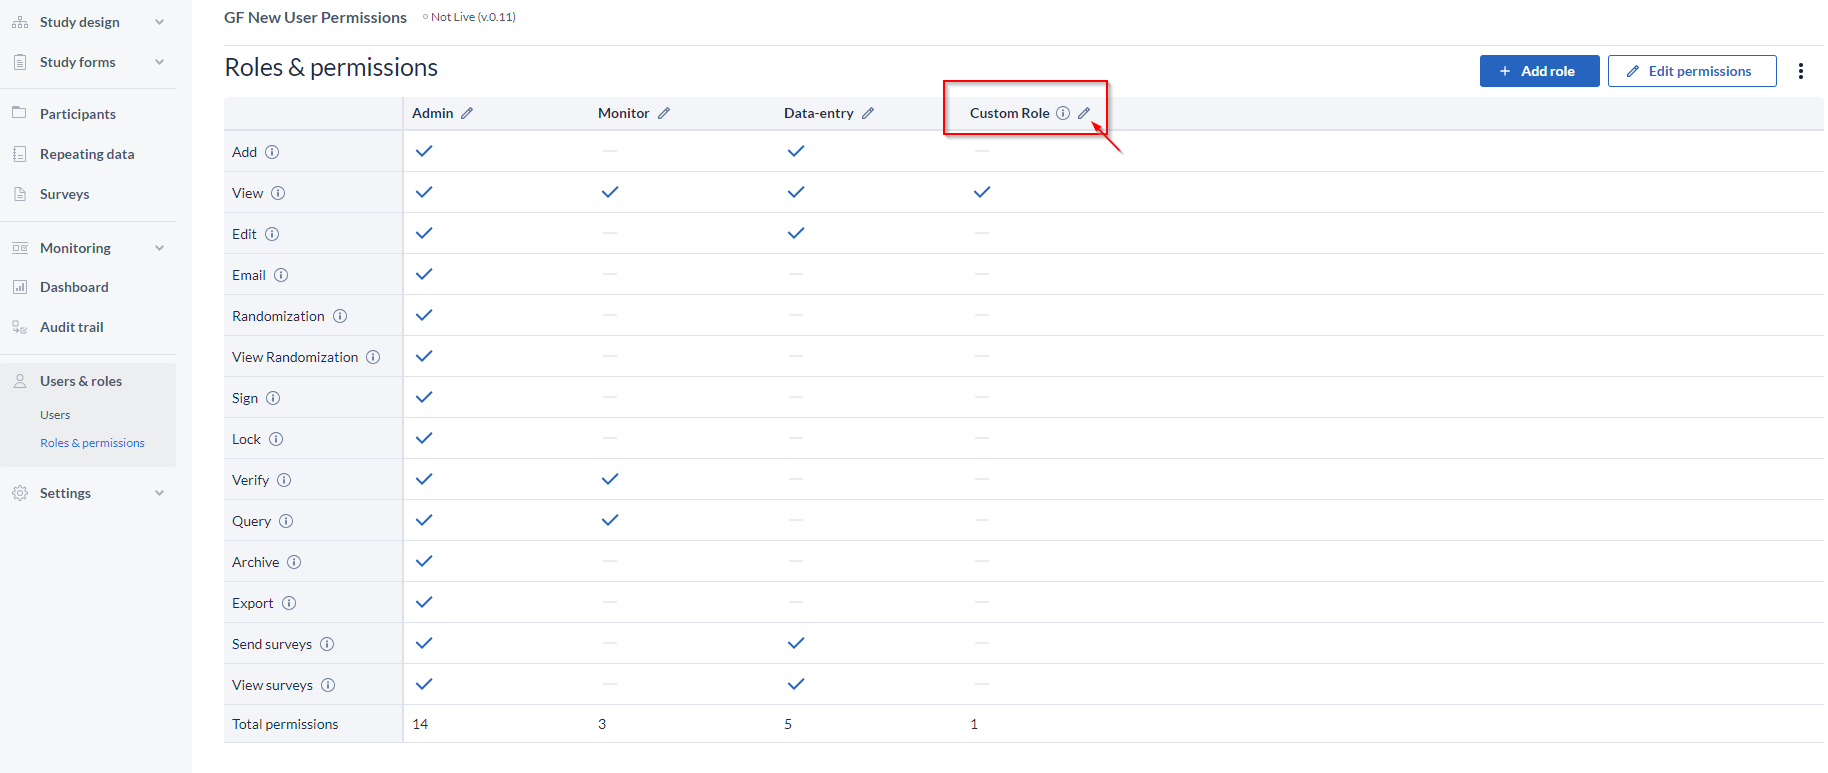
How to edit/delete a role:
- Go to the pencil icon, next to the name;
- Edit the name or add a description, as needed;
- Delete by clicking the “Delete Role” button, and confirm the action;
Permissions overview
It can be viewed or downloaded with the following steps:
- Navigate to the Users page
- Go the 3 dot menu
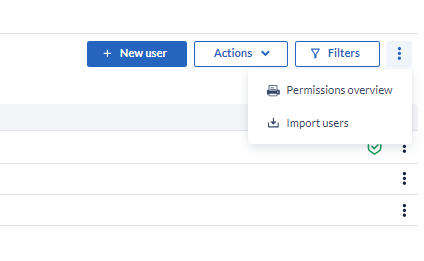
- Click on Permissions overview
- A new window will open with the user information
- Right click on the page and select the Print option
- Print or Save as PDF (as needed)