Adding and editing a consent form in eConsent
Table of Contents
This article explains how to add new consent forms, edit or delete existing ones.
Adding a new consent form
1. Click on the ‘Add consent form’ button.
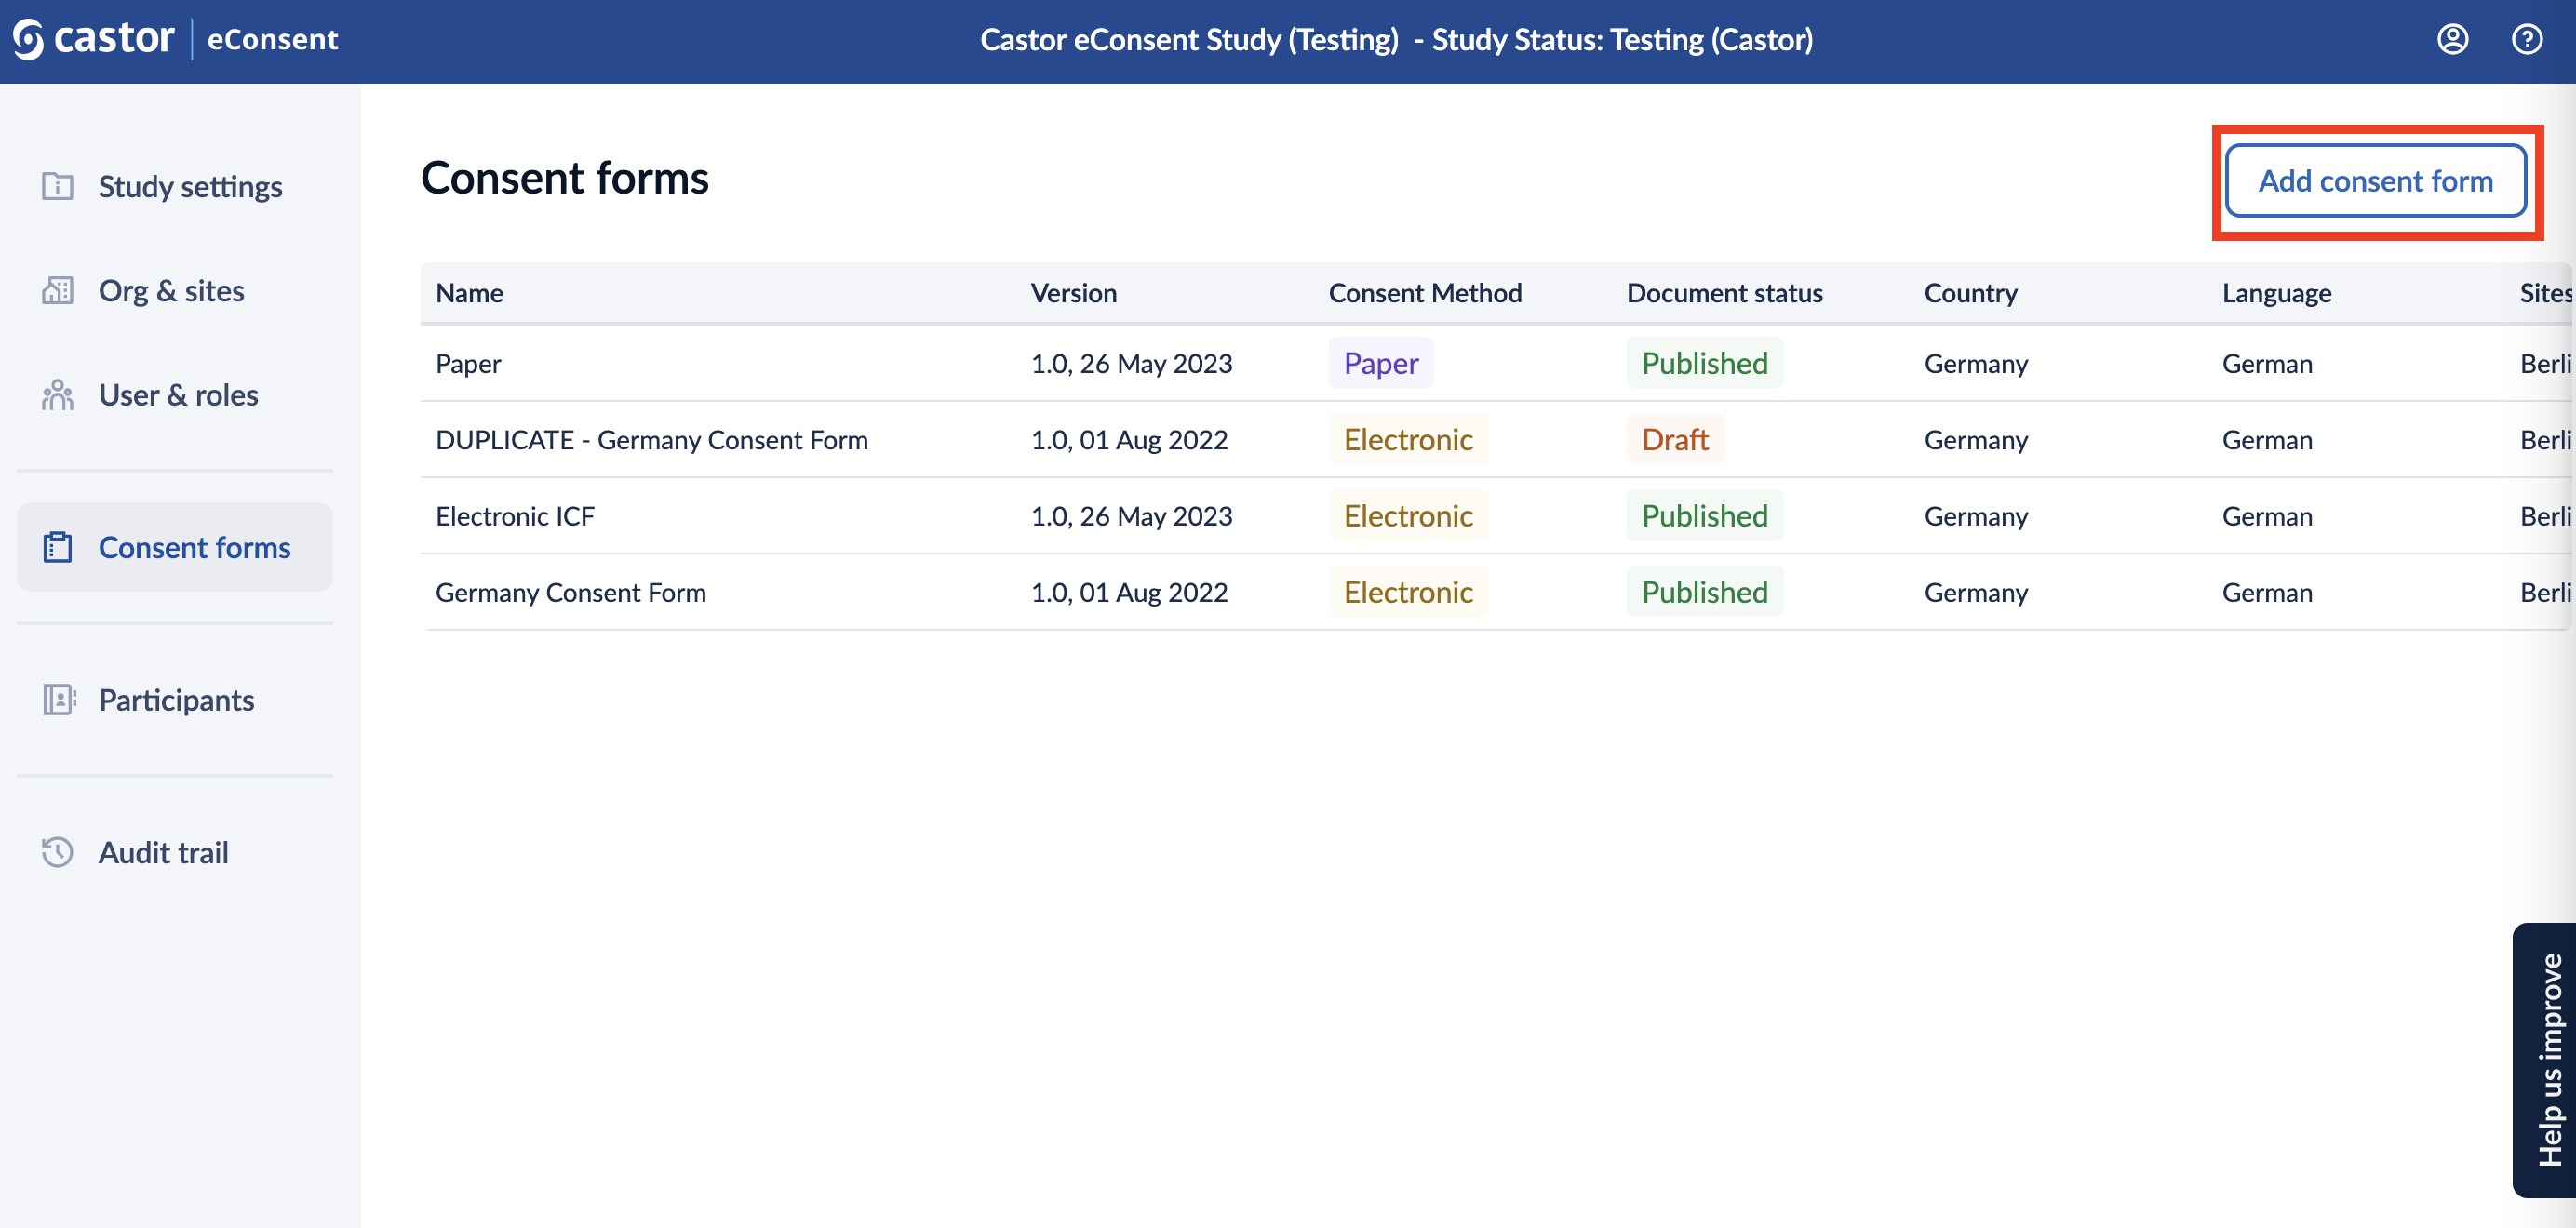
2. You will be taken to the ‘Consent form setup’ page to specify the details of the new consent form:
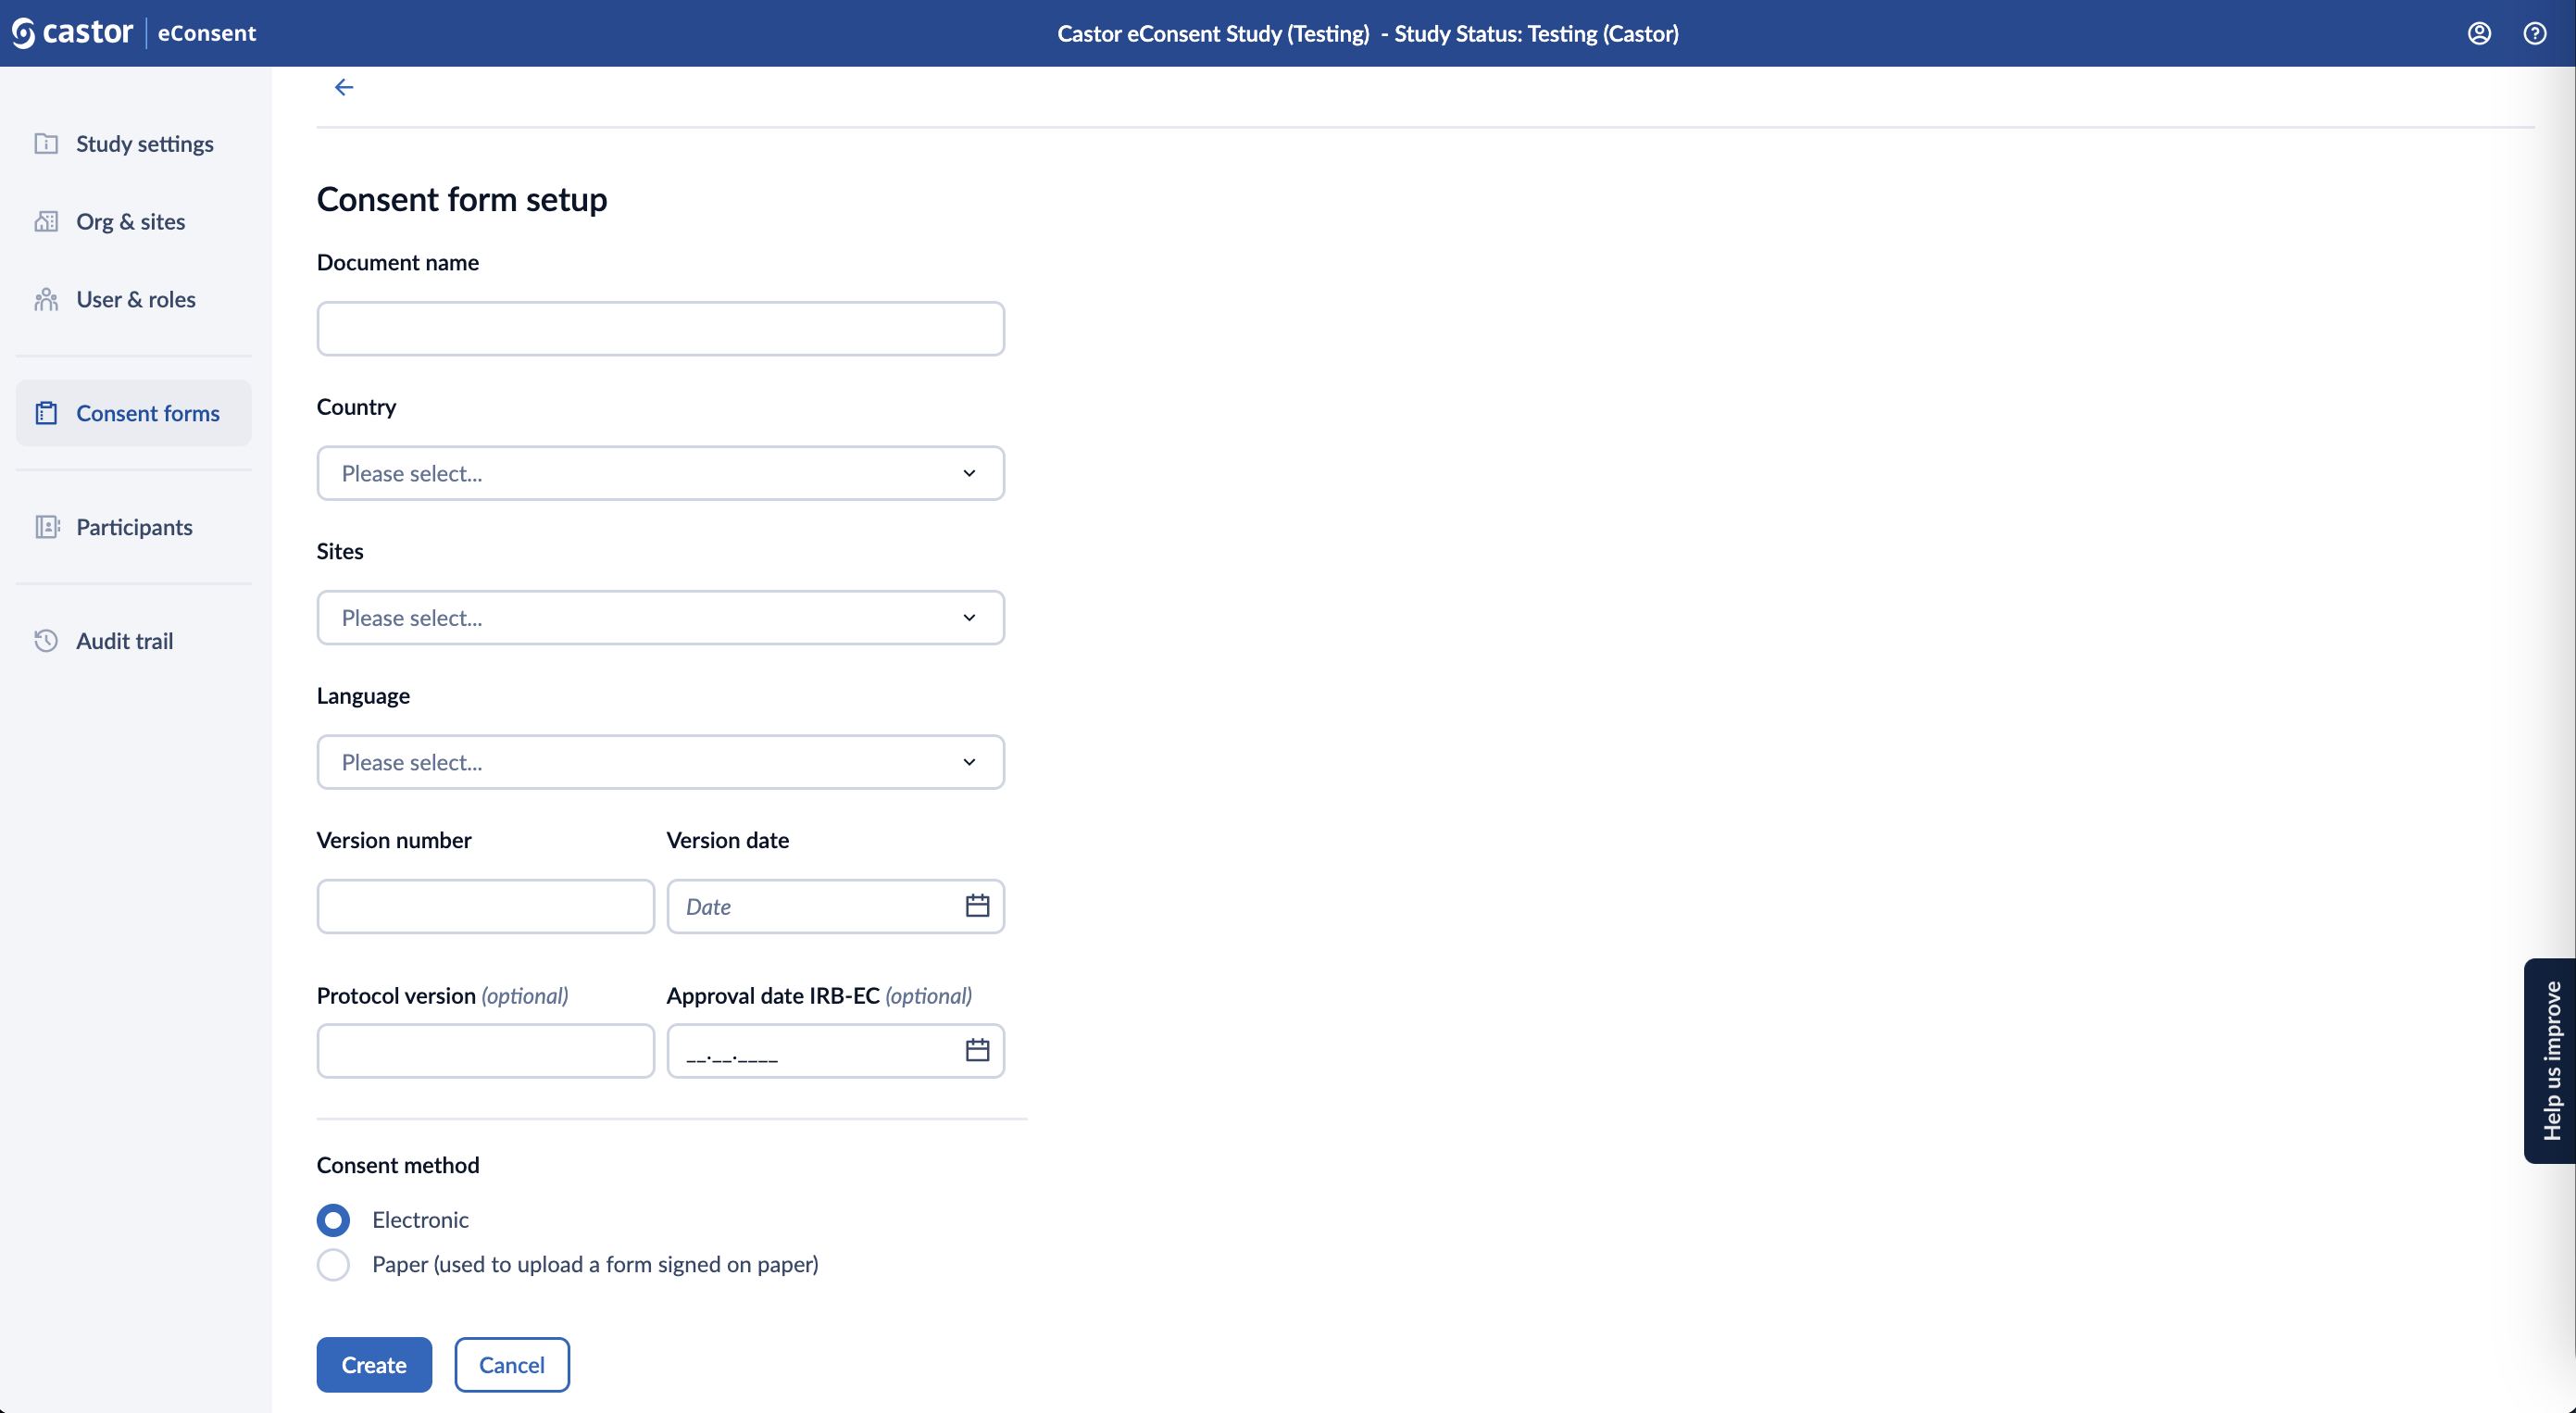
- Document name: title of a consent form
- Country: country(ies) to which a form can be linked
- Sites: site(s) where a consent form is available
- Language: language of a form
- Protocol version: optional field
- Version number: current version of the form
- Version date: date of the form version
- Approval date IRB-EC: date when the form was approved by IRB-EC, optional field
- Consent method: Electronic (created with the eConsent ICF Builder) or Paper (used to upload a form signed on paper)
Navigating back to the ‘Consent Forms’ overview will cancel any applied changes.
3. Click on the ‘Create’ button to create a form. Once the form is created, the status of the form will be changed to ‘Draft’ and it will be displayed in the Consent Forms overview.
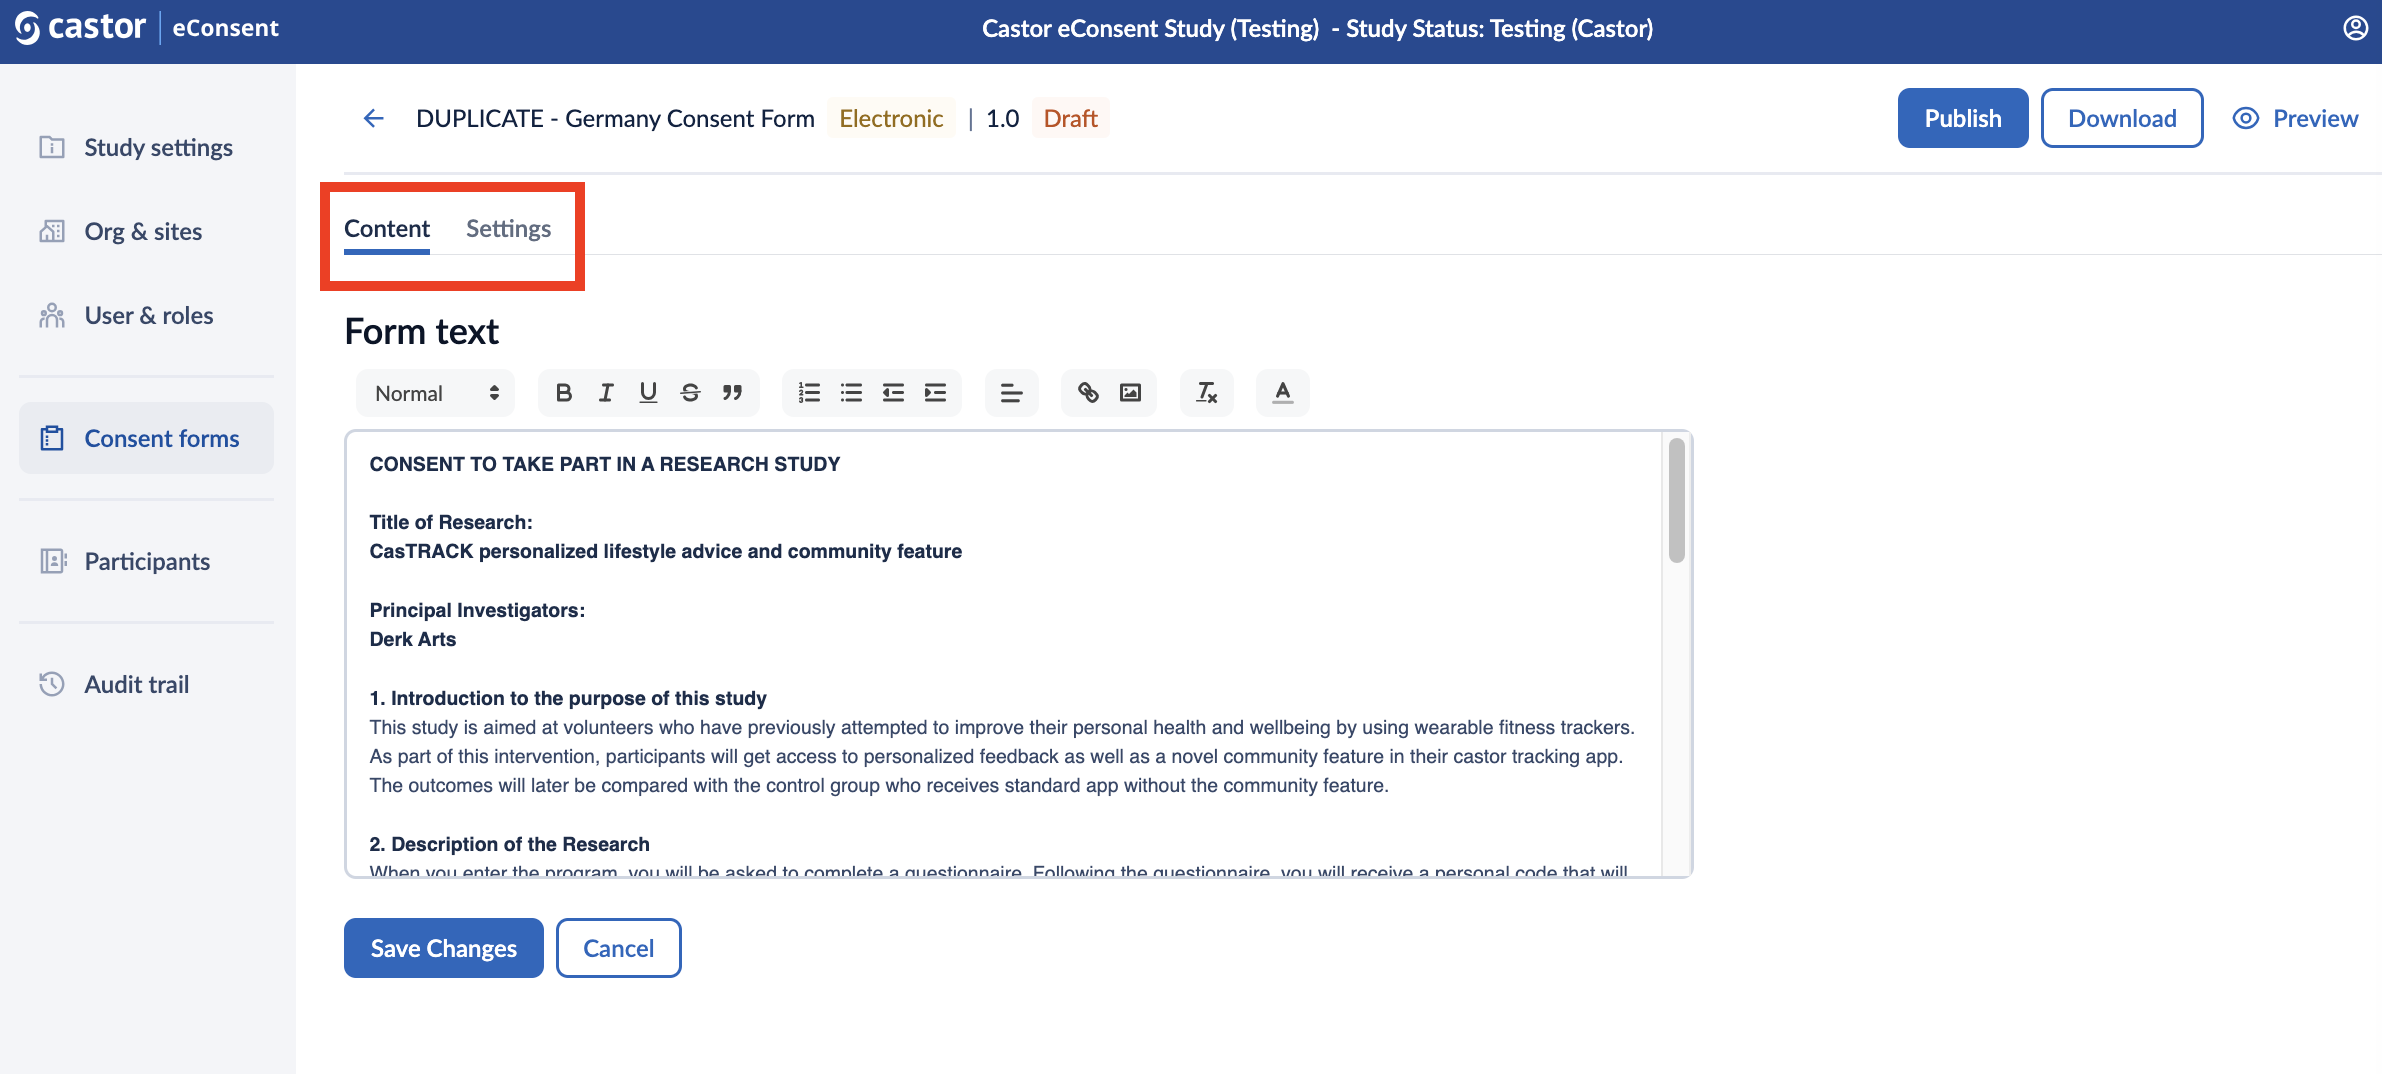
4. After the form is created, you will need to add the form text and set the relevant form properties. Click on the form row to start adding content to your form.

The ‘Content’ and ‘Settings’ tabs allow you to define your form fields and other properties.
Paper Consent Form
When creating a paper consent form, you will be redirected to the ‘Paper form settings’ page where you can specify the paper form properties. Read the section below about the ‘Settings' sub-tab to learn more about defining the properties for your consent forms.
Electronic Consent Form Content
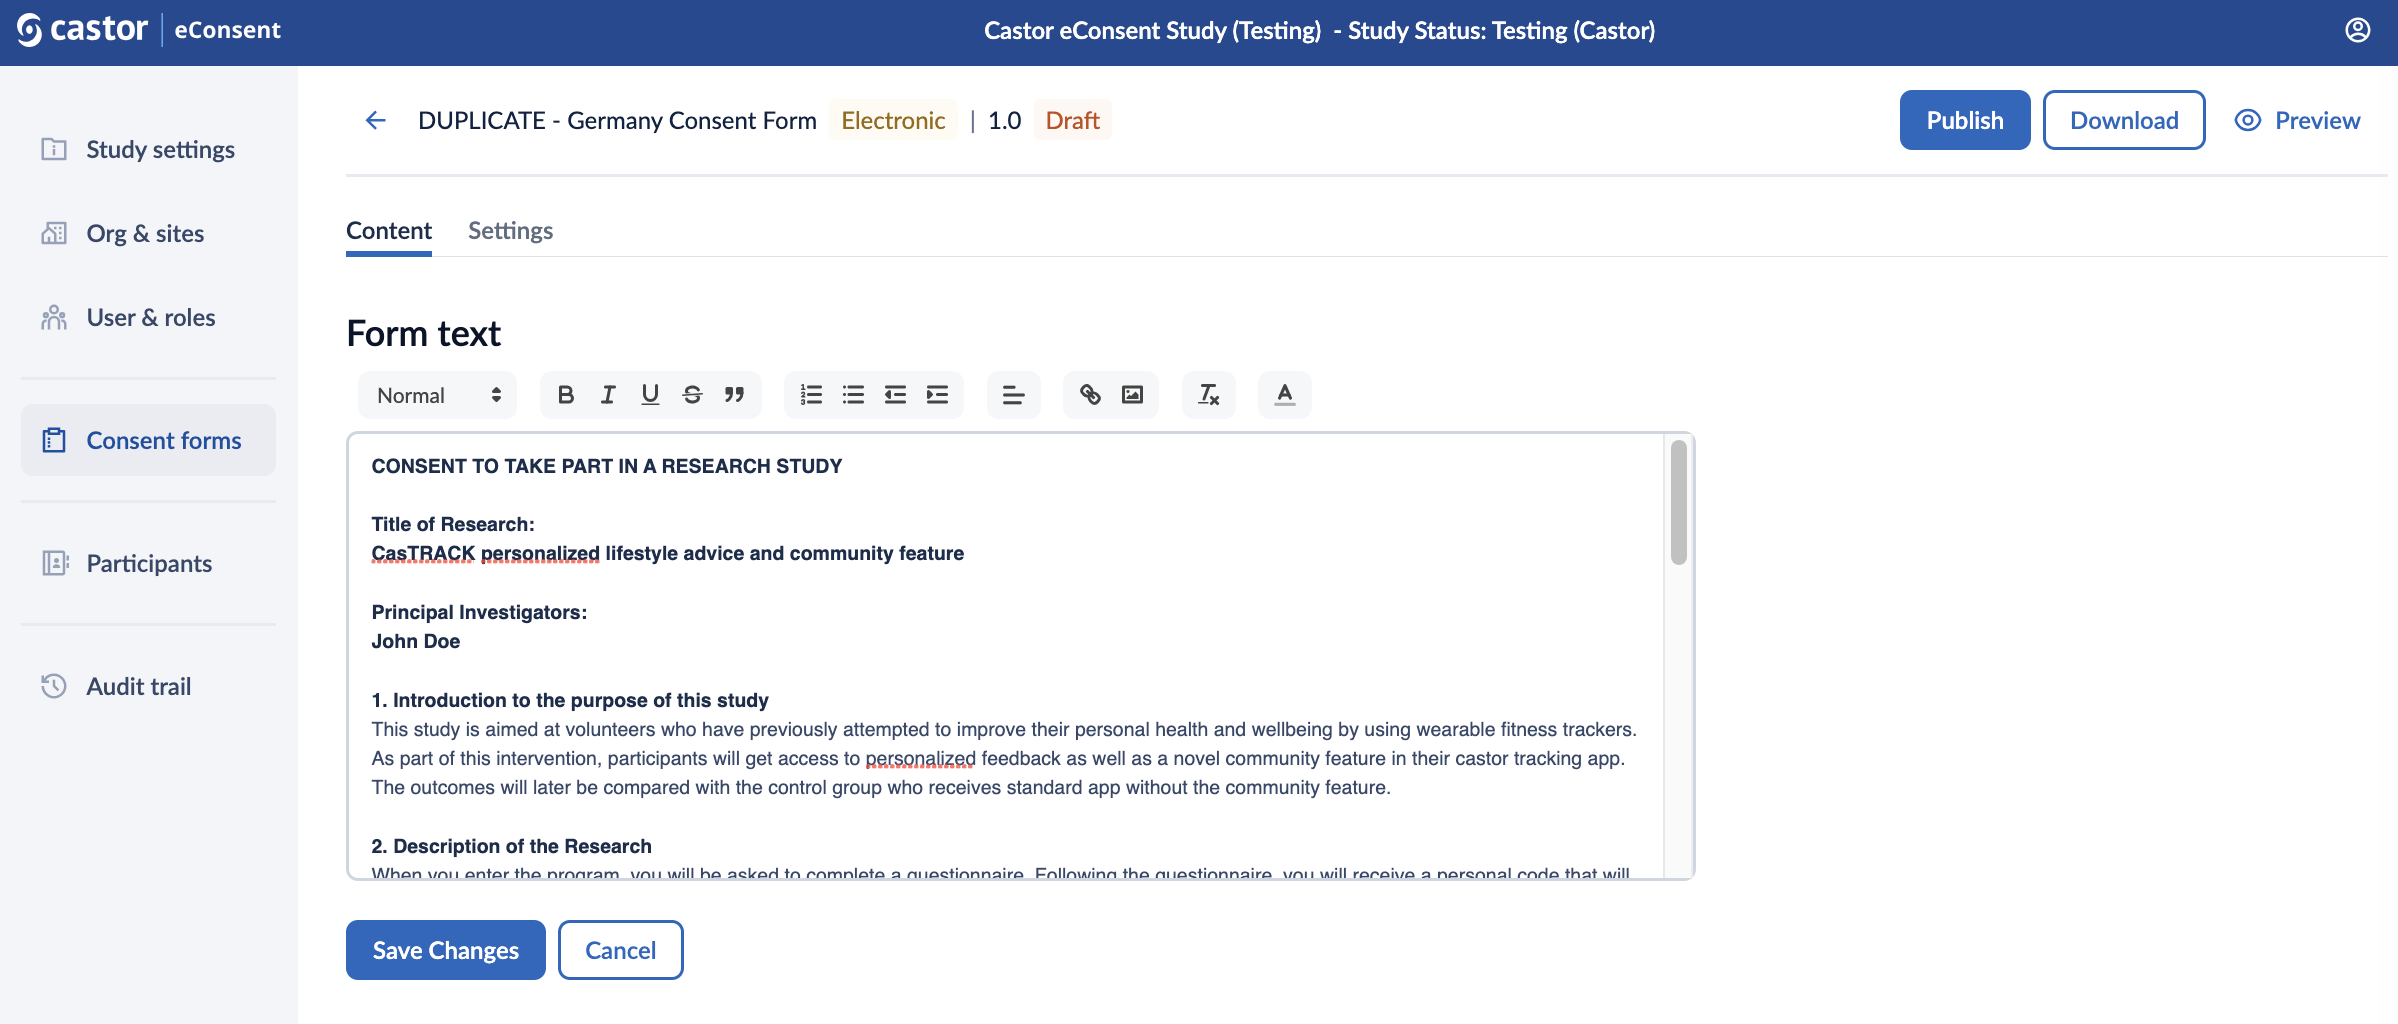
In the ‘Content’ tab, you are able to define the form text, add checkboxes and signature statements, and publish, download or preview your consent form.
Form text: here you can include the form text and format the text. Make sure to click on the ‘Save changes’ button, as the text will not be saved automatically.
In the following sections you can define signature statements for participants, legally authorized representatives and study team members. The needed signatures on the consent forms can be configured for each form.
Participant Section
In the participant section you can define participant questions, agreements and signature statements.
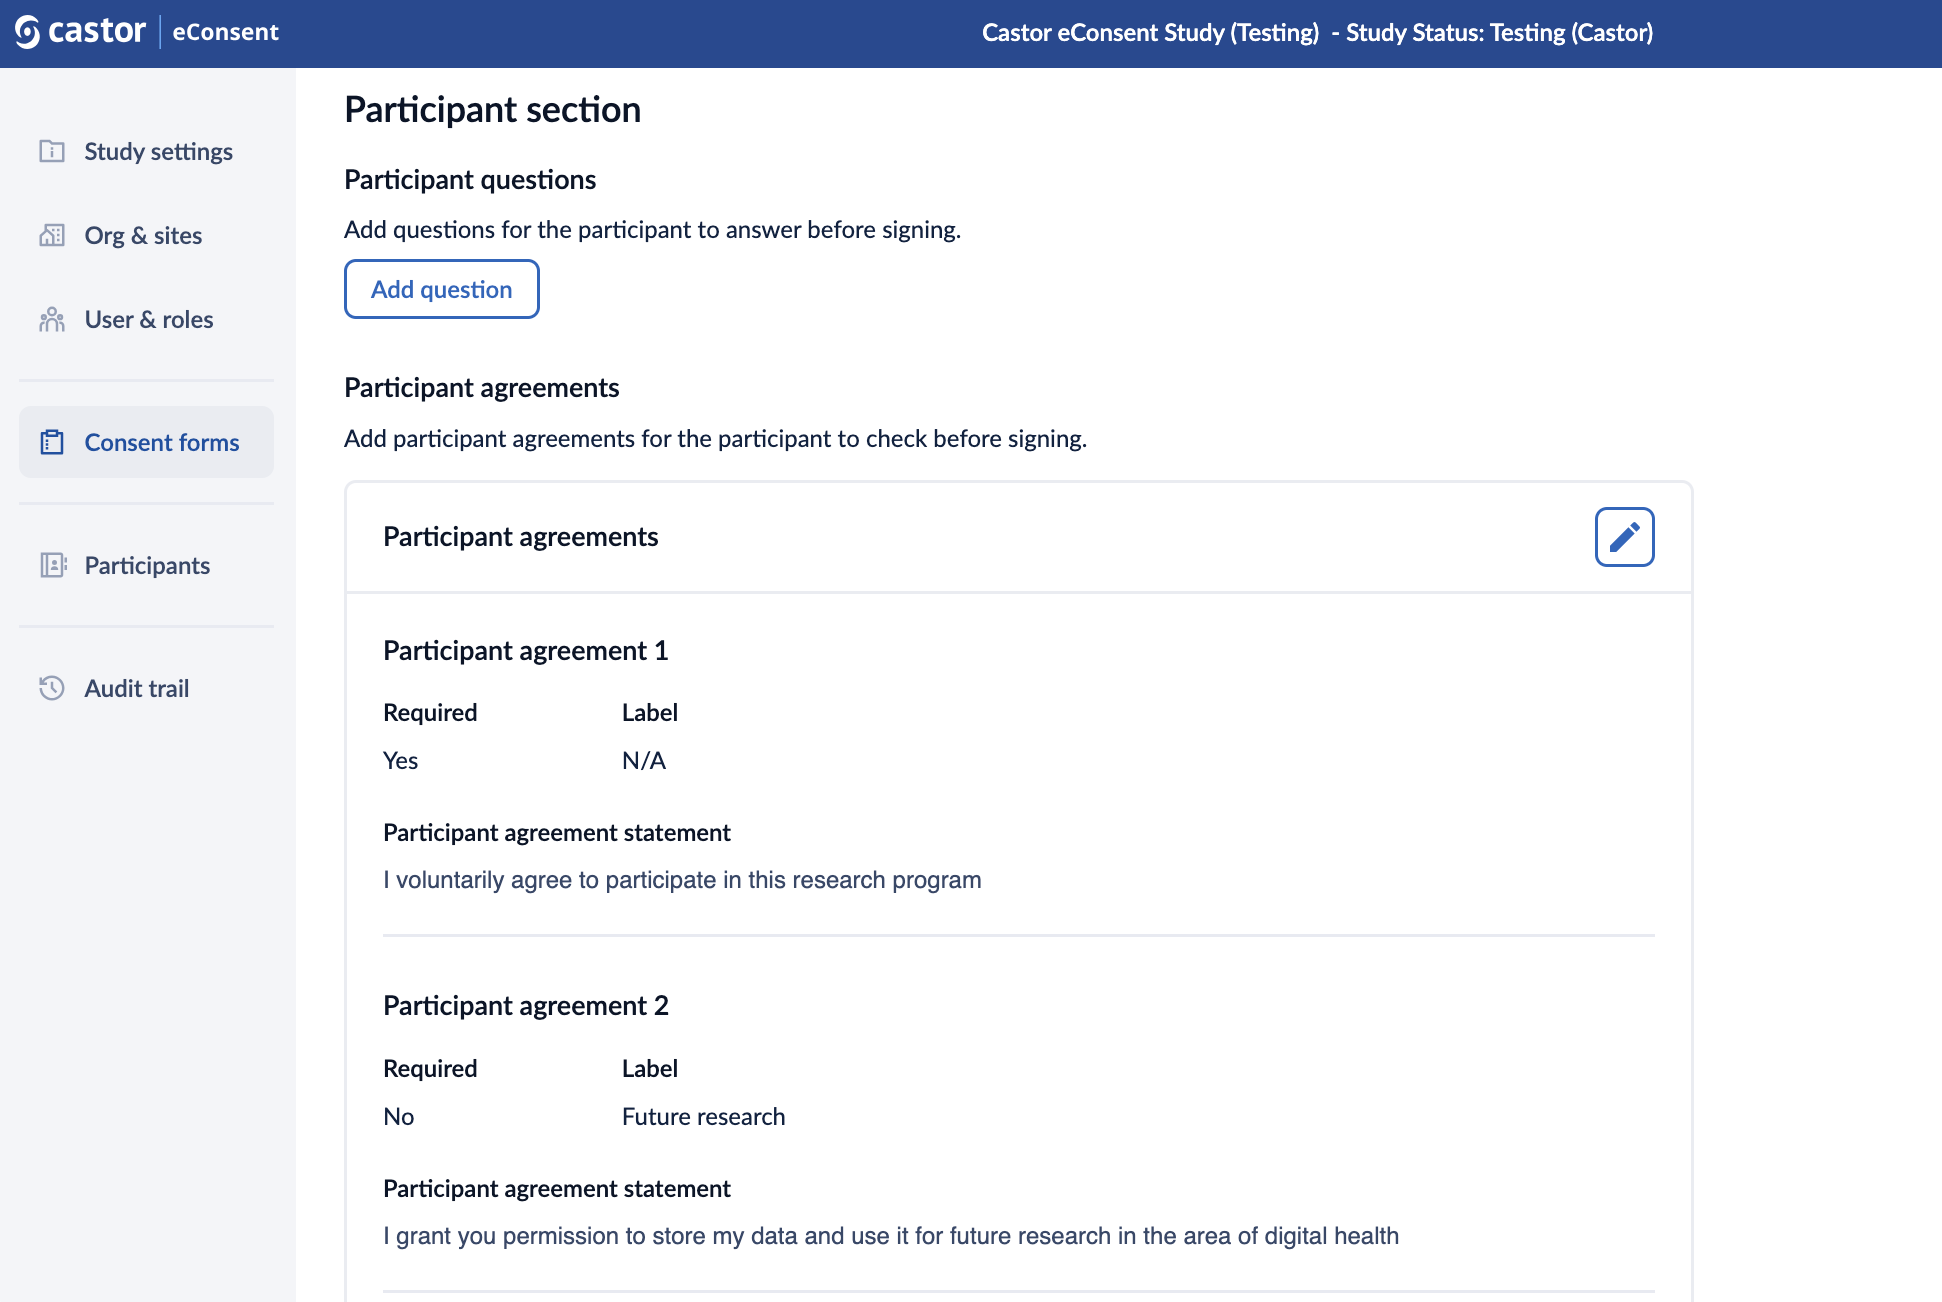
Participant questions
The “Participant questions” feature allows incorporating radio button questions into the Informed Consent Forms. This enables participants to easily select responses from radio button options while signing the form.
Study teams can customize the answer options for each radio button question, tailoring the choices to match the specific study requirements. Additionally, study teams can set radio button questions as required, promoting thorough data collection by preventing document saving until all required questions are answered. This can be useful for adding comprehension questions.
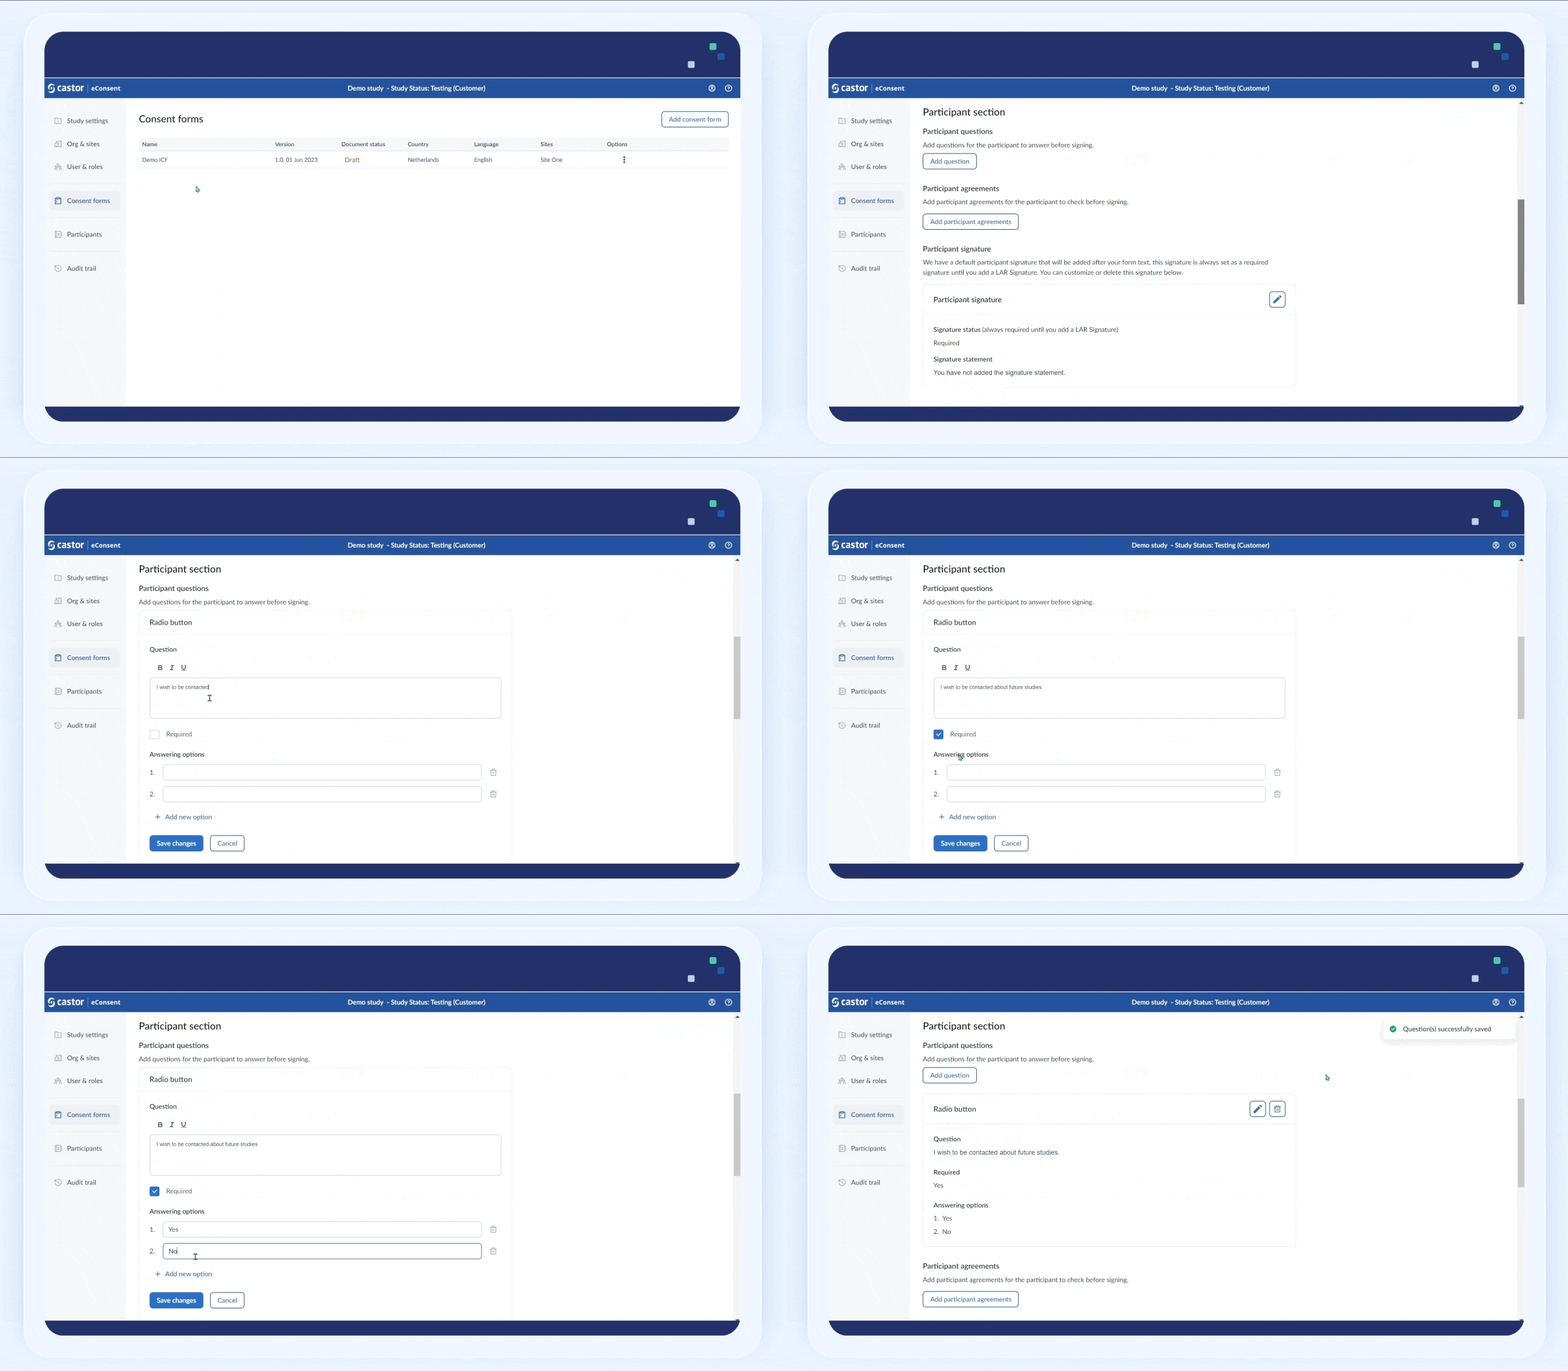
To add a question:
1. Click on the “Add question” button
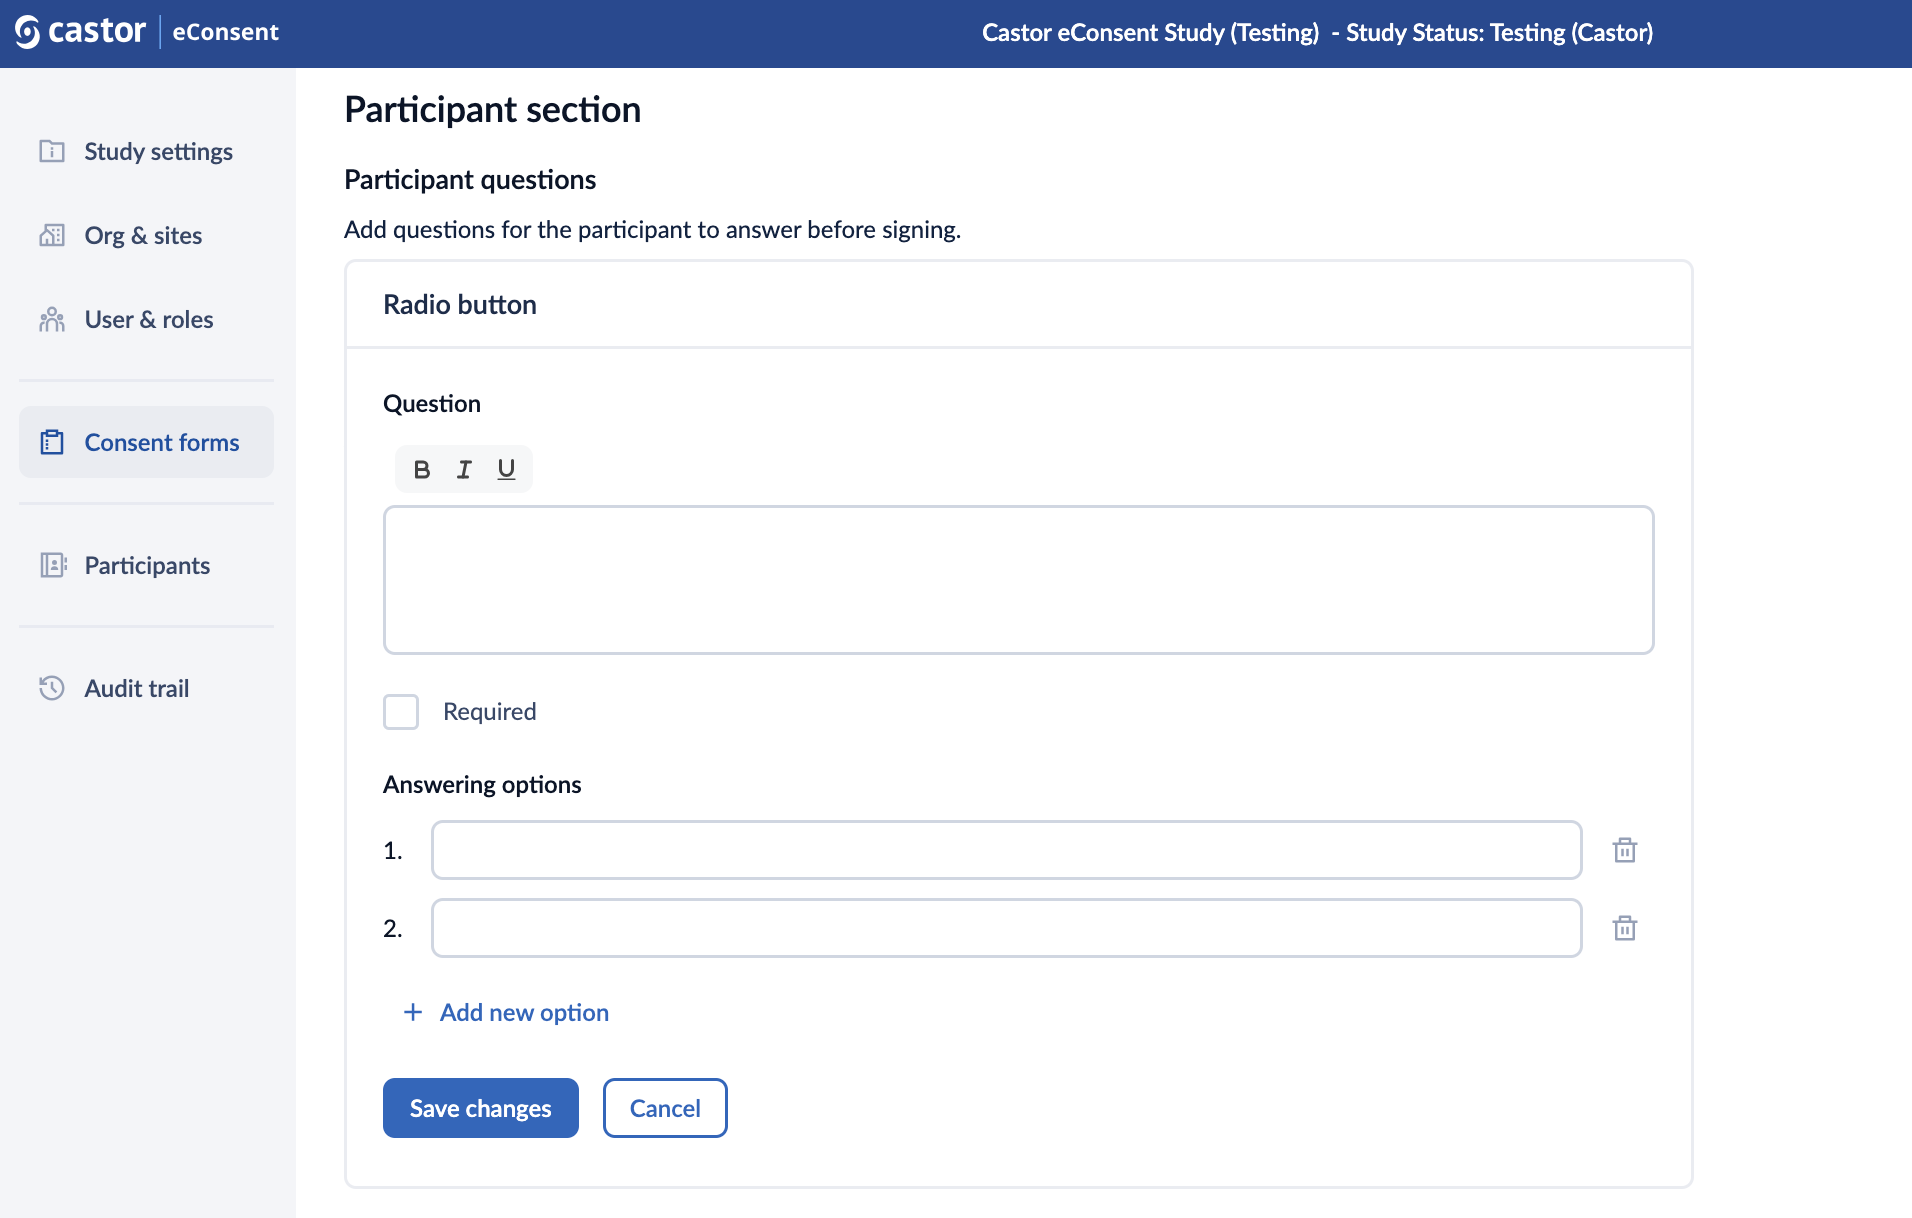
2. Fill out the question text field
3. Select the “Required” checkbox field to make the question mandatory
4. In the “Answering options” section, add possible answers. To add a new answer option, click on the “+Add new option” button. To delete an answer option, click on the trash bin icon next to an option.
5. Click “Save the changes” button to save the question. Once the question is saved, it will appear in the “Participant questions” section:
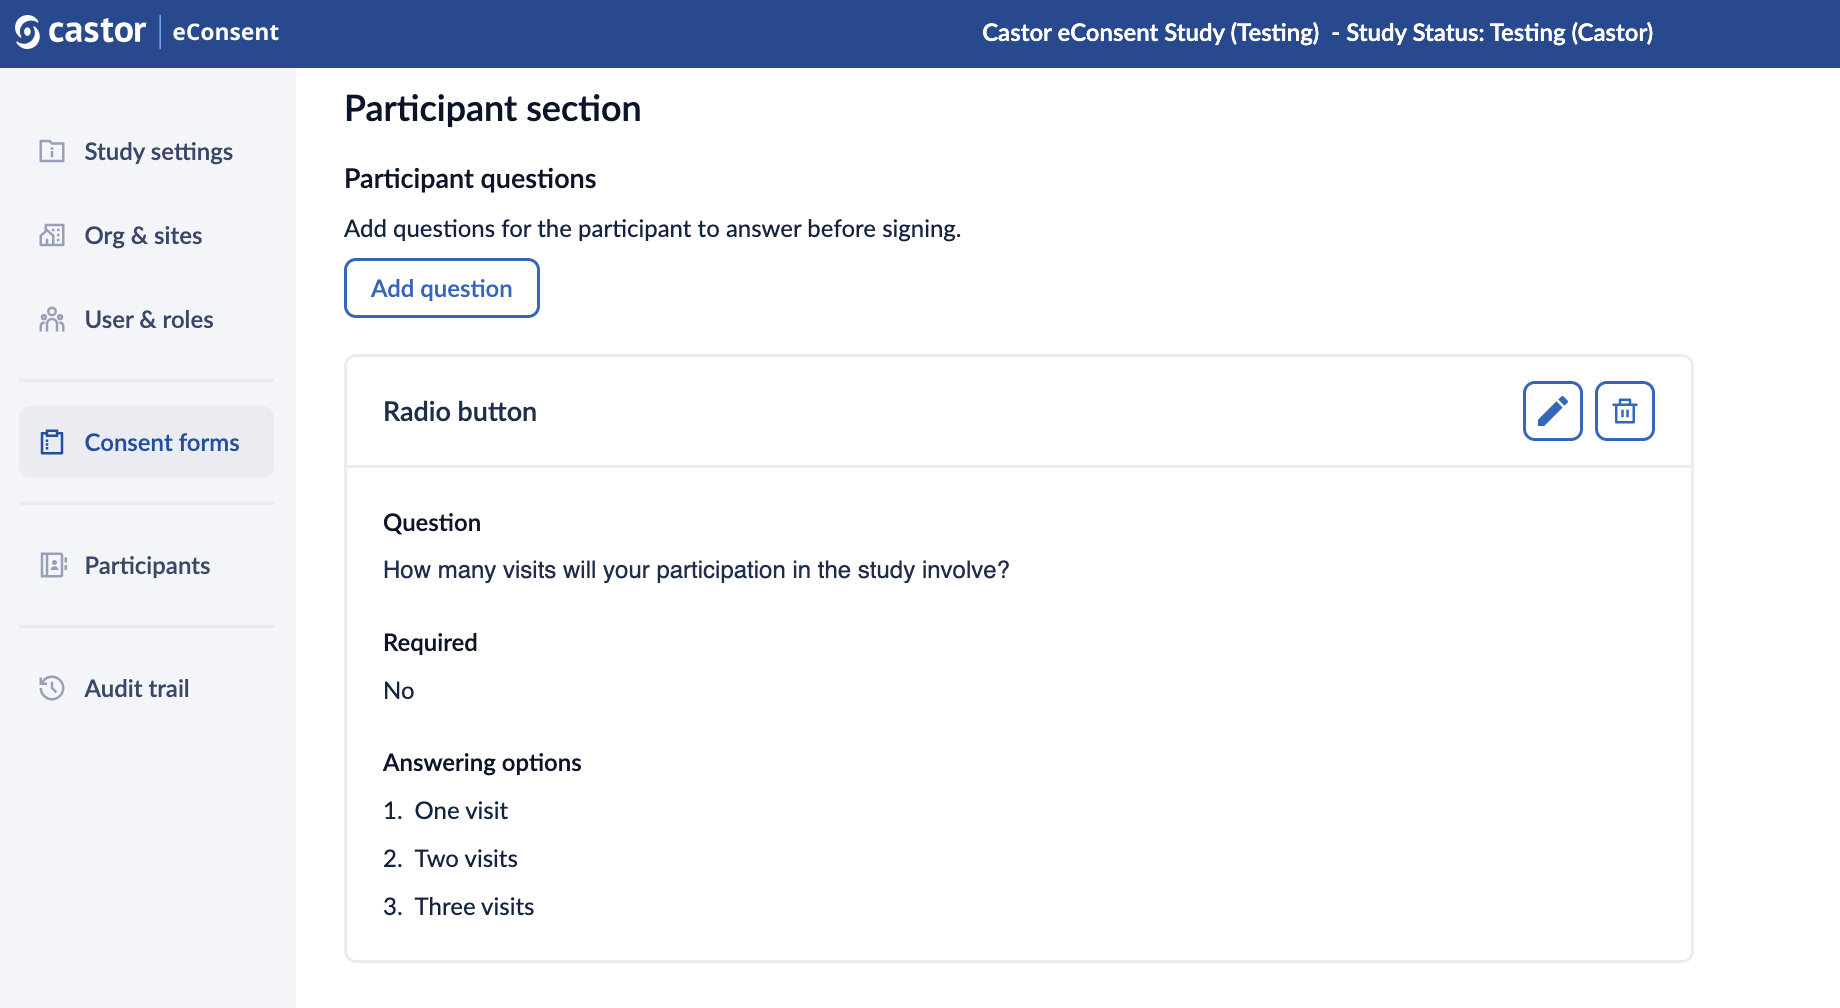
6. Click on pencil icon to edit the question (possible while the form is not published) or on the trash bin icon to delete the question. When click on the delete button, a pop-up window will appear asking to confirm the deletion of the question.
Radio button questions and their corresponding answers are prominently displayed in both the PDF version of unassigned and signed ICFs, ensuring accurate data representation.
Furthermore, these participant questions and answers are seamlessly integrated into ICF information exports, streamlining data sharing and management. Changes to radio button questions are tracked in the audit trail, enhancing transparency and accountability throughout the research process.
Managing participant agreements
It is possible to add participant agreements for the participant to check before signing. Follow the steps below to add/edit or remove a participant agreement:
1. In the ‘participant agreements’ section, click on the ‘Add participant agreements’ button to add an agreement.

2. A ‘participant agreement’ dialog window will appear which allows to define the following properties of a participant agreement:
- Required: this option will make the participant agreement mandatory;
- Label: title for the agreement. You can only add a label to optional agreements;
- Participant agreement statement: the text of the agreement.
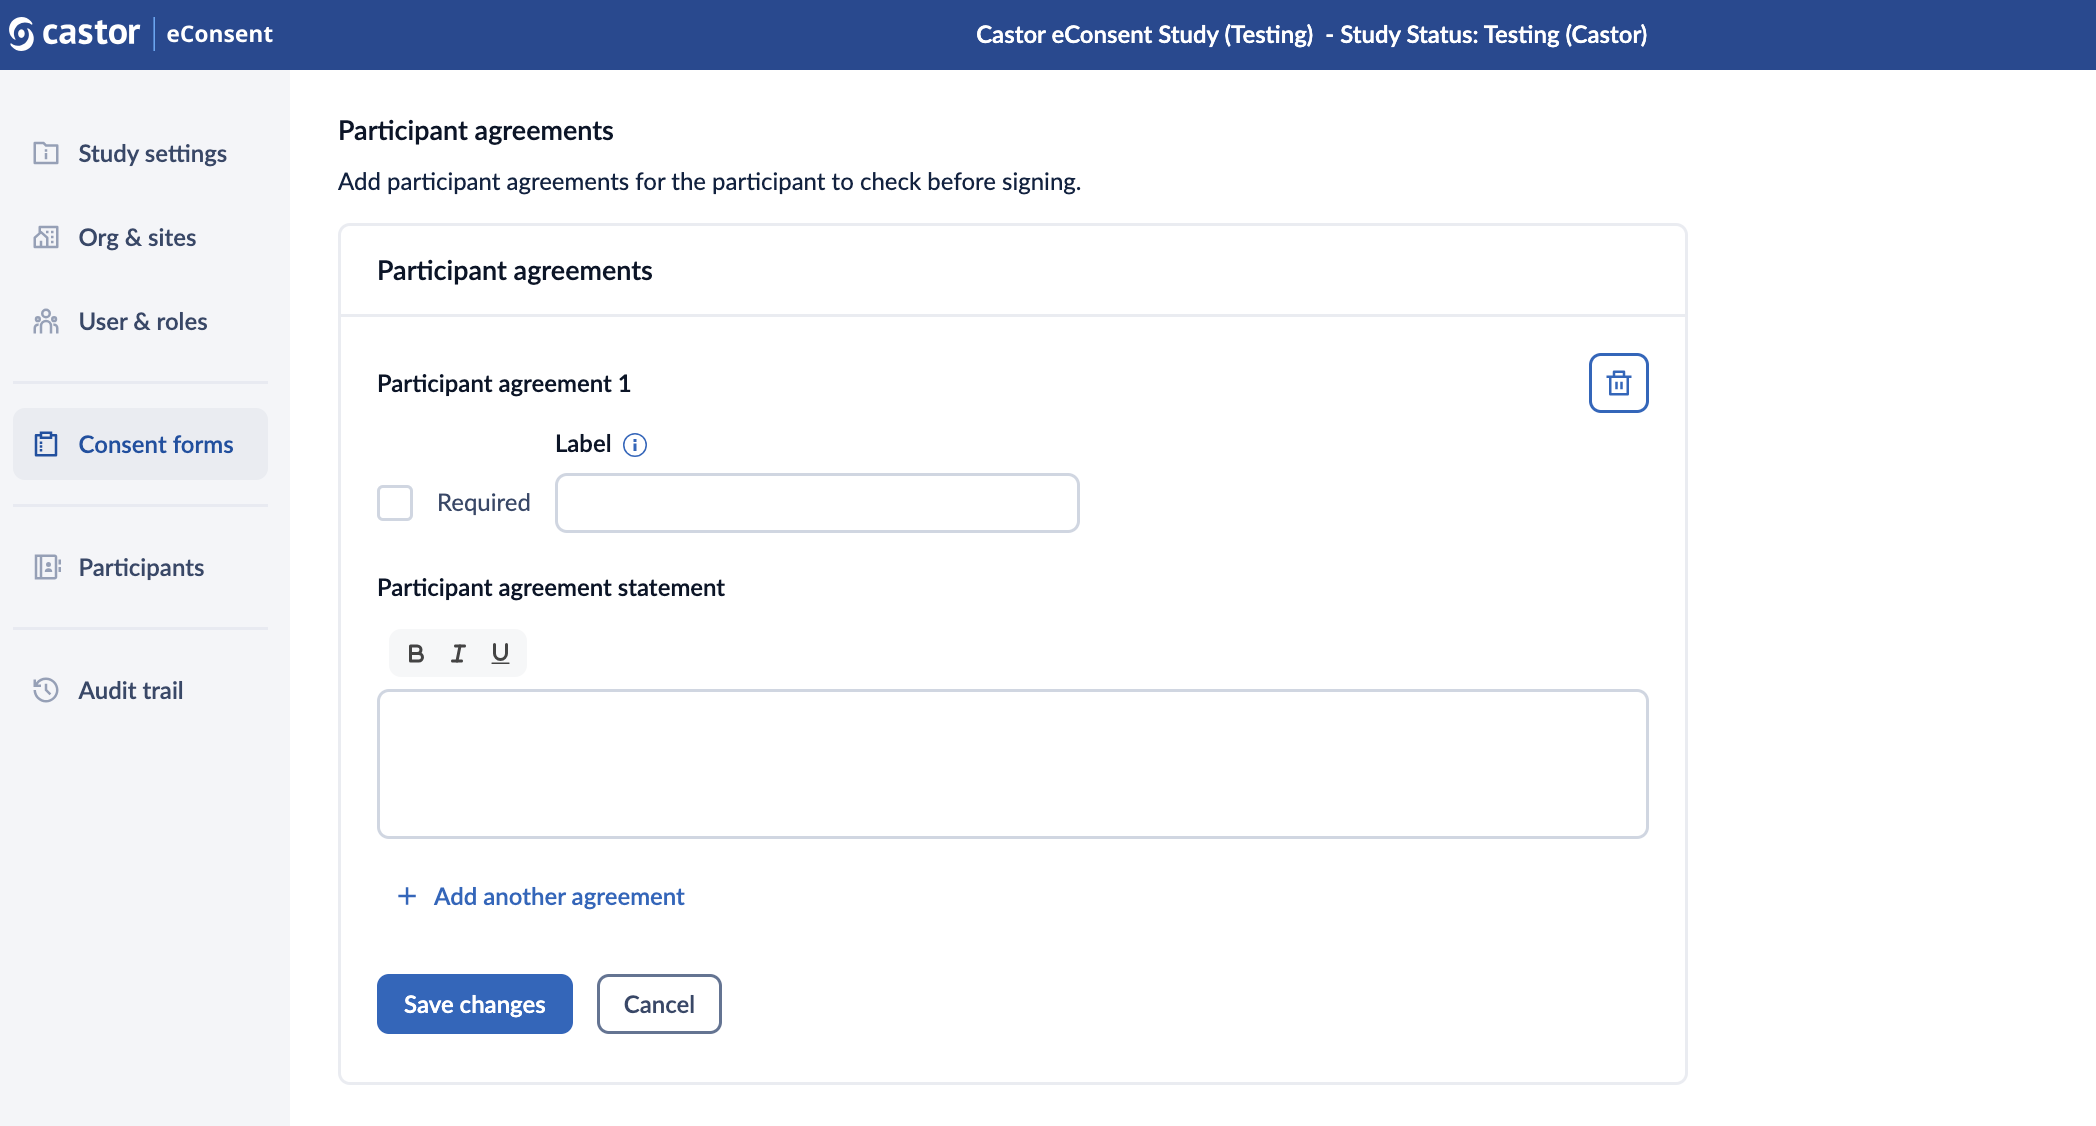
3. Click on ‘Add another agreement’ button to add additional agreements.
4. Press on the ‘Save changes’ button to add the agreement(s) to your consent form. *Clicking ‘Cancel’ will reverse the changes.
5. To delete a participant agreement, click on the trash bin icon.
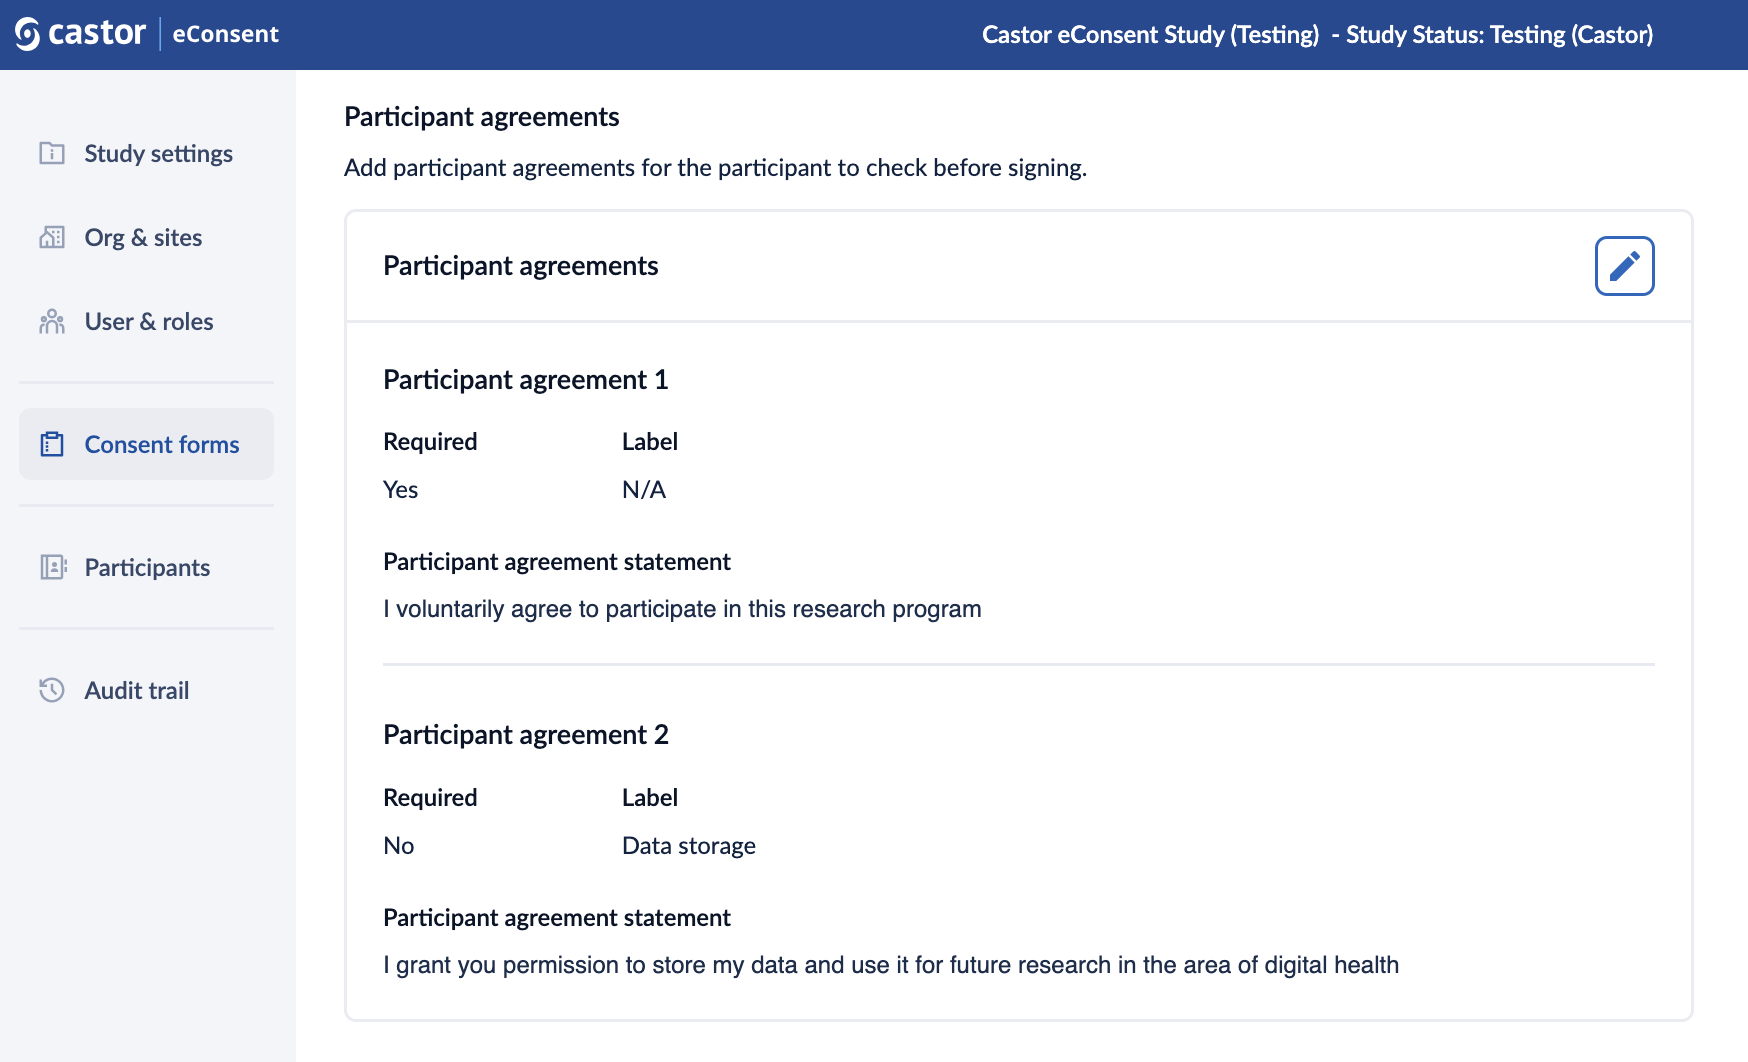
6. Once the participant agreements are saved, they are displayed in the “Participant agreements” section. Press on the pencil icon ![]() to edit these agreements (possible if the consent form is not published yet):
to edit these agreements (possible if the consent form is not published yet):
Participant signature
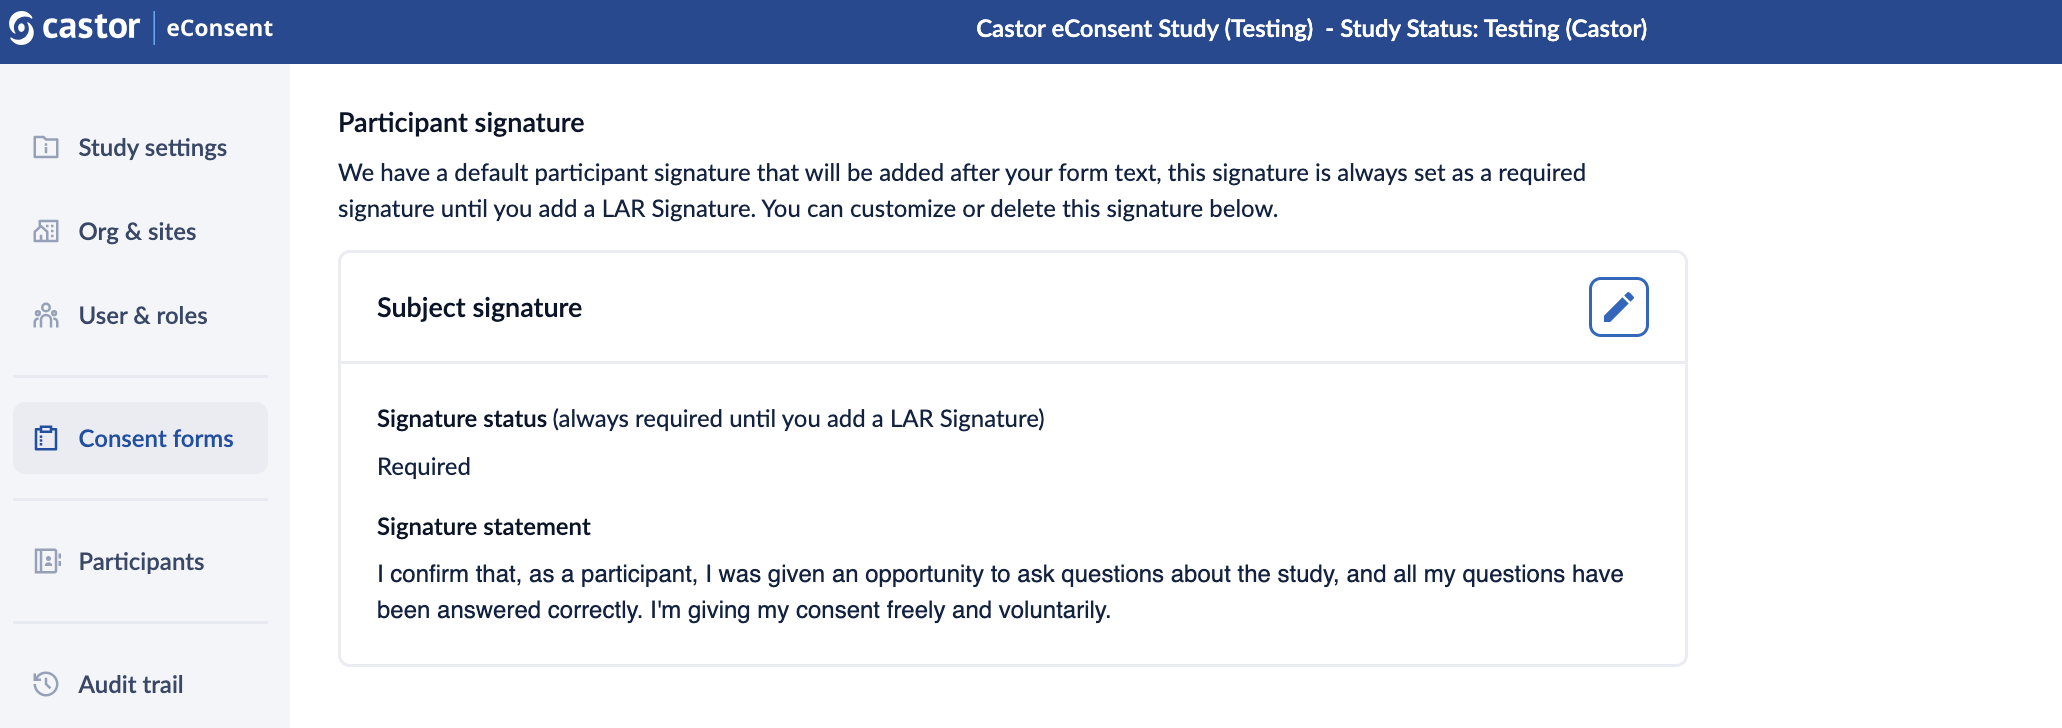
A default participant signature will be added after your form text, this signature is always set as a required signature until you add a LAR Signature. Clicking on the ‘pencil’ icon ![]() allows you to edit signature statements.
allows you to edit signature statements.
LAR (Legally Authorized Representative) section
In this section you can add an optional LAR (Legally Authorized Representative) Signature. Once this is added you can choose to include either your participant or LAR signature on your consent form.
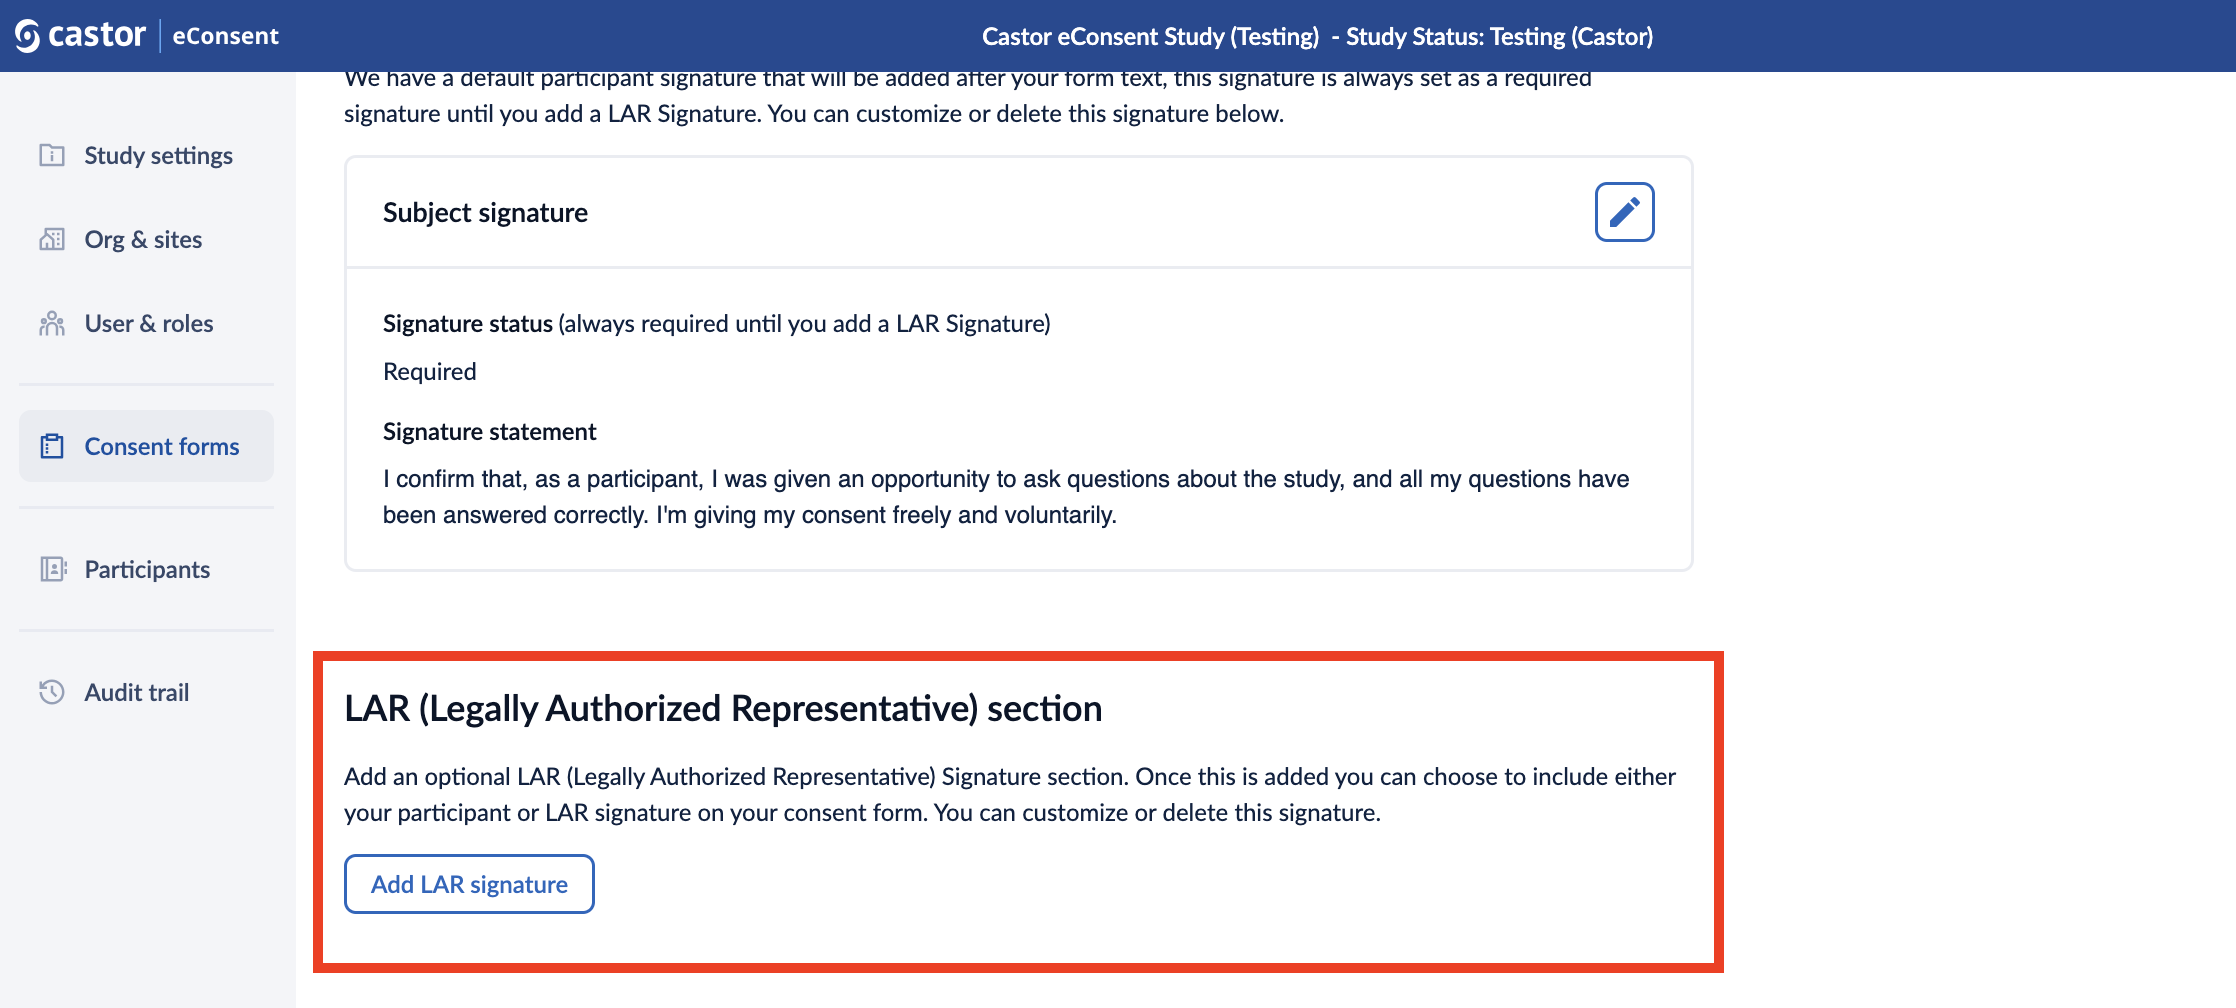
1. Click on the “Add LAR signature” button to configure the signature:
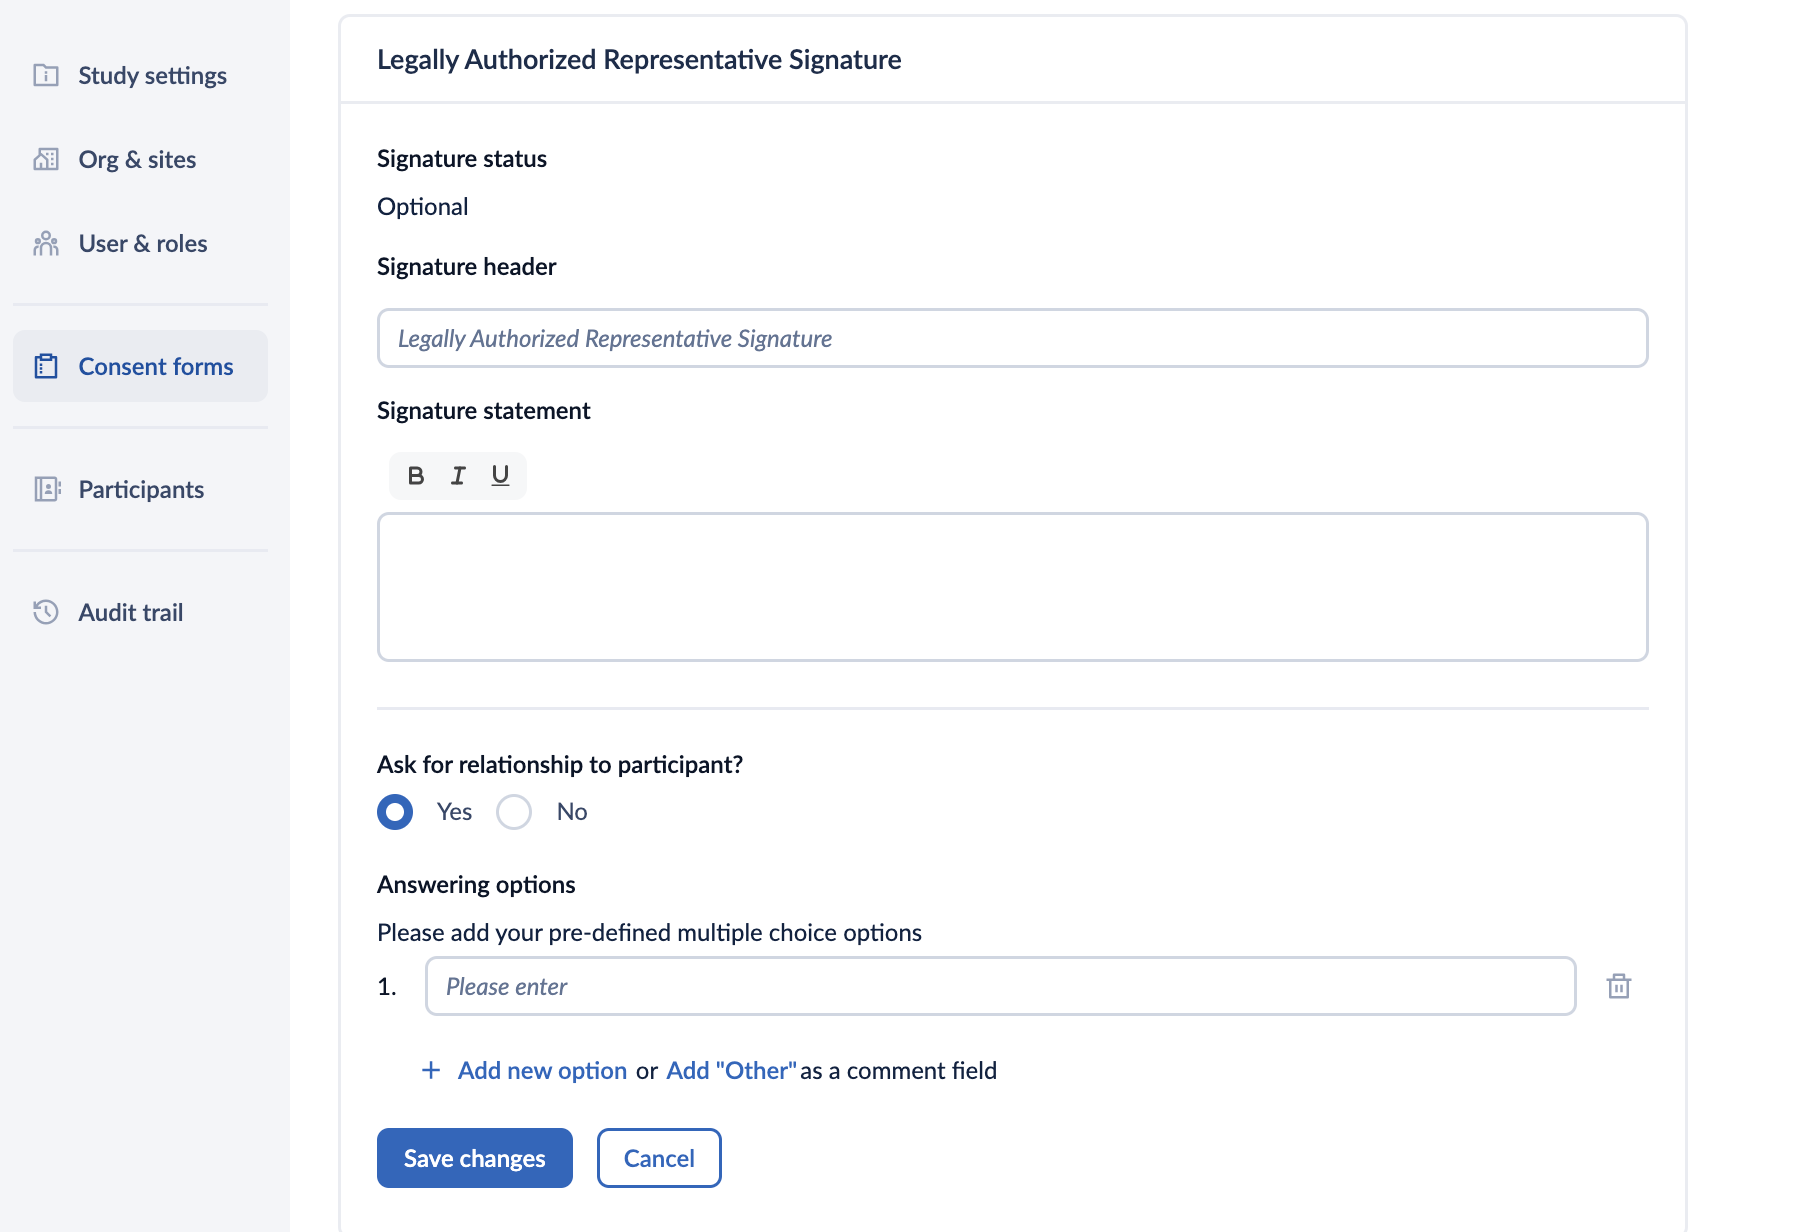
- Signature status: displays whether the LAR signature is required or optional
- Signature header: allows to defined your customized signature title (maximum 60 characters).
- Signature statement: here you can define the signature statement for the participant who will sign the consent form.
- Ask for relationship to participant?: selecting ‘Yes’ will allow you to add a list of options (multiple choice) for users to specify their relationship to participant using the ‘Add new option’ button.
- Answering options: Here you can add your pre-defined multiple choice options. Additionally, you can choose the ‘Add Other’ as a comment where the users can provide their own answer in the text field. If the the relationship to participant is not required, selecting the ‘No’ option disables the question in the LAR signature section.
- Click on the Save changes button to add the LAR signature. If you would like to reverse the changes, click on the ‘Cancel’ button.
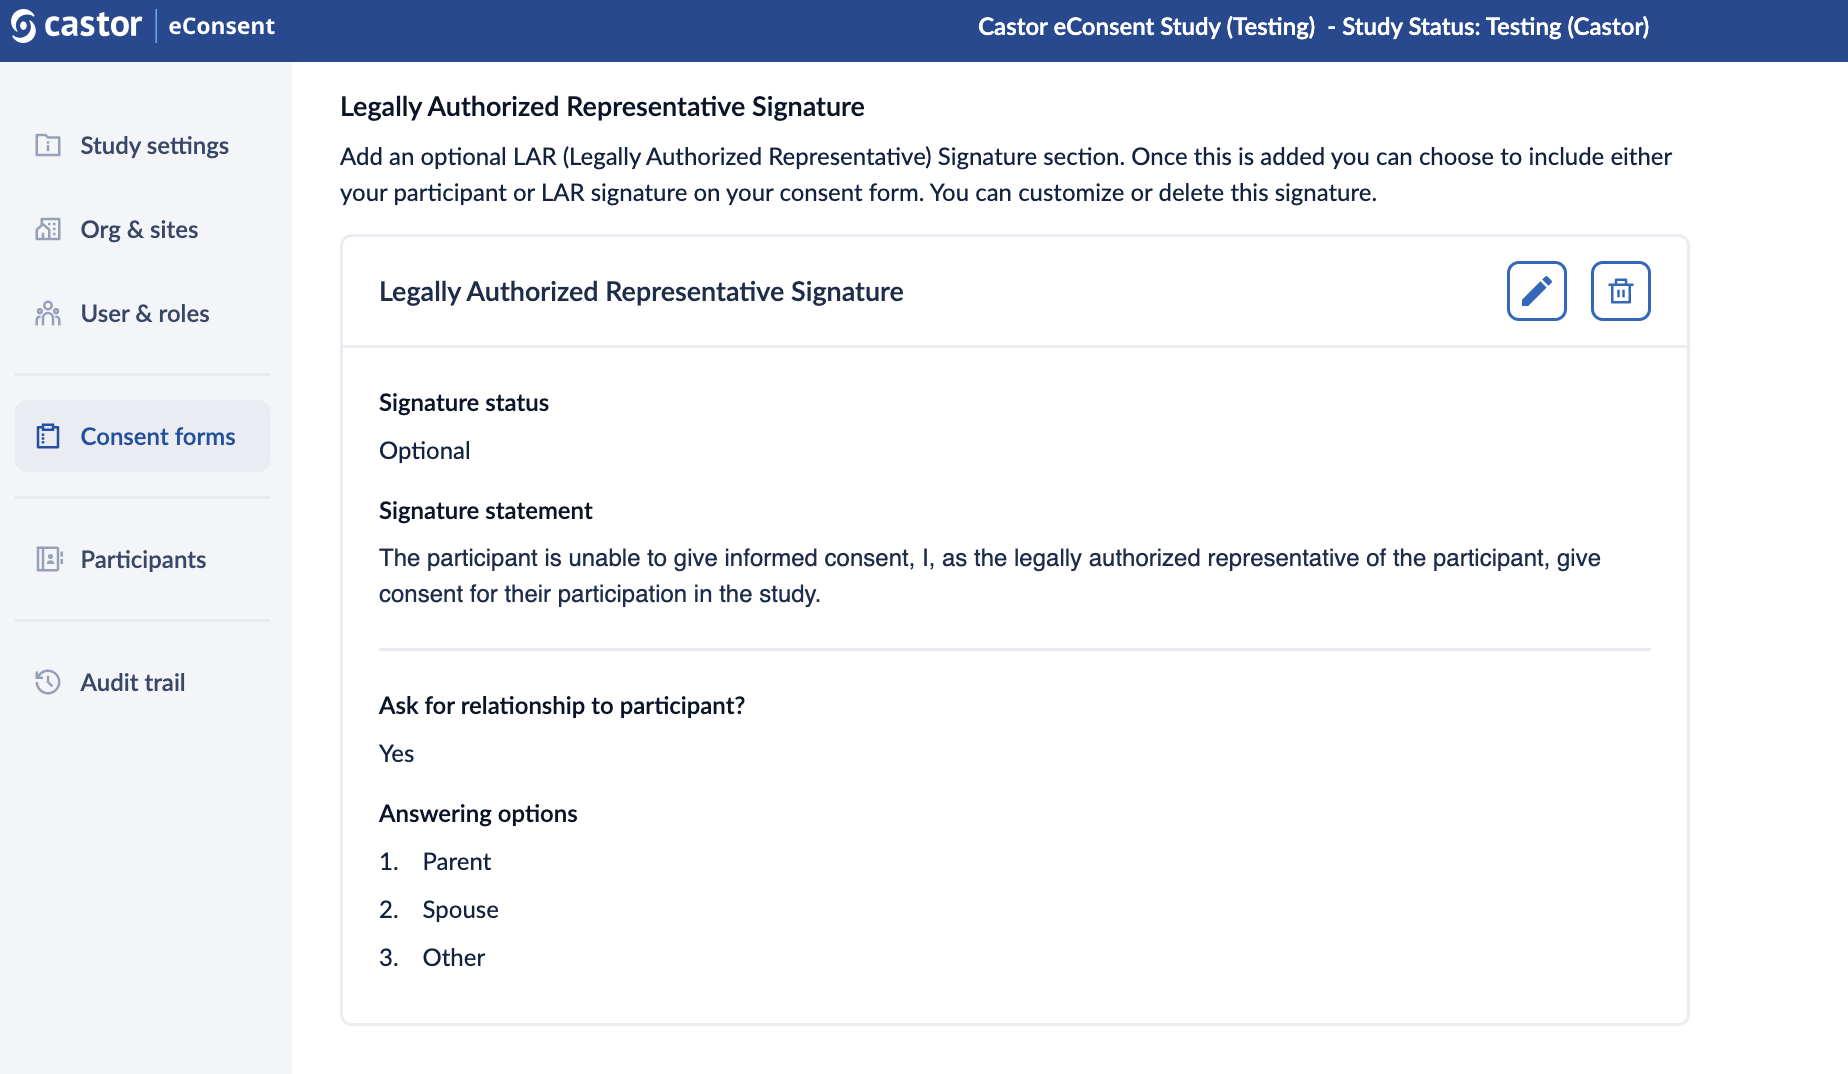
- Once the signature is published, it will be visible in the “Legally Authorized Representative Signature” section. Press on the pencil icon to edit the signature or on the trash bin icon to delete it:
Please note that the system times out after 20 minutes of inactivity. Make sure to click on ‘Save changes’ button to save your edits.
Study team member Section
This section allows to add, customize or delete study team member signatures.
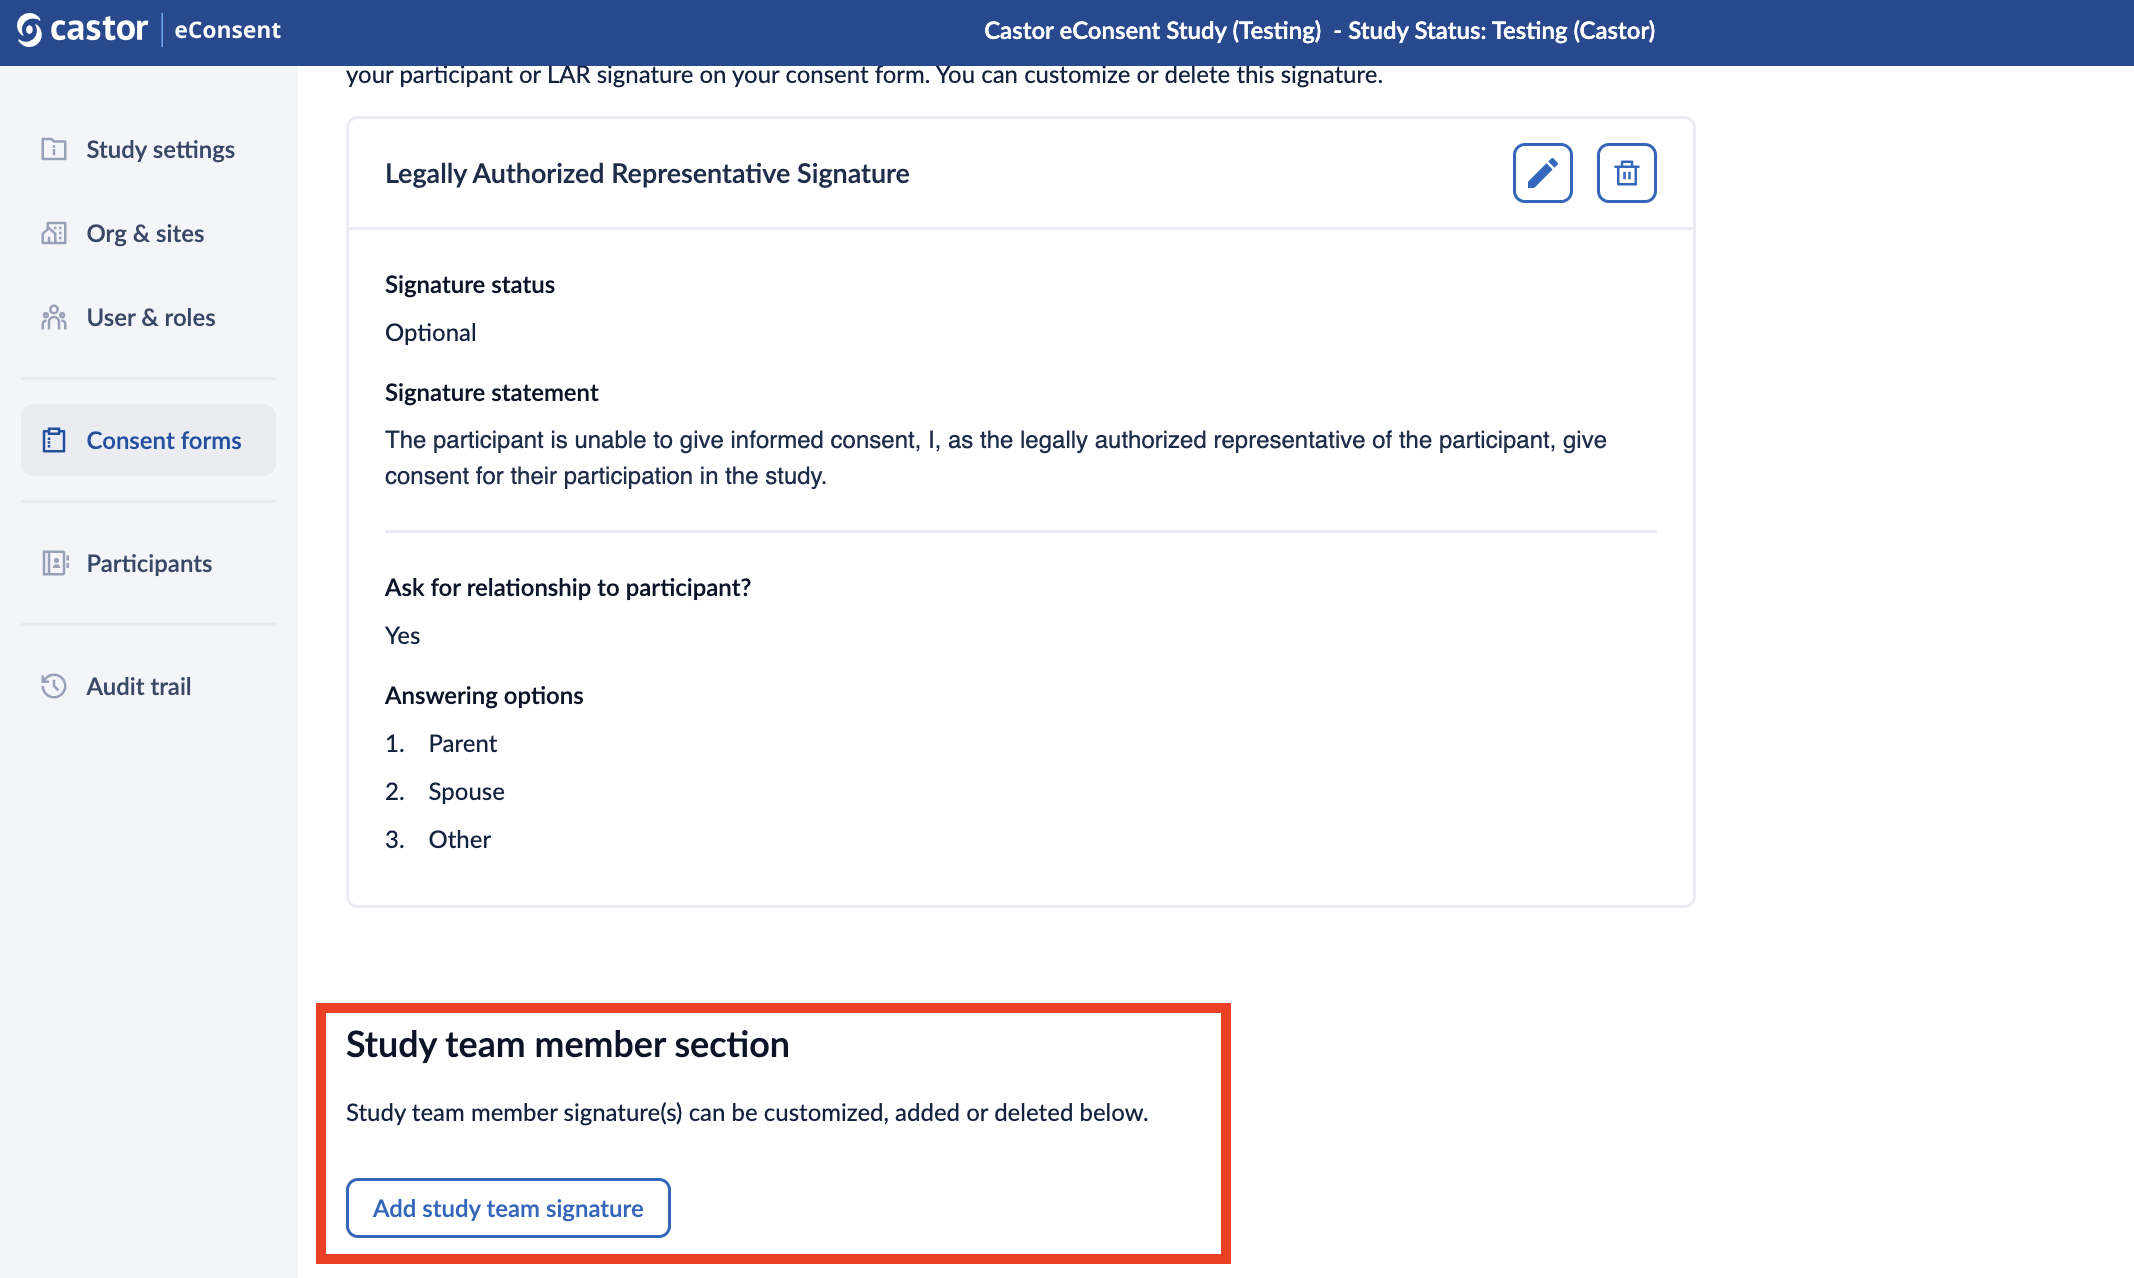
It is possible to have none or maximum two study team signatures. When only one signature is added, it will be set to 'Required' by default. The headers of the study team member signatures are configurable per ICF template.
To add or edit a study team member signature, follow the steps below:
1. Click on the “Add study team signature” button.
2. When editing the study team member signature, you can define the ‘Signature header’ and the ‘Signature statement’.
3. Click on ‘Save changes’ button to add the signature.
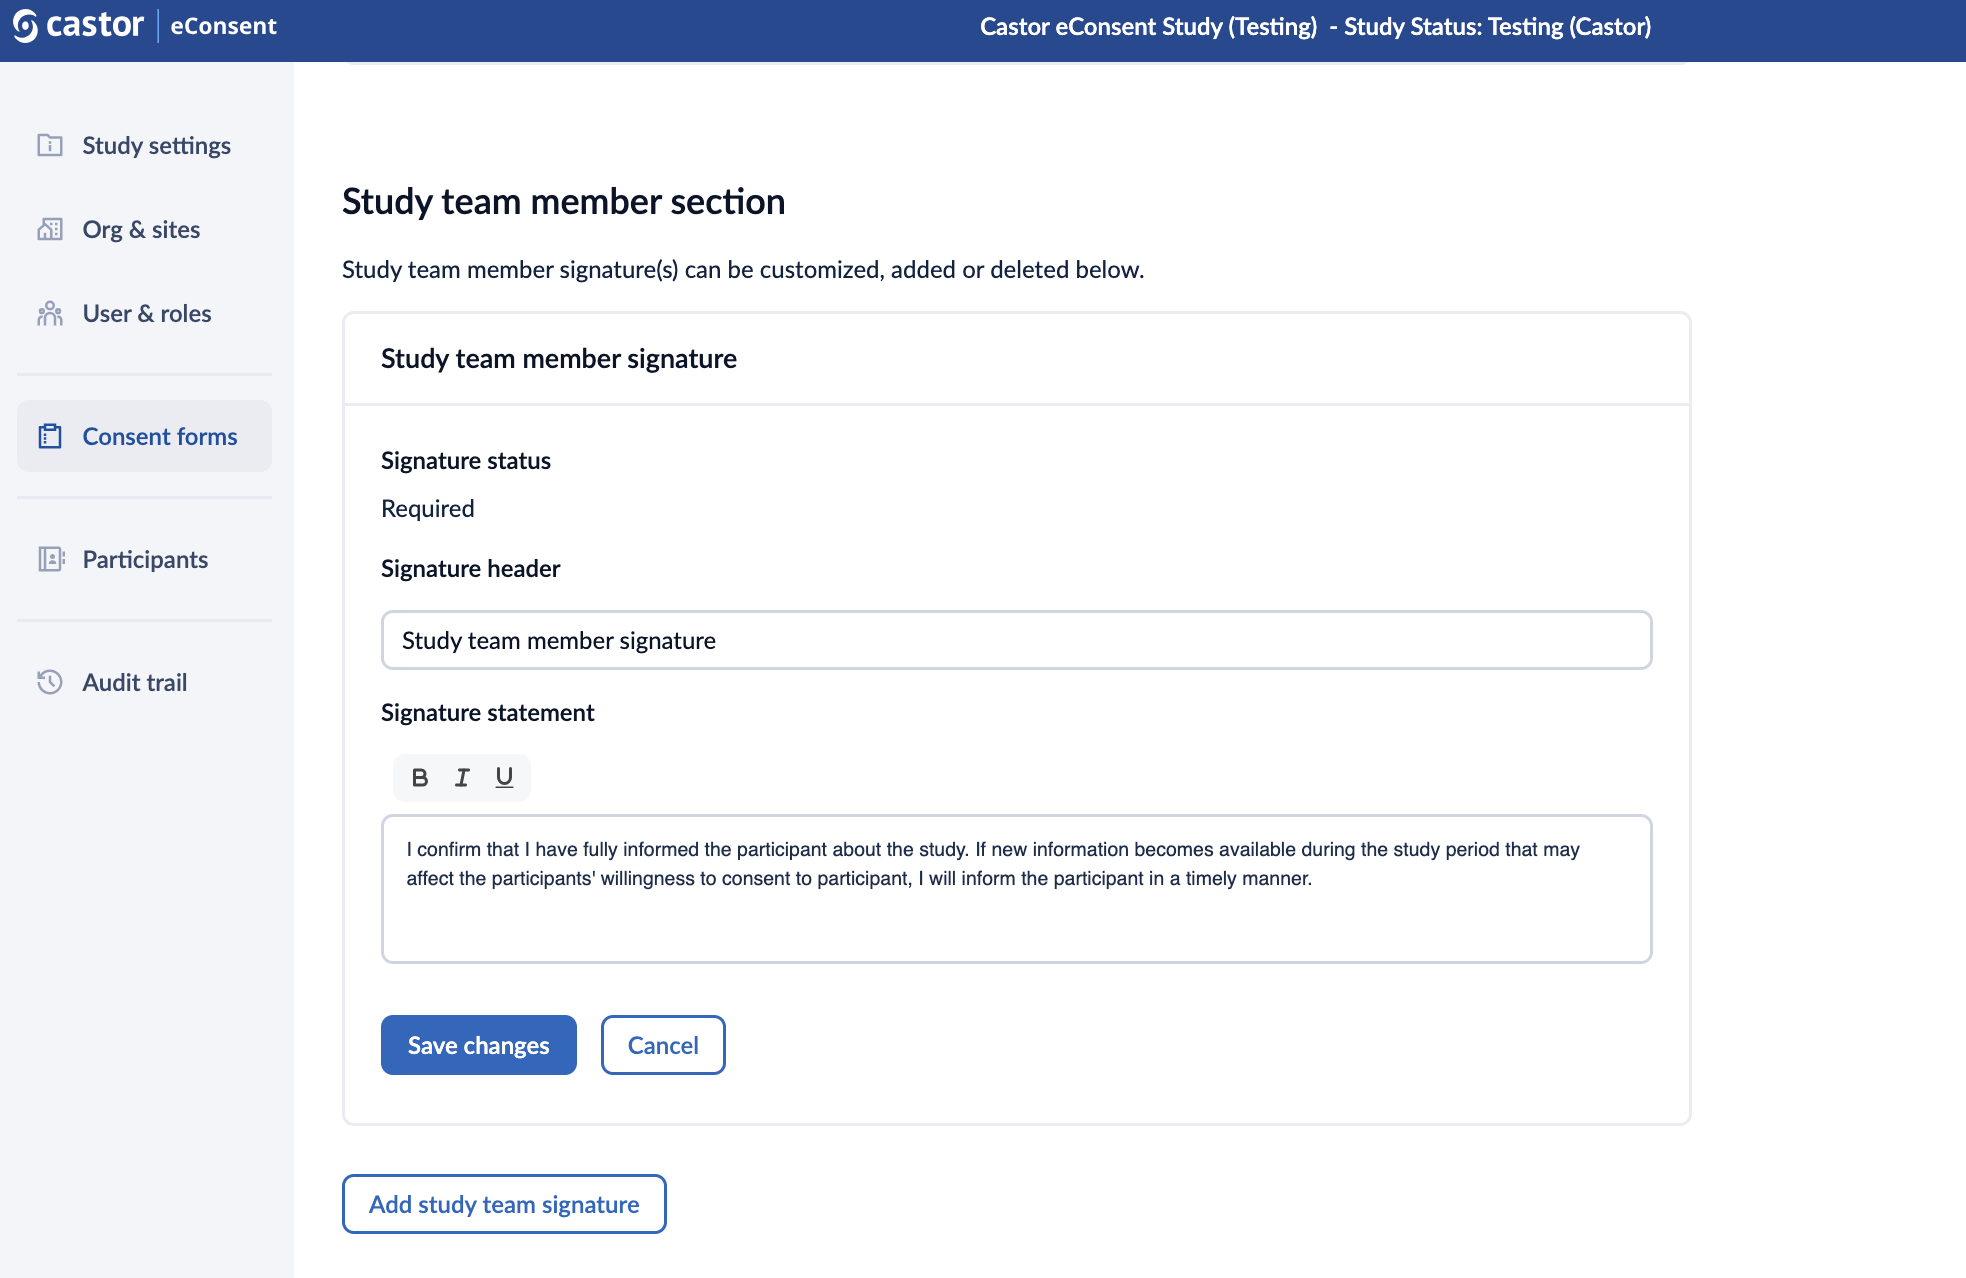
4. Once the signature is added, it will appear in the “Study team member section”. Click the pencil icon to edit the signature or the trash bin icon to delete it.
5. A second study team member signature can be added to the ICF template by clicking on the 'Add study team signature' button.
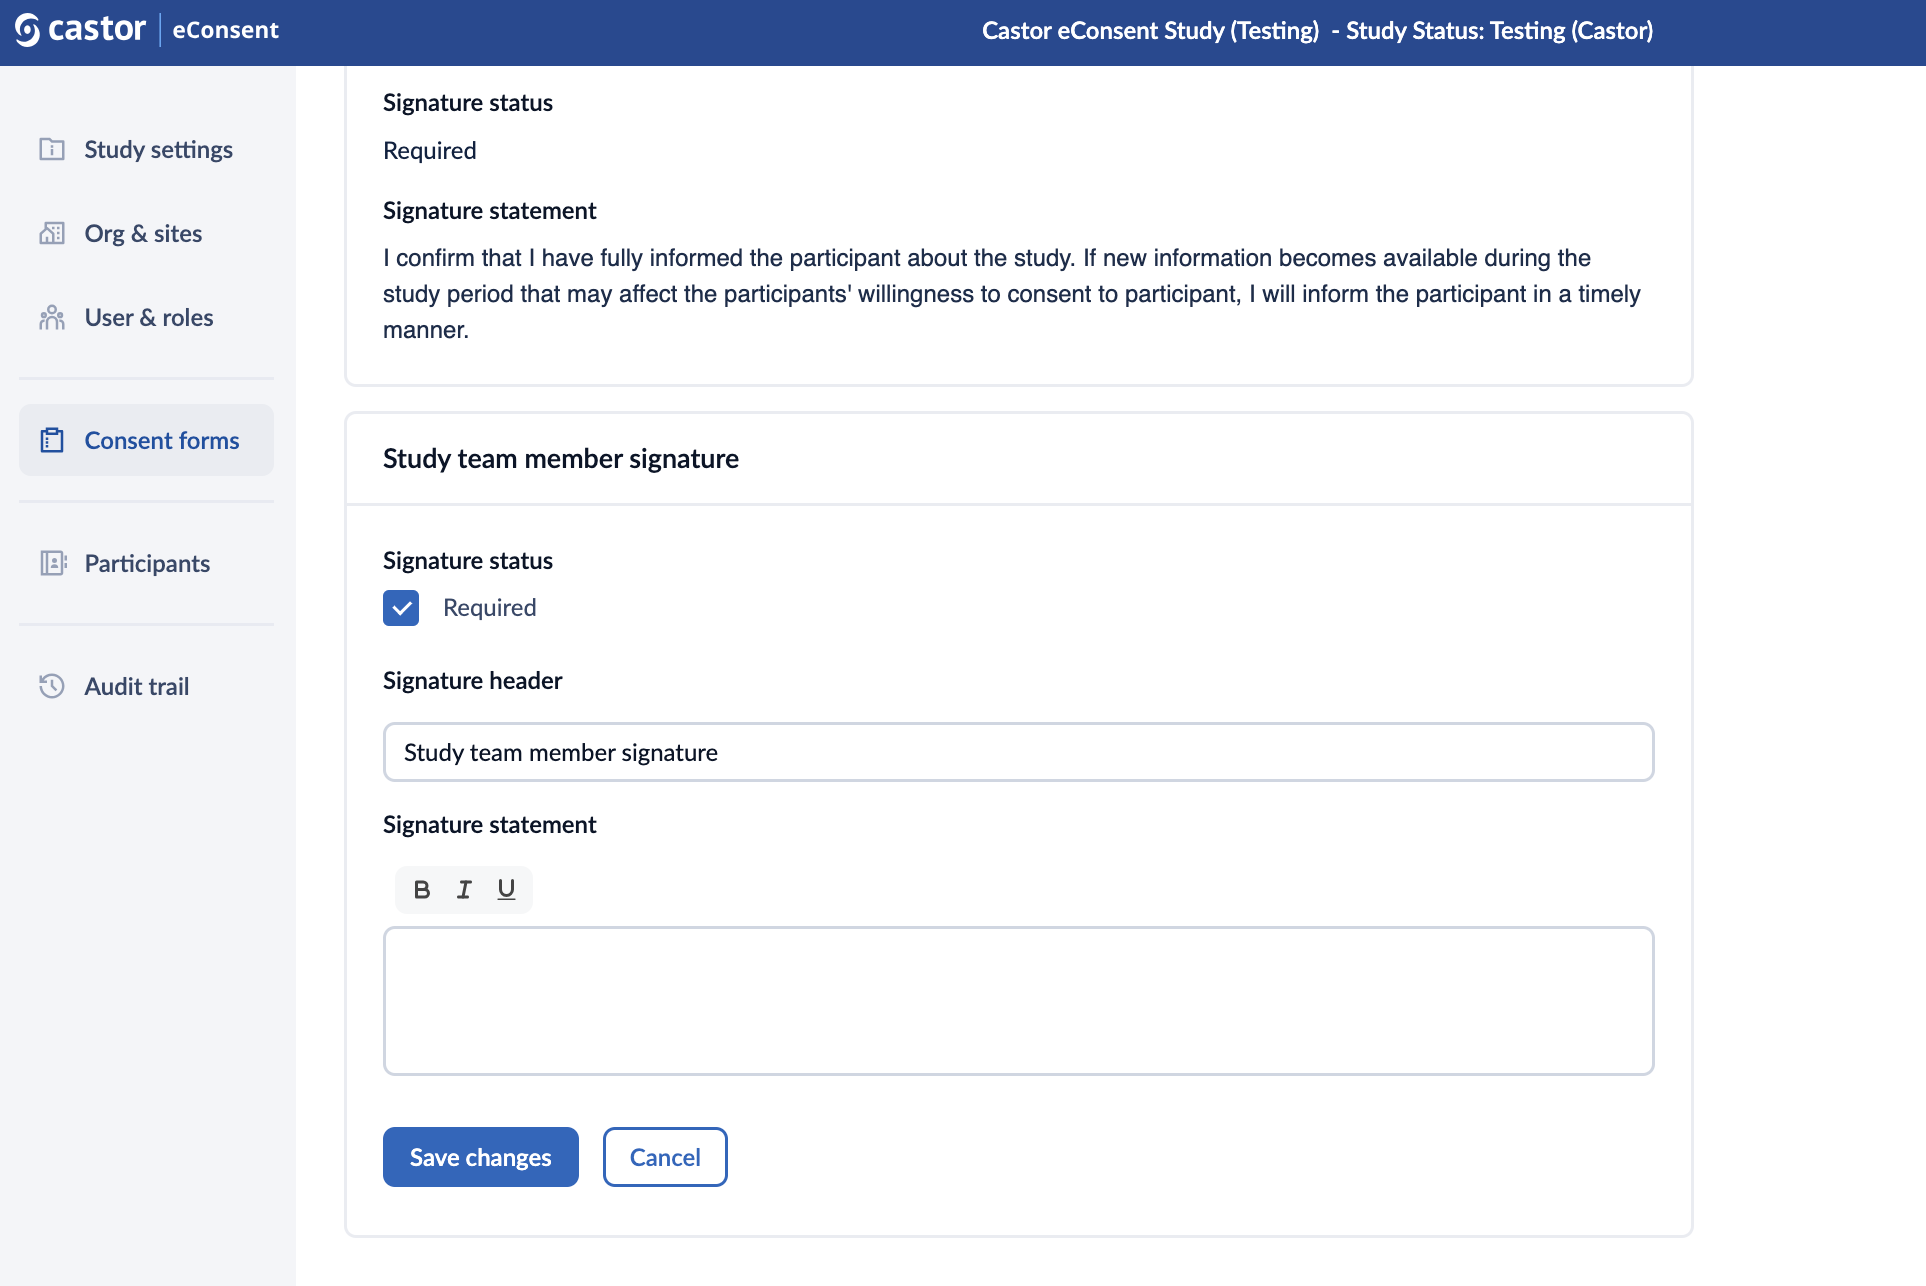
- This second signature can be setup as:
- Required - The second study team member signature component always needs to be signed before the ICF is set to completely signed (status ‘Consented’);
- Optional - If it is unknown upfront whether a second study team member signature is needed for a specific form or participant, the second signature can be marked as optional. In that case, the second study team member signature component needs to be (de)activated by the first study team member that signs the ICF. If the signature component is deactivated, it can no longer be signed. If the signature component is activated, it has to be signed before the ICF is set to completely signed (‘Consented’).
- The section ‘Additional signature(s) details’ in the ‘Consent form (most recent)’ card on the profile page of the participant displays the consent status of the additional signature, the header name of the additional signature, and whether a notification has been sent.
- When there is a required second signature component, or an activated optional second signature component, a signature can be requested by sending an email notification.
- Should a second signature component is activated by mistake, this component can be deactivated again via the action by clicking on the three dot menu of the ICF. This also works the other way around; a deactivated signature component can be activated again.
- The second study team member signature component can be signed by users with sign rights. The second signatory cannot be the same as the one who is required to sign on the first signature component.
- Activating or deactivating the signature components is logged on the audit trail.
Publishing the form
When you have finished editing the form, you can publish the form by clicking the ‘Publish’ button at the top of the ‘Content’ tab.
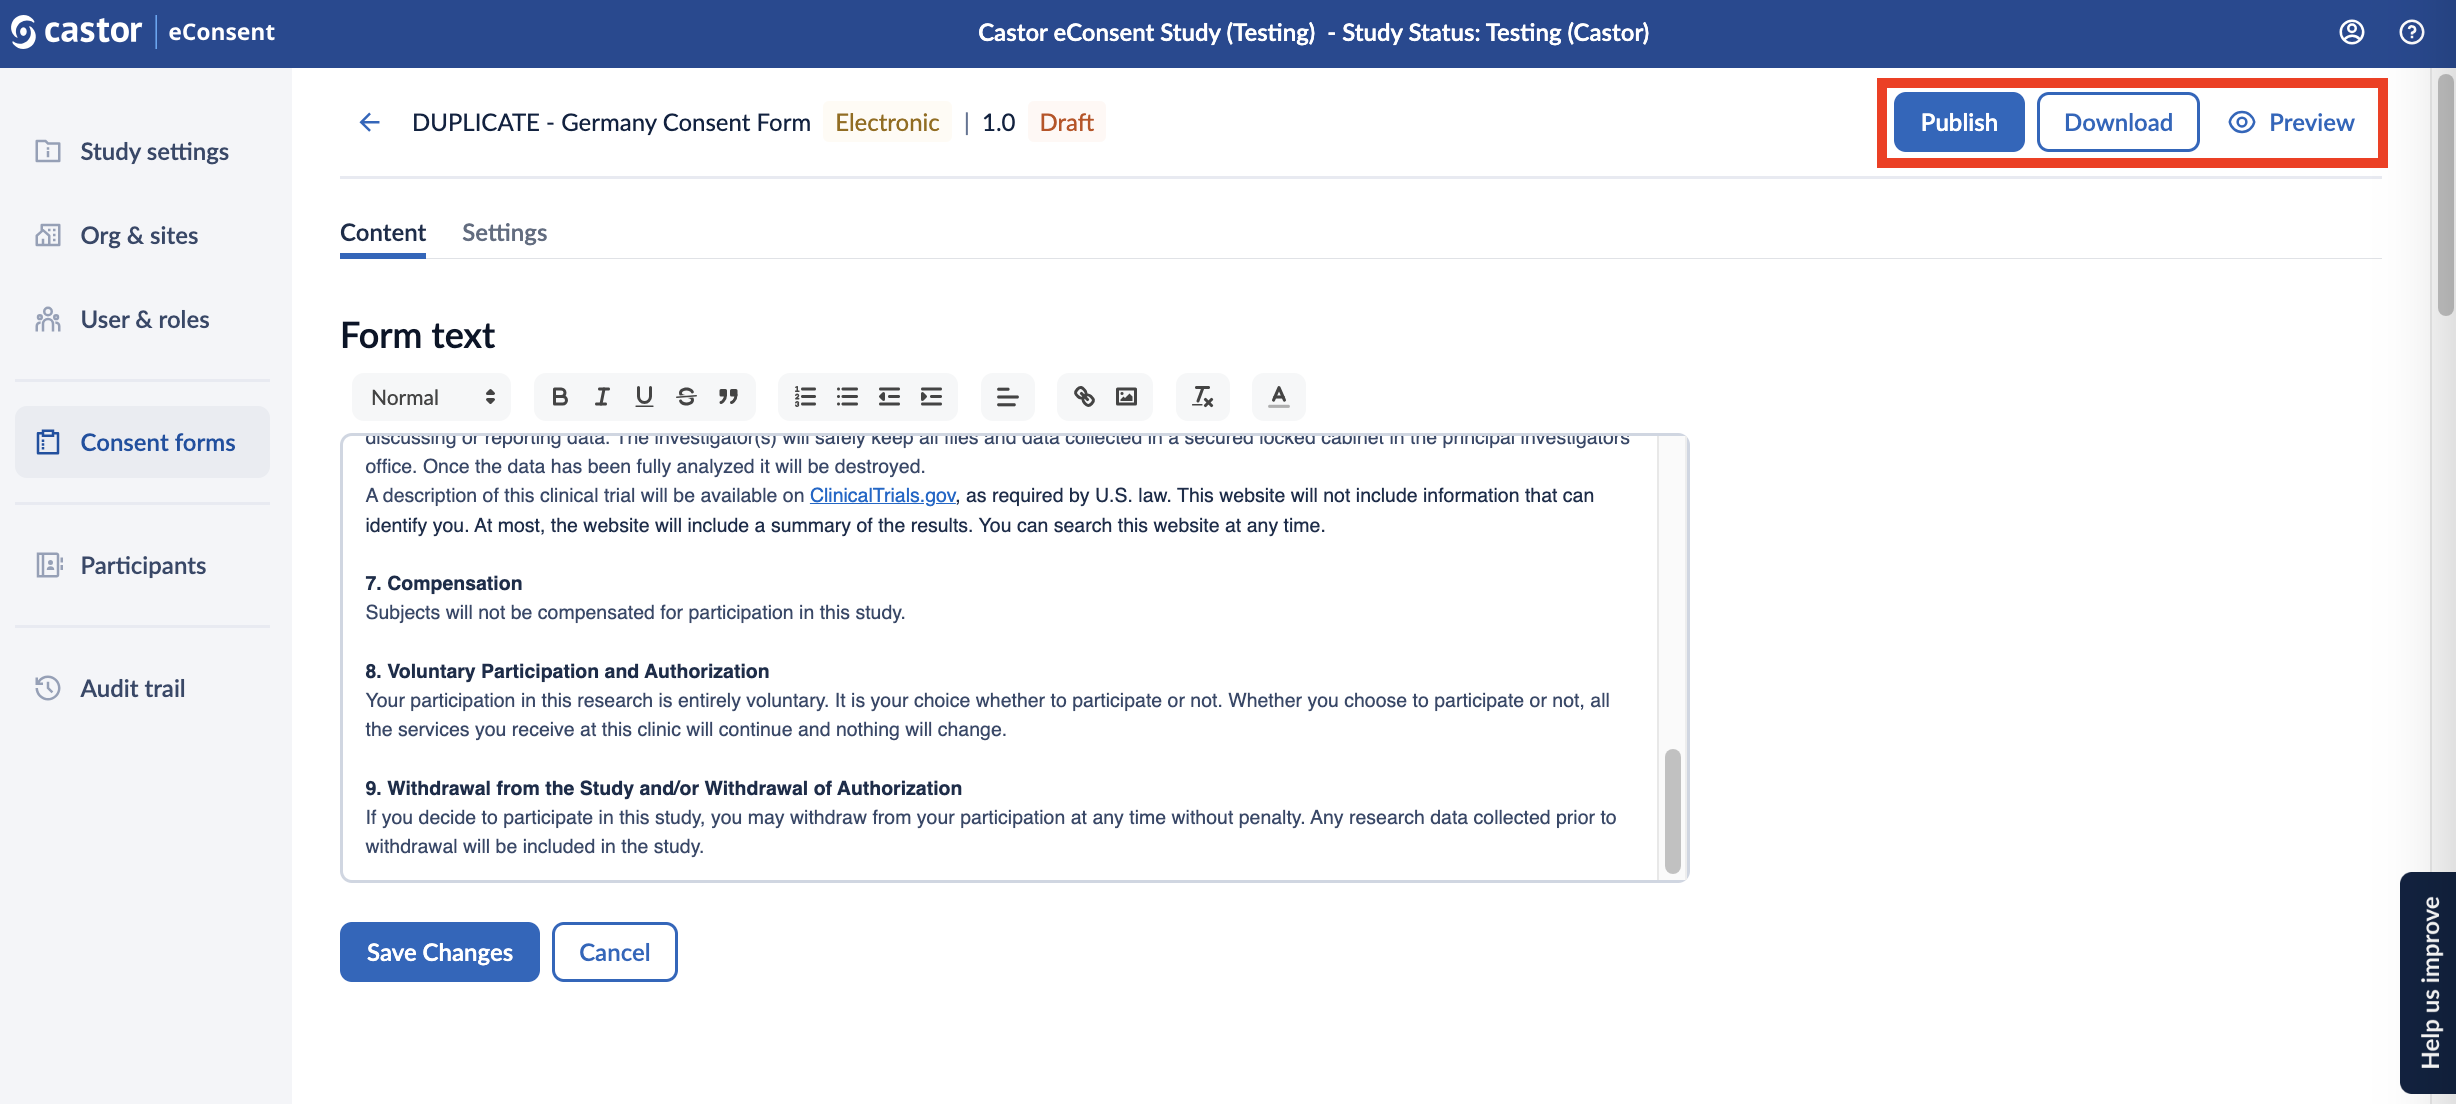
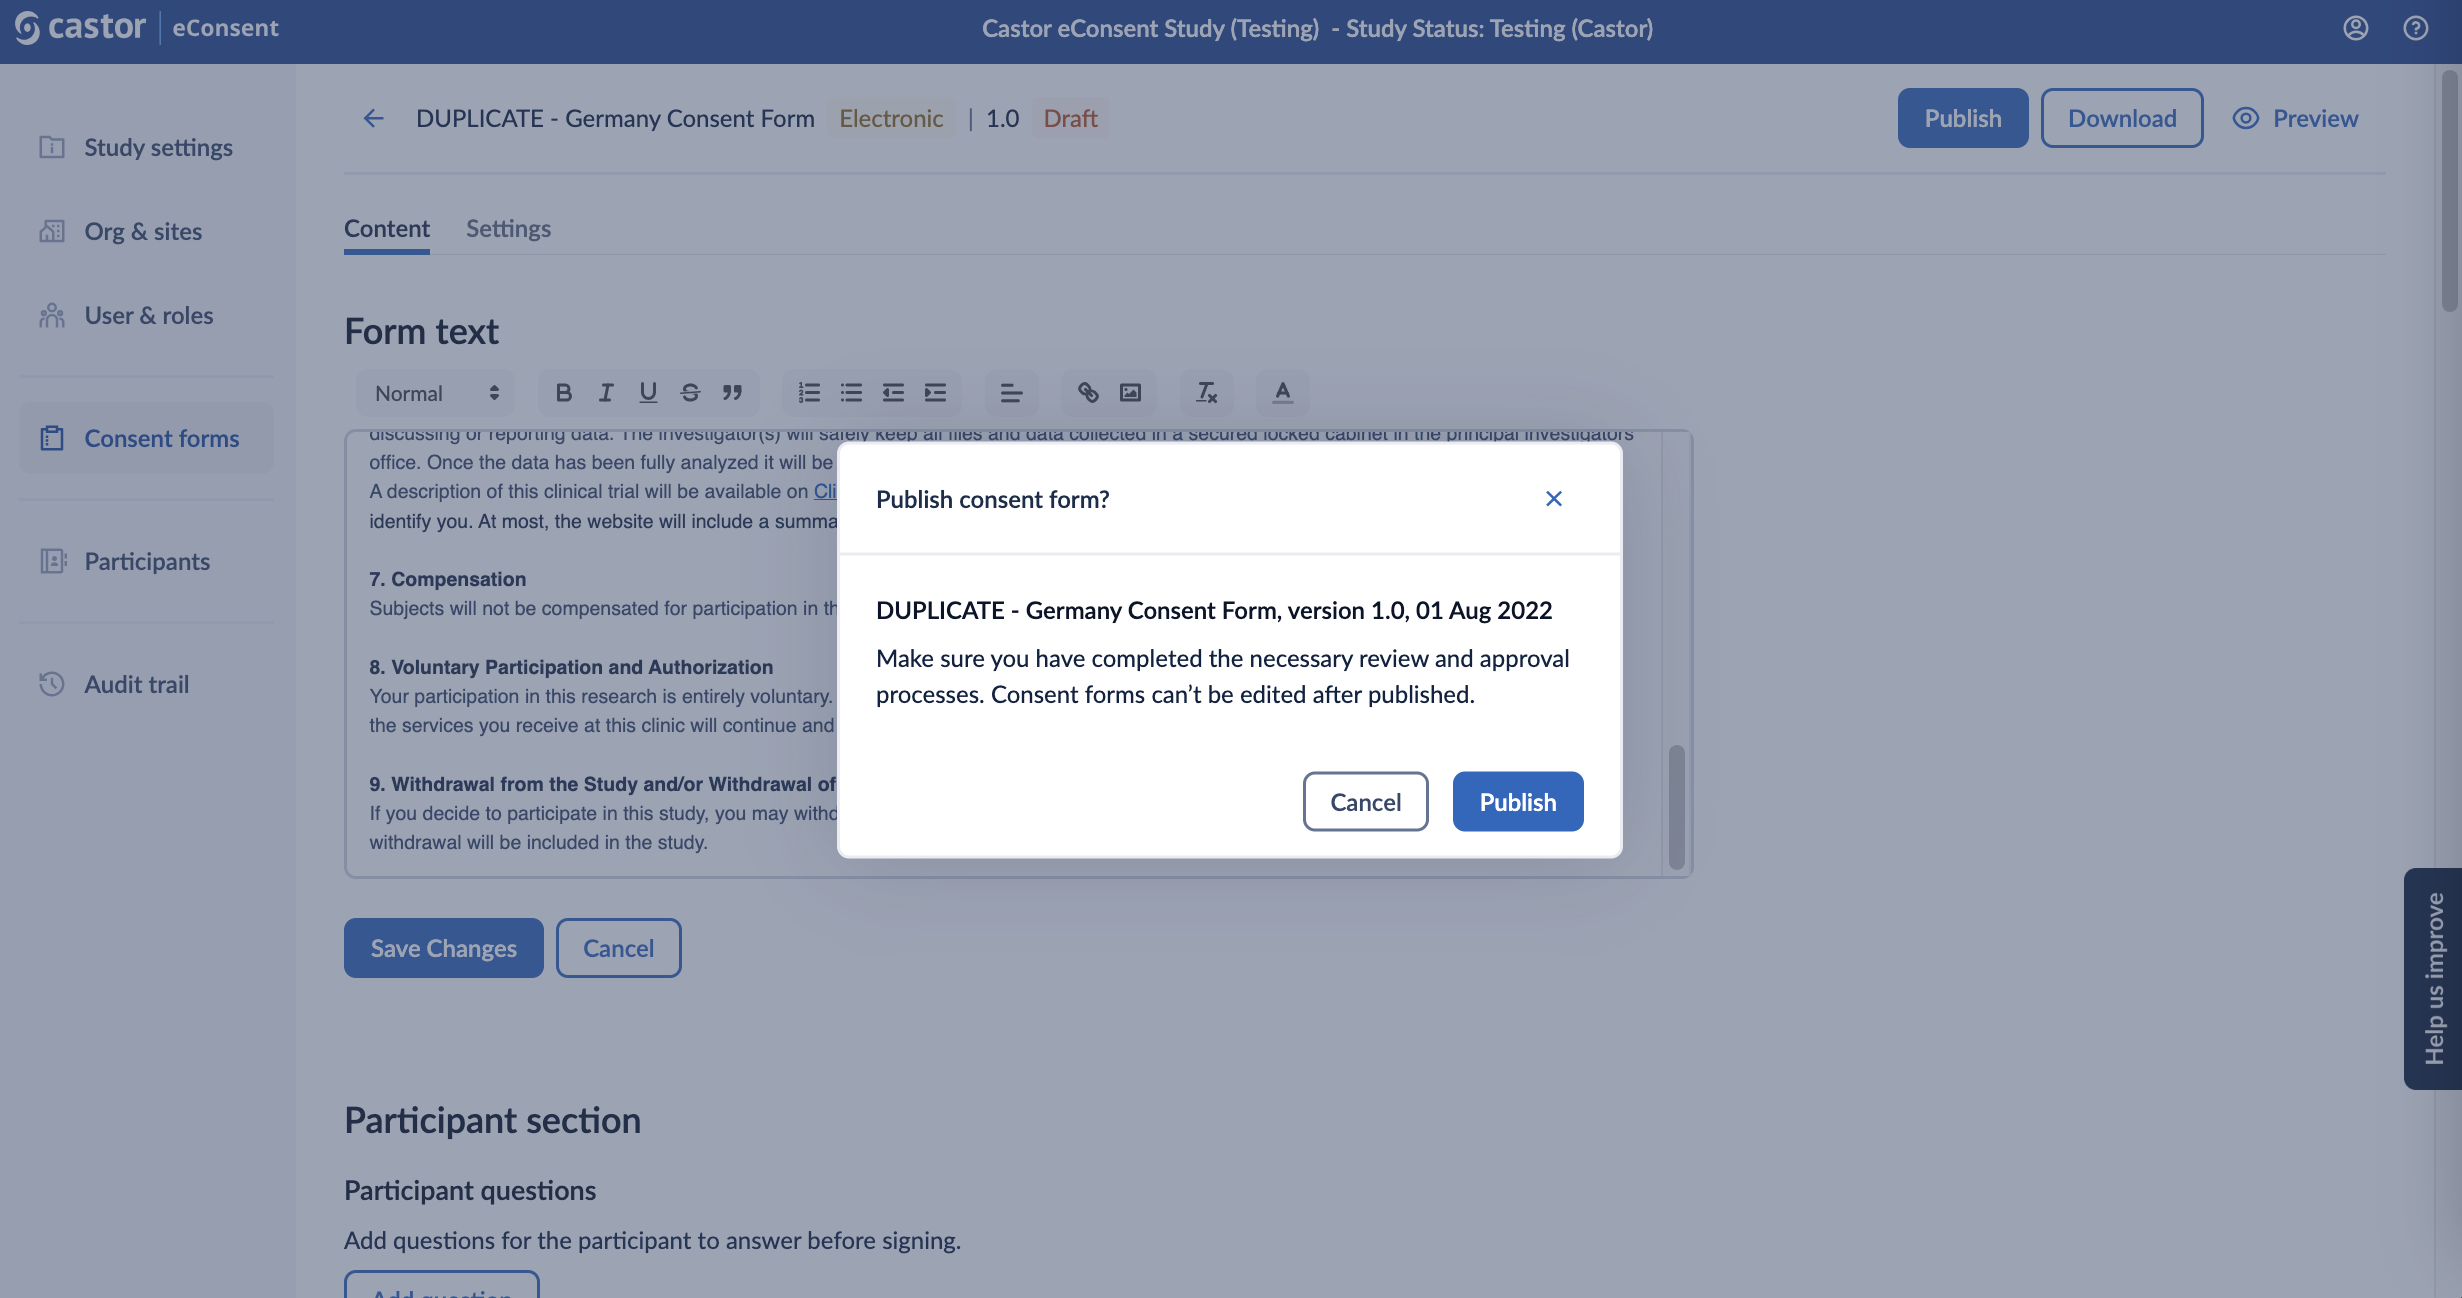
Once the form is published, it will no longer be possible to edit the content of the form. Please ensure you have completed the necessary review and approval processes prior to publishing. Click ‘Publish’ to publish the form.
Settings
In the ‘Settings’ page, you can change the form settings such as Form name, Country, Site(s), Language, Version number and Version date.
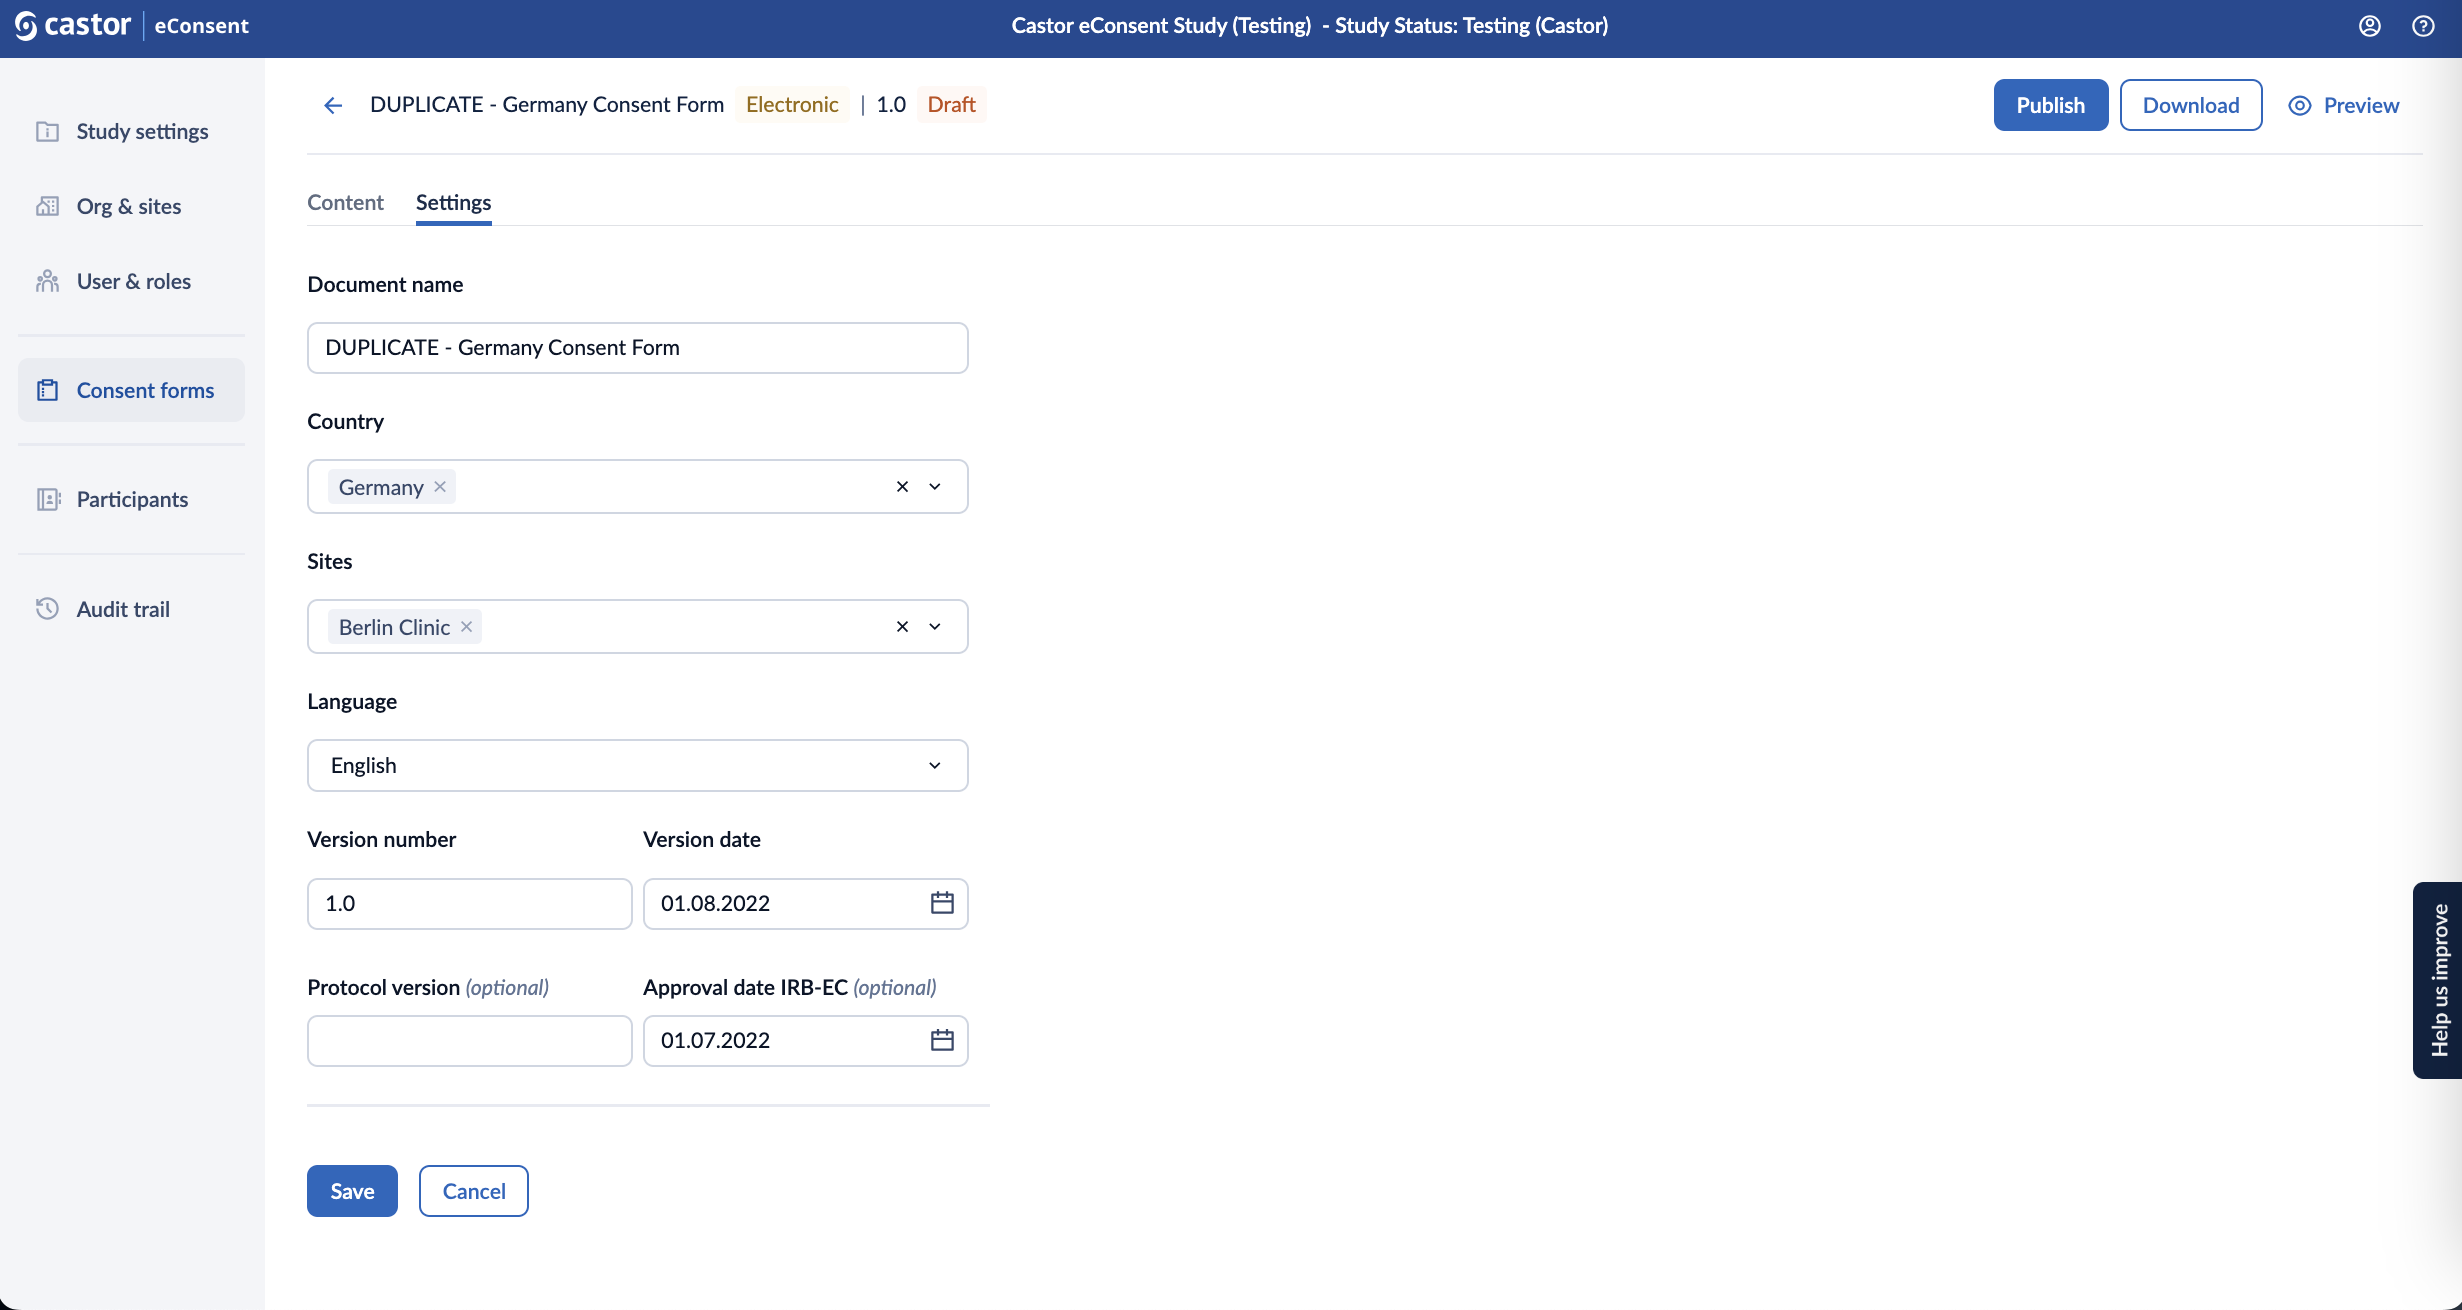
After the form is published, you will be able to modify the ‘Country’ and ‘Sites’ to which the form is linked in the ‘Settings’ tab and other fields will be greyed out.