User and roles in eConsent
Table of Contents
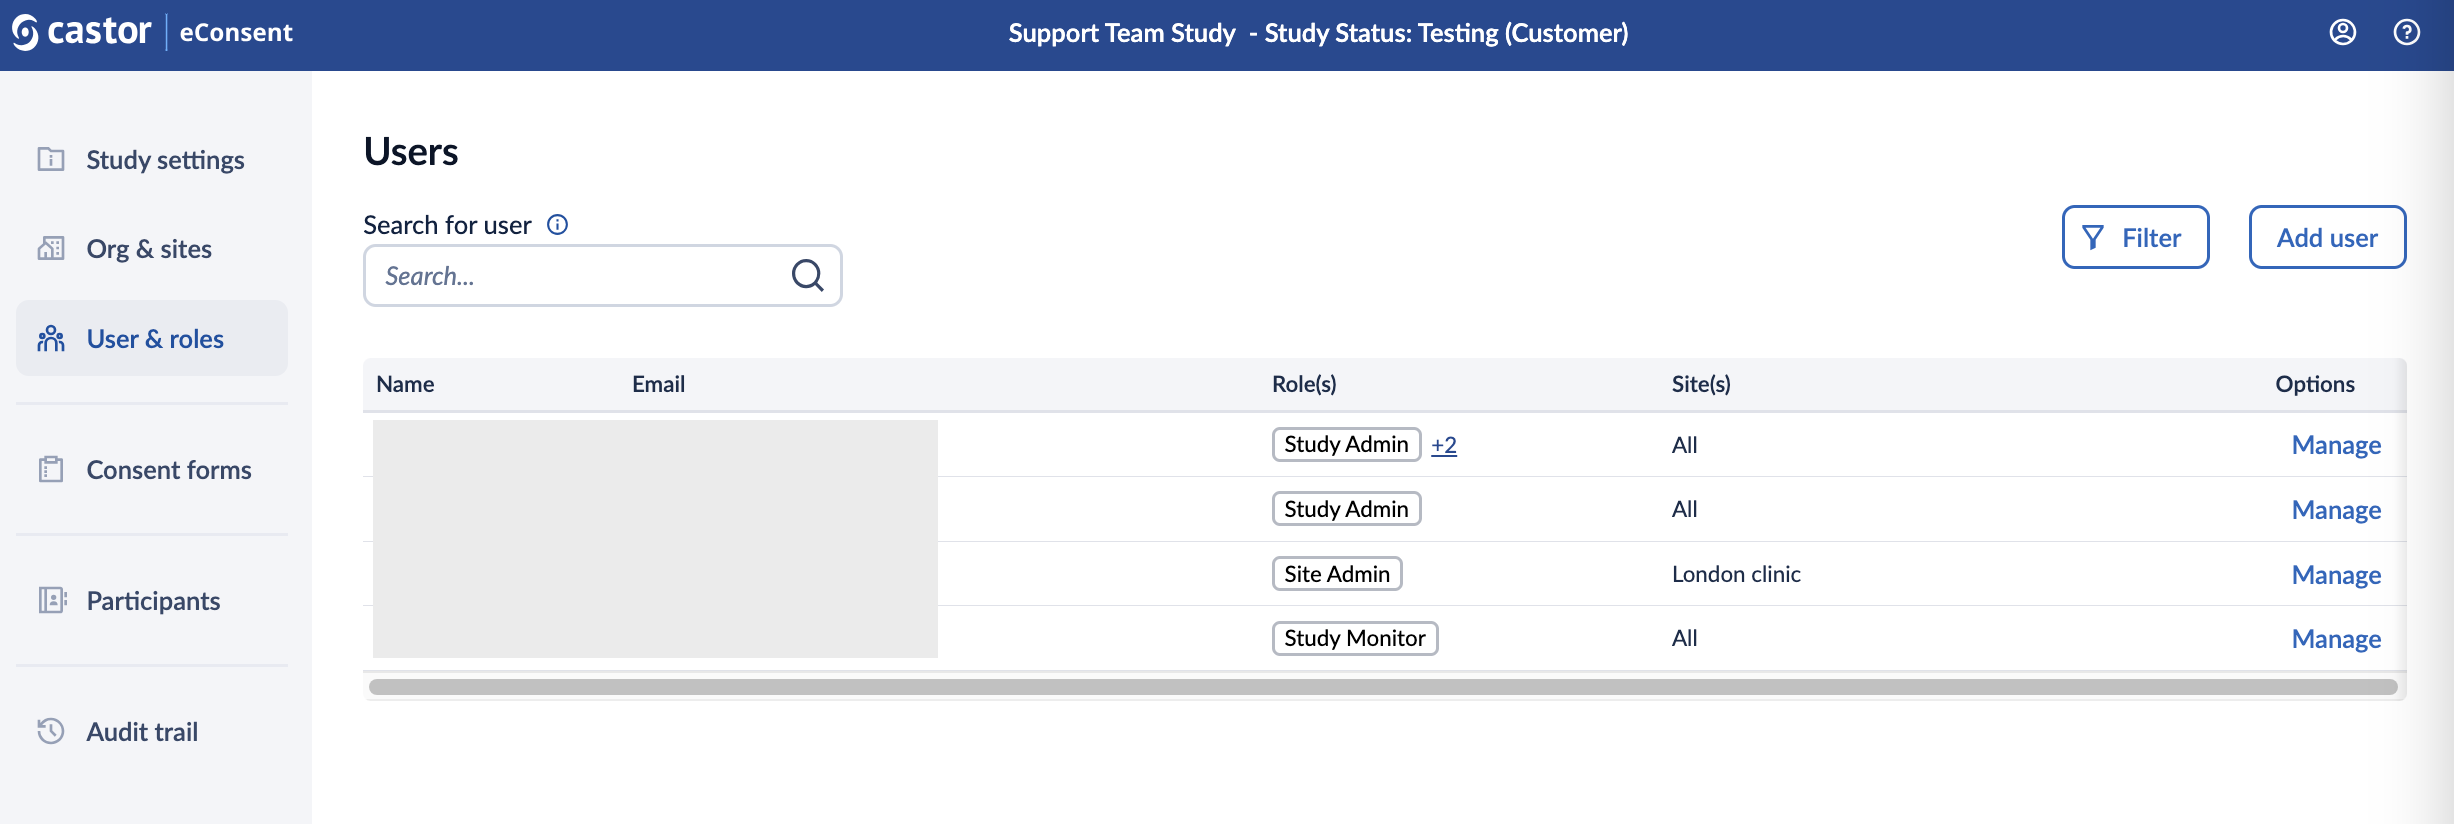
The User & Roles page displays the names, emails, roles, and sites for everyone with access to your study. From this page, it is possible to revoke access, view pending study invitations, and re-send or cancel invitations.

- Search bar: allows searching for a user based on the full email address
- Name: Displays the name of the user once they have accepted the invitation.
- Email: Email of the user.
- Roles: Displays the roles assigned to the user.
- Sites: Shows the sites to which the user has access.
- Manage: Allows the study admin to manage users, their roles and view the invitation status.
- Filter: by pressing the Filter button, it is possible to refine or limit the displayed users based on certain criteria, namely. When you click on or interact with a "Filter" button, it usually opens a menu or dialog that lets you specify specific parameters, such as keywords, categories, dates, or other attributes, to narrow down the data or information you're viewing.
Role(s)
The user role(s) can be assigned at the Study level, which means that the role will be applicable for all sites in the study. This includes the role(s) of Study Admin, Study Monitor, Study Investigator, and Study Read-only. Alternatively, you can assign site-specific user roles which will only be linked to selected site(s). These include the role(s) of Site Admin, Site Investigator, and Site Monitor.
It is possible to choose from the following list of the default roles:
- Study admin: The study admin can perform all actions related to the study settings, Org & Site, User Roles, and Consent forms
- Site admin: The site admin can view study settings, organization and sites, view, add and edit user & roles, consent forms, invite, view non PII and PII, edit and sign ICF, and view the audit trail.
- Study/Site investigator: The study and site investigator can view study settings, organization and sites, view user & roles, consent forms, invite, view non PII and PII, edit and sign ICF, and view audit trail for a study or site respectively.
- Study/Site monitor: The study and site monitor can view study settings, organization and sites, view user & roles, consent forms, view non PII and PII, and view audit trail for a study or site respectively.
- Study/Site read-only: The study and site read-only role allows to view study settings, organization and sites, view user & roles, consent forms, view non PII, and view audit trail for a study or site respectively.
| Study Admin | Site Admin | Study/Site Investigator | Study/Site monitor | Study/Site read-only | ||
| Study Settings | View | Yes | Yes | Yes | Yes | Yes |
| Edit | Yes | No | No | No | No | |
| Org & Sites | View | Yes | Yes | Yes | Yes | Yes |
| Add,Edit | Yes | Yes | No | No | No | |
| User & Roles | View | Yes | Yes | Yes | Yes | Yes |
| Add, Edit | Yes | Yes | No | No | No | |
| Consent Forms | View | Yes | Yes | Yes | Yes | Yes |
| Add, Edit | Yes | Yes | No | No | No | |
| Subjects | Invite | No | Yes | Yes | No | No |
| View non PII | Yes | Yes | Yes | Yes | Yes | |
| View PII | No | Yes | Yes | Yes | No | |
| Edit | No | Yes | Yes | No | No | |
| Sign | No | Yes | Yes | No | No | |
| Audit trail | View | Yes | Yes | Yes | Yes | Yes |
Adding a user
To grant account access to the study for a new user, follow the steps below:
1. Click ‘Add user’ button in the ‘Users’ overview:

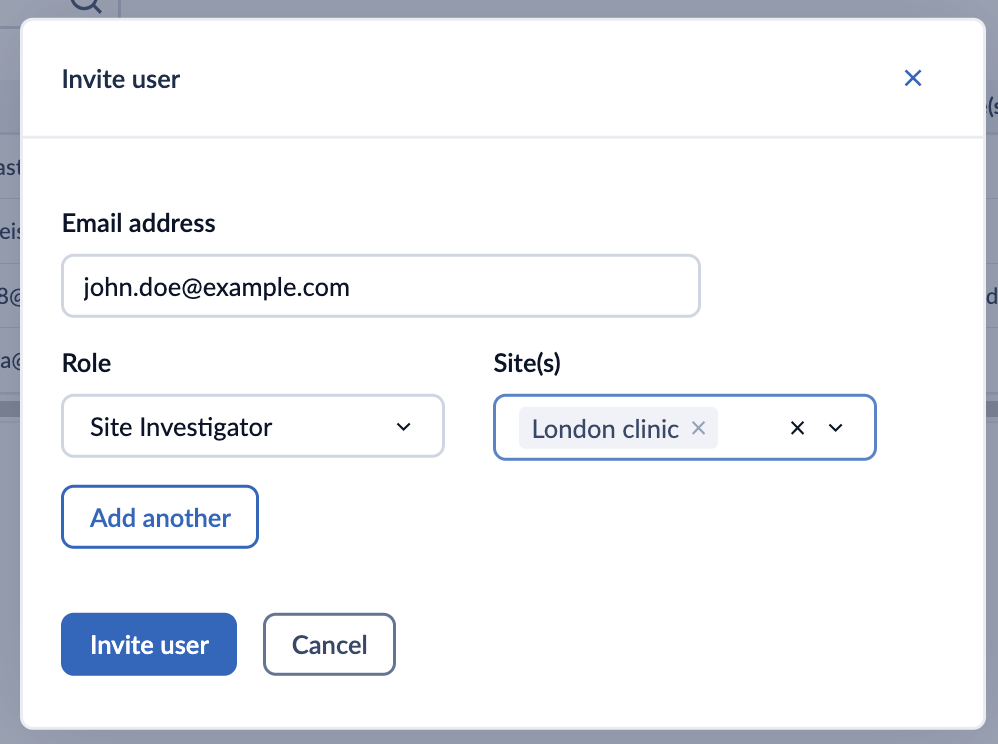
2. In the ‘Invite user’ window, add the user details:
- Email: The email address of the user
- Role: Specify a role which a user needs to have for All sites or a specific site
- Sites: Choose sites for which the role should be applicable. By default All Study roles (Study Admin, Study Monitor, Study Investigator, and Study Read-only) are granted access to all sites.
- Add another: This will allow the addition of other role options for the user.

3. Click ‘Invite user’ to send an invite or ‘Cancel’ to cancel the invitation.
Managing existing users
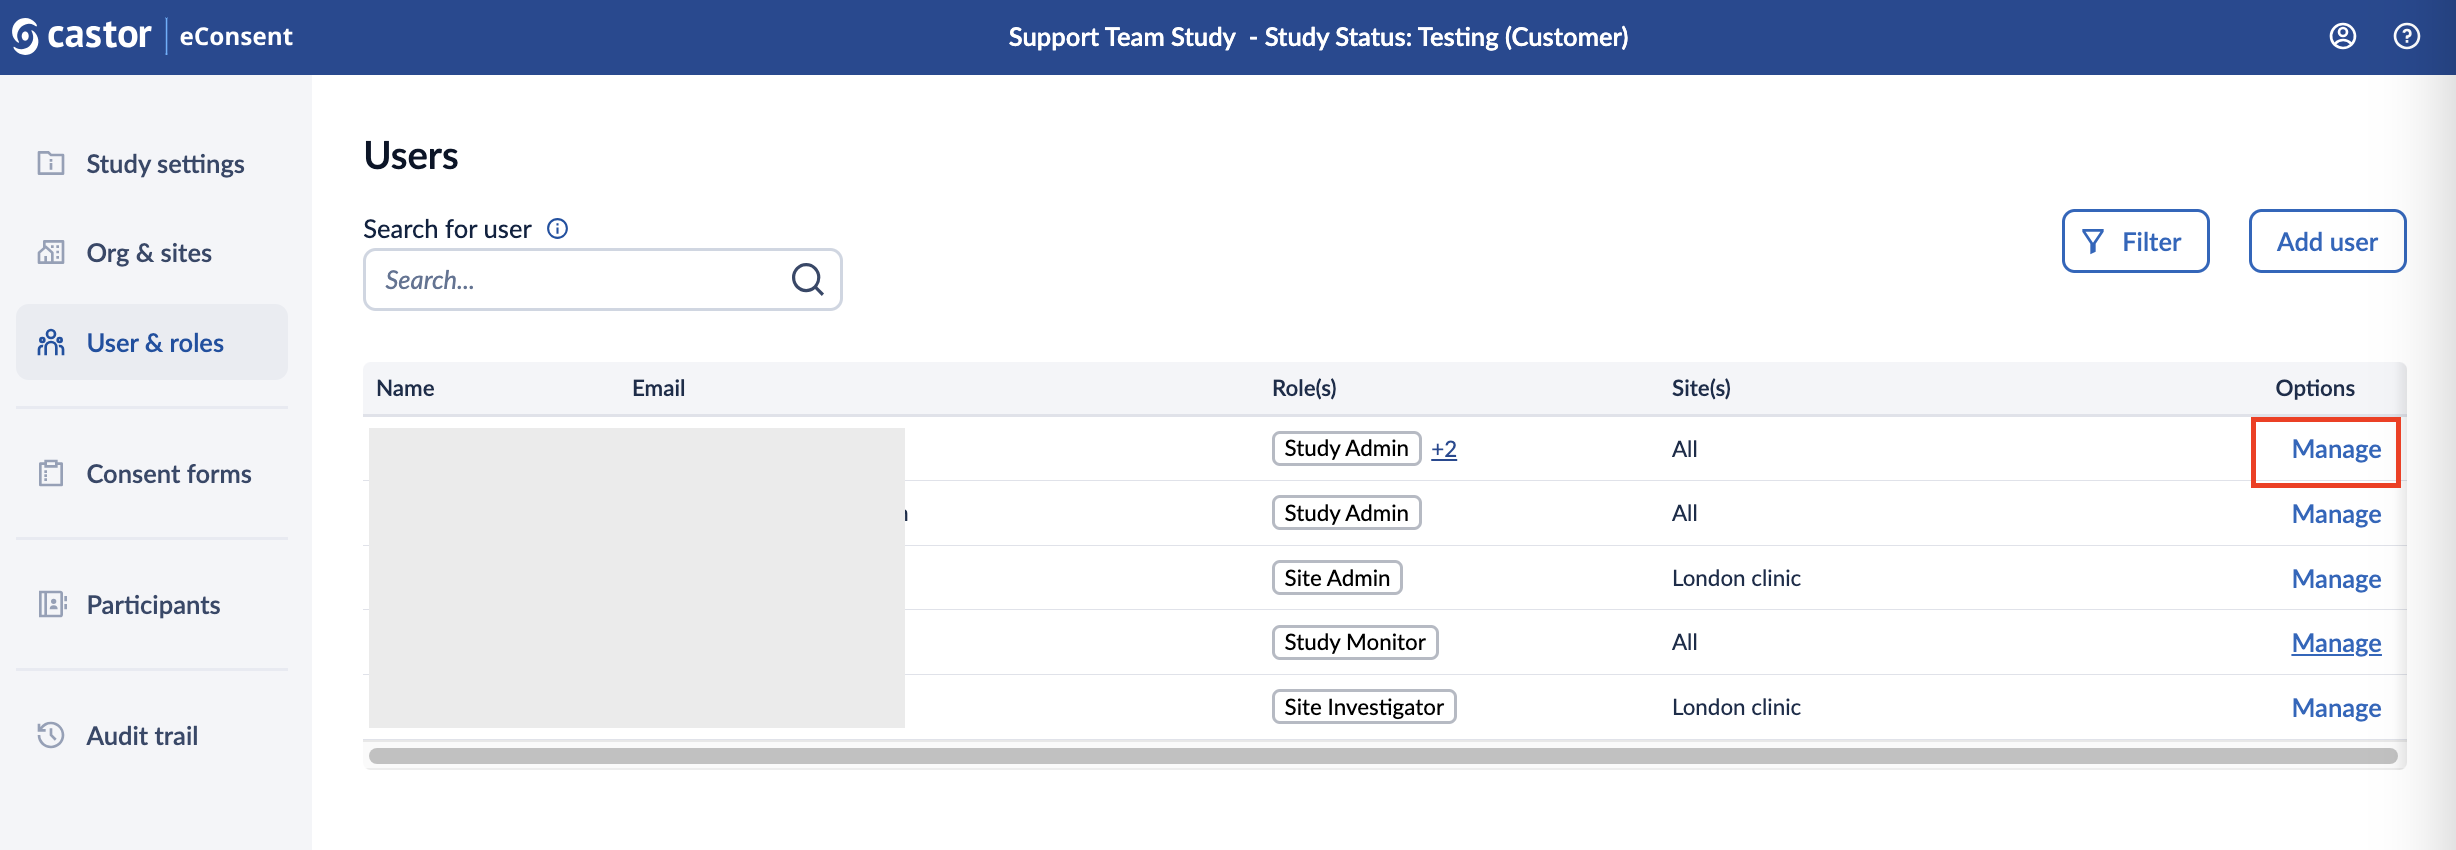
The ‘Options’ column allows you to edit roles for existing users that have been invited to the study as well as to resend invites.
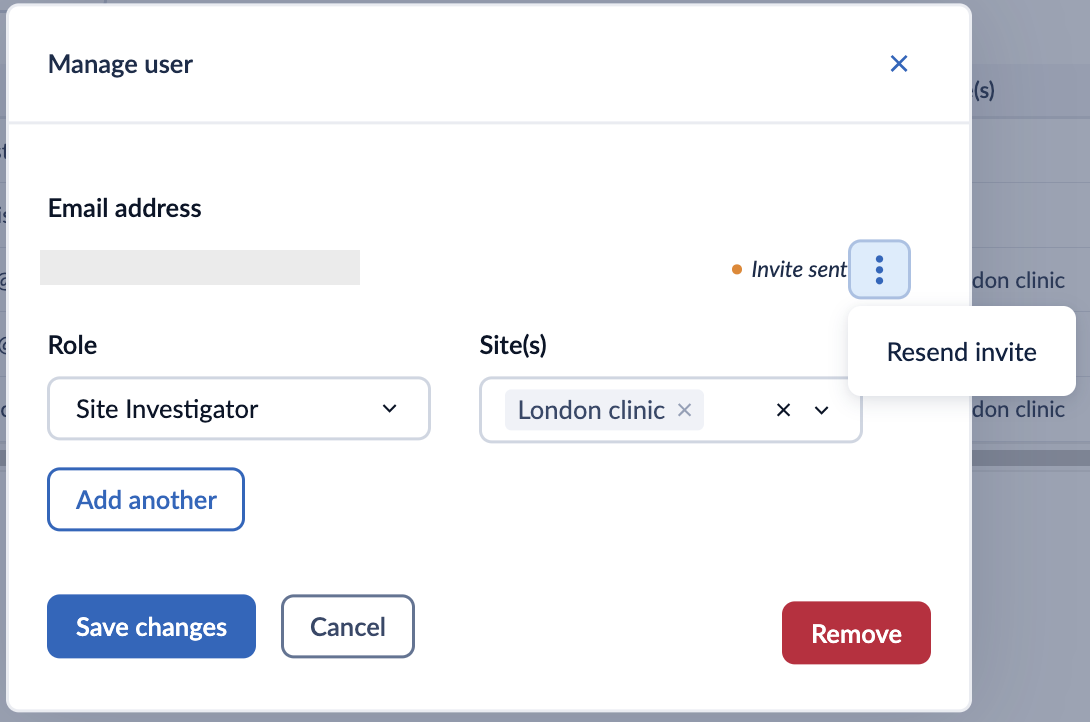
In the ‘Options’ column, click on the ‘Manage’ button to access the ‘Manage user’ window:

Once you have edited the user details, click on the ‘Save changes’ button to apply changes.
It is possible to resend an invitation to a user who has not yet accepted the invitation by clicking on the three dots menu in the ‘Manage user’ window.
