eConsent study settings
Table of Contents
The study settings tab allows configuring the main study details. The tab contains the following sub-tabs:
- General
- Configurations
- Personal details fields
Below we will go into detail about each sub-tab's options.
General settings
Use the General settings to configure settings that cover basic aspects of your study, for example, the study title and logo, and study description. This is also the tab that you see when you open your study.
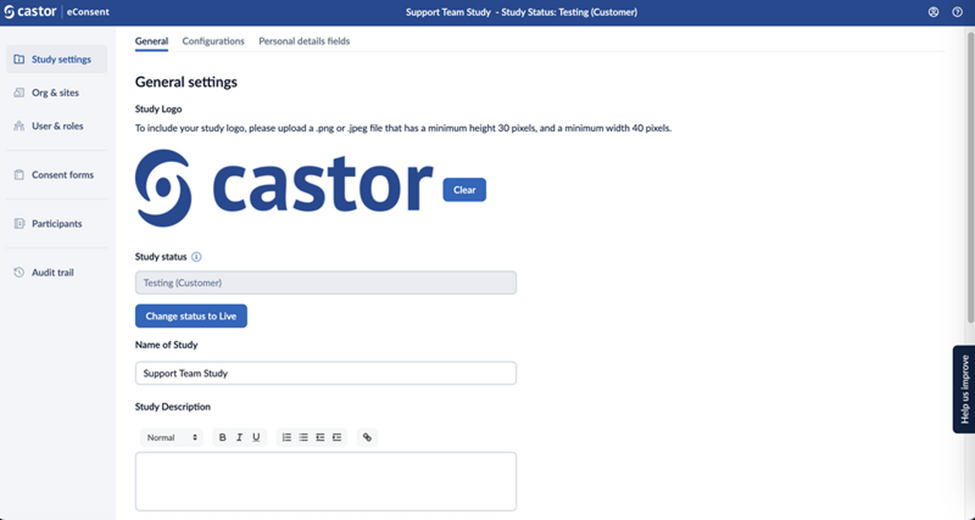
- Study logo: To include your study logo, please upload a .png or .jpeg file that has a height between 30 and a minimum width of 40 pixels. To remove the logo, click on the ‘Clear’ button.
- Study status: This field displays the study status information. A study goes through the following statuses: Testing (Castor), Testing (Customer), and Live. To learn more about what each status means, read the article ‘Study status’.
-
Name of the study: The title of your study.
Study description: Description of the study. The study description will be displayed to participants in Castor eConsent.
Contact settings
In the ‘Contact Settings’ section, you can add some general contact information for your study.
This information will be available to patients in Castor eConsent.
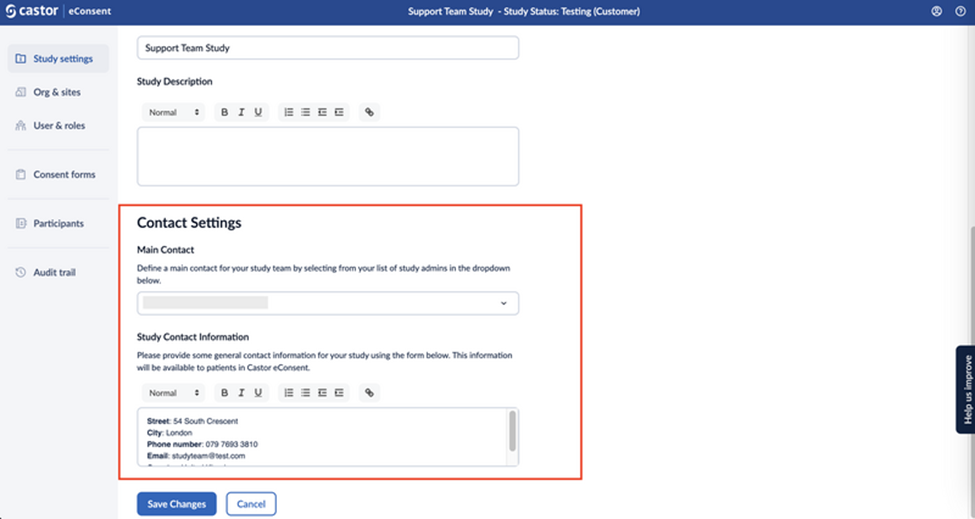
- Main contact: This field allows you to add a main contact for your study team by selecting them from your list of study admins in the dropdown. The main contact is visible for study team members only.
-
Study contact information: This field allows adding some general contact information for your study. This information will be visible to patients in Castor eConsent when they log in and access your study.
Configurations
By accessing the 'Configurations' tab, you can define properties related to consent, screening, and participant IDs for your study.
Consent options
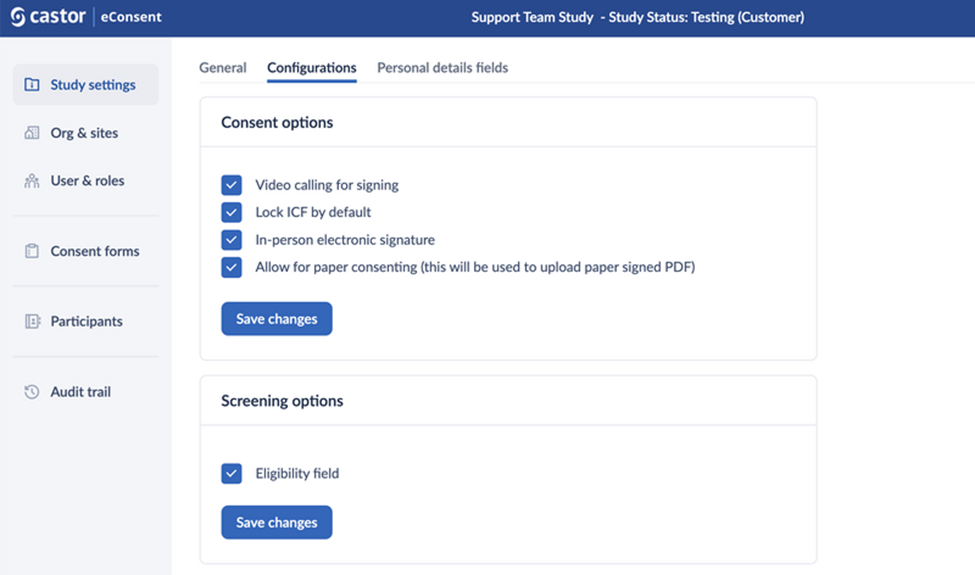
The ‘Consent options’ section allows you to enable the following features:
- Video calling for signing: This will activate the possibility to perform a video call.
- Lock ICF by default: When the ICF is locked by default, it will first have to be unlocked by a study team member to allow for the participant to sign. To enable or disable these features, check the checkbox accordingly and click the button ‘Save changes’ to apply the changes.
- In-person electronic signature: This feature allows the signing of the consent forms in person.
The in-person signing process is started by the user who is conducting the consent procedure by selecting the ‘Sign in-person’ ICF option from the participant.
The study team member who is conducting the consent procedure first has to confirm the participant's identity before the in-person signing can kick off. This identity confirmation step is logged in the audit trail.
When handing over the device to the participant, the participant can directly sign the ICF without having to create an eConsent account.
Allow for paper consenting (this will be used to upload paper signed PDF): when this setting is enabled, study admins can create paper ICFs which will allow for uploading of a signed PDF.
Screening options

Participant eligibility can be captured in eConsent using the 'Screening options' section.
A study setting ‘Eligibility field’ allows the collection of your participant eligibility status (available statuses are: pending, pass, and fail) including the timestamp of when this was updated.
The eligibility status can be updated manually, or automatically based on the outcome of a screening survey that is filled in by the participant.
Screening and participant IDs
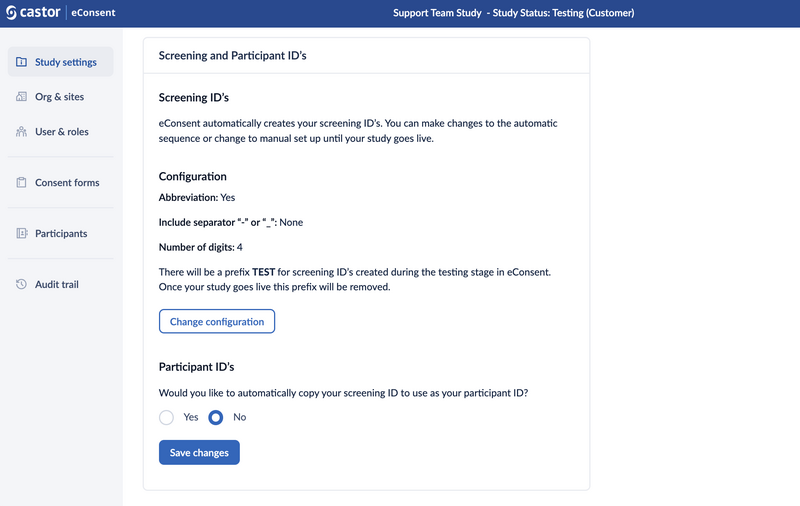
It is possible to configure the screening ID and participant ID for your study.
Screening ID's:
- eConsent automatically creates your screening ID’s. You can make changes to the automatic sequence or change to manual setup until your study goes live.
- To configure the Screening IDs, click on the 'Change configuration' button, set the field 'Set up automatic eConsent screening ID sequence?' to 'Yes', and define how the IDs should be configured.
- Site abbreviation, a separator, and the number of digits are configurable when enabling automatic screening ID generation. When this feature is enabled, no manual entry of screening IDs is allowed.
Click on the 'Set screening ID' button to save the changes.
Participant ID's:
- A study setting to let eConsent automatically generate screening IDs is added. Site abbreviation, a separator, and the number of digits are configurable when enabling automatic screening ID generation. When this feature is enabled, no manual entry of screening IDs is allowed.
- It is possible to copy over the screening ID into the participant ID for studies that do not make a distinction between these two identifiers by setting the field 'Would you like to automatically copy your screening ID to use as your participant ID?' to 'Yes'.
Participant withdrawal settings
It is possible to withdraw a participant from the participant detail page. Within the study settings, a study administrator can toggle the 'Reason for withdrawal' setting. The setting can be enabled even if the study is already live. When turning this setting on, a reason must be provided when withdrawing the participant. Next to that, the administrator can configure the reasons an investigator can choose when withdrawing.
- To edit a default reason for withdrawal, simply place the cursor in the field and start editing the provided text.
- To remove the reason for withdrawal click on the trash bin icon.
- To add a reason for withdrawal click on the ‘+Add new option’.
- To save or cancel changes use the relevant buttons - ‘Save changes’ or ‘Cancel’ - at the bottom
When withdrawing a participant, the study team member can select a pre-configured reason for withdrawal. When withdrawing a participant, a study team member can choose 'Other' as a reason for withdrawal. This allows them to fill in a custom reason in a text field.
After confirmation, the reason for withdrawal is added to the audit trail event.
Personal details fields
Additional personal details of the participants can be collected. Data to be collected can be configured in the section 'Personal details fields'. This data is collected on a per-study level, and participants will be prompted to fill in the data. Study team members can also add and edit this information.
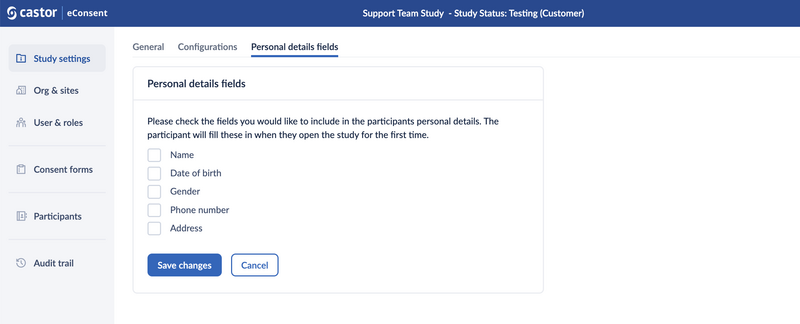
The following participant information can be collected:
- Name,
- Date of birth,
- Gender,
- Phone number,
- Address.
When opening the study as a participant, and there are personal details requested, the participant is prompted to fill in and submit their data before continuing. participants can always review their submitted data via the ‘Study Profile’ tab.
Changes concerning the participant's personal details are logged in the audit trail.