Select an action for your automation
Table of Contents
The action describes the result of the event triggering.
Open the action dialog
After you navigate to the Automation Engine and select an event, click on the "Action" button (1).
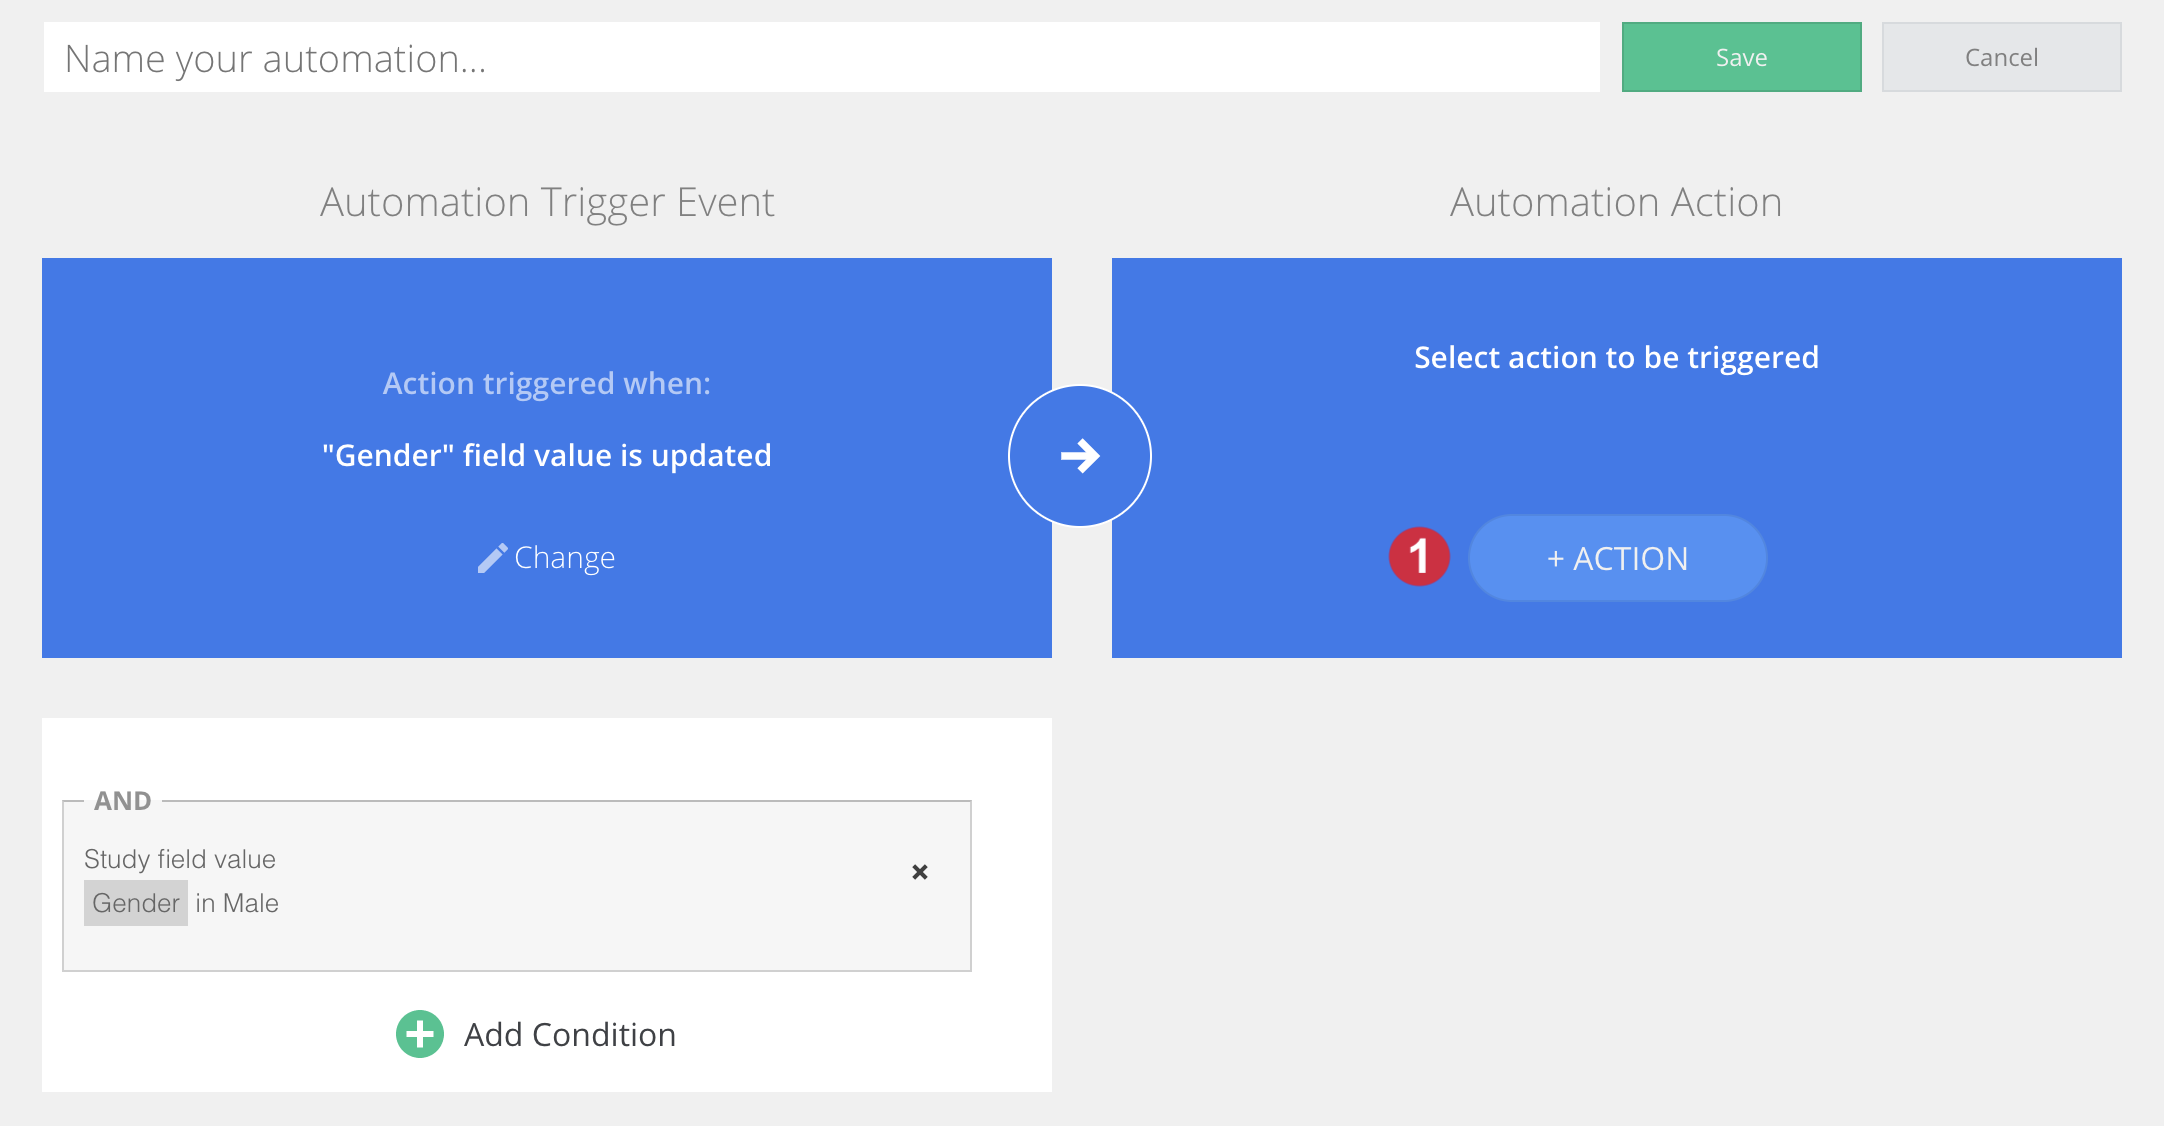
Select an action
A pop-up will show up in which you can select an action:
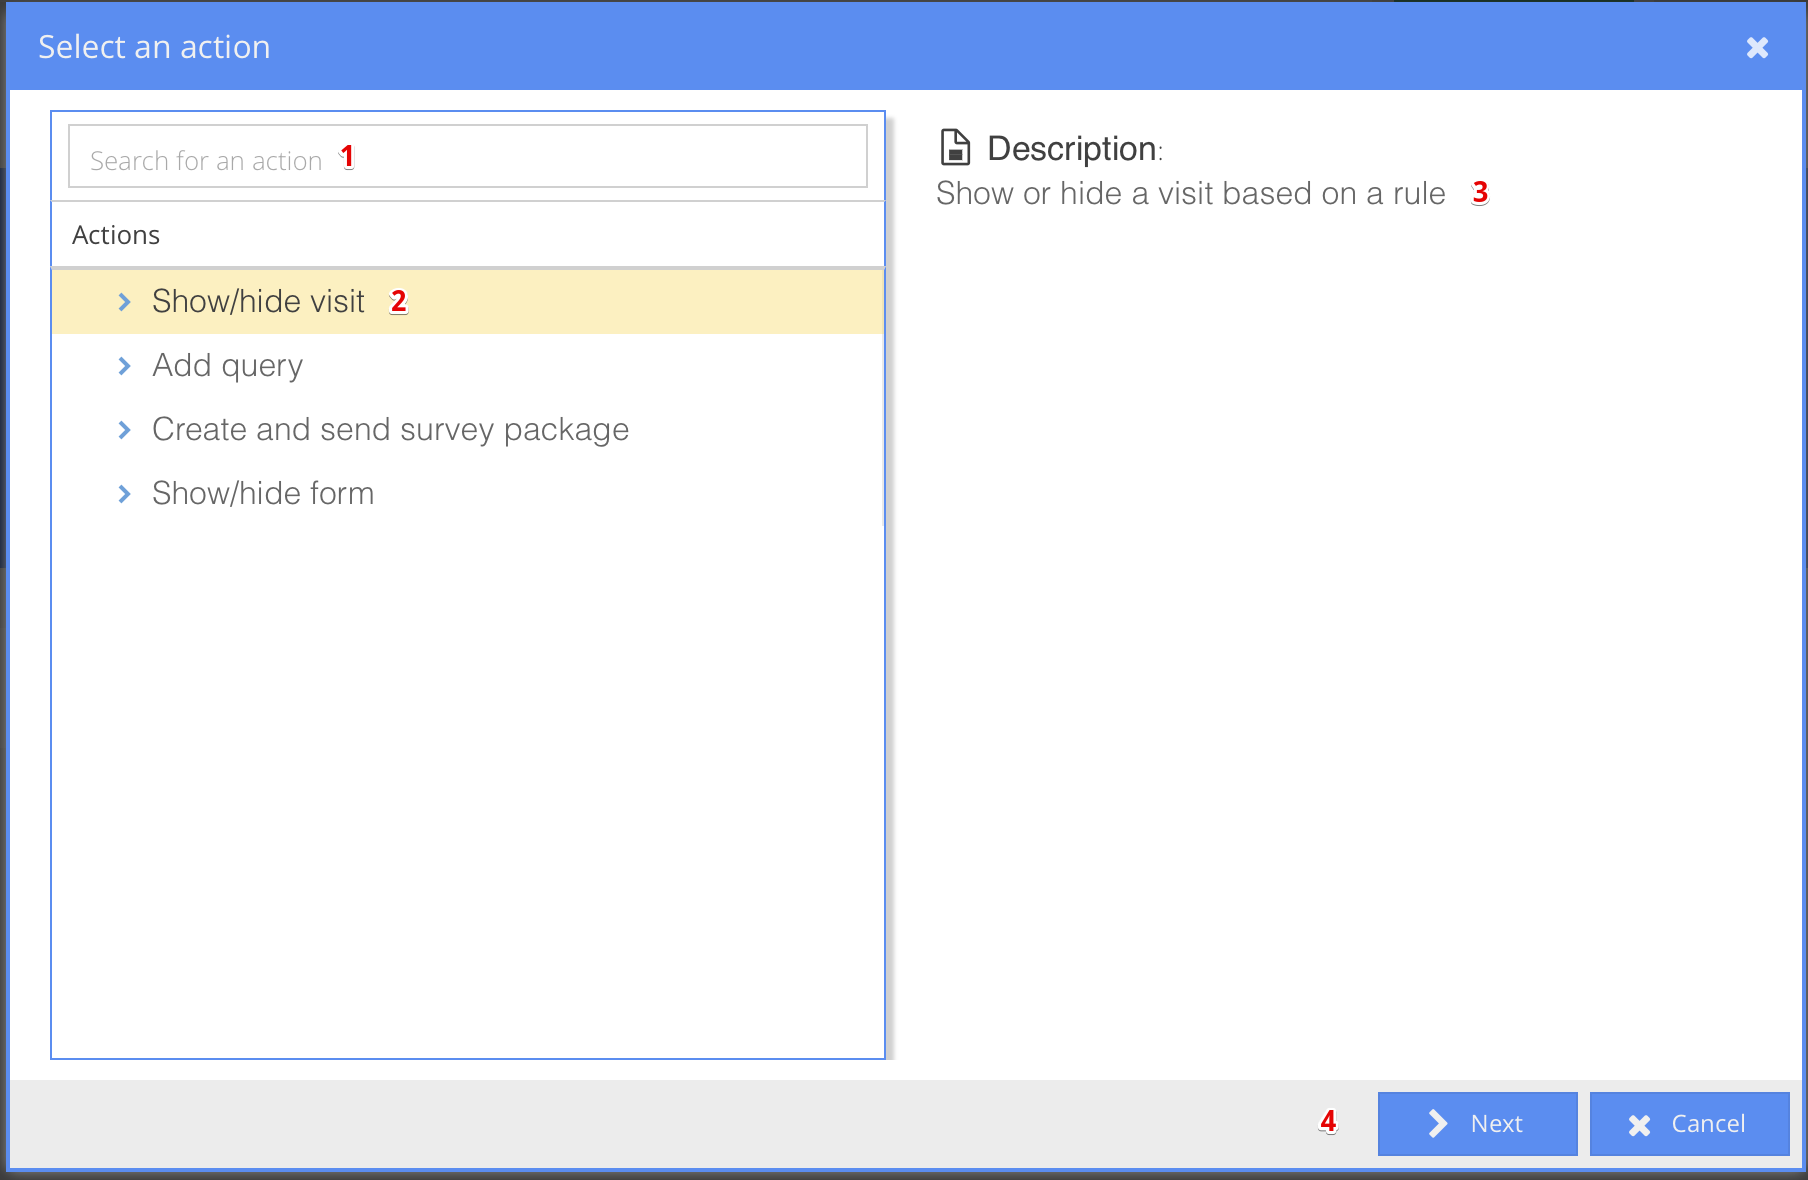
- Search for an action: As more actions are supported by our system, you will be able to search for your desired resulting action using the search box at the top left side of the popup dialog.
- Actions: A list of all actions appears on the left side of the popup dialog. Note that only Actions that are supported with your previously chosen event will appear. Therefore, if you choose a different event you may see a different list of Actions. One action must be selected before continuing with your automation.
- Description: A description of the action appears at the top right side of the popup dialog.
- Next/Cancel: Once you select your action, click the "Next" button at the bottom right of the dialog. If you want to quit without saving the action, click "Cancel".
- Upon clicking "Next", you will be taken to a new screen to specify the details of your action. This screen changes depending on the action you select; Show/hide visit, Add query, Create and send survey package, or Show/hide form.
Show/hide visit
The Show/hide visit action will hide a visit when the condition is true, and show a visit when the condition is not true. Currently only the Field Value Updated event can trigger this action. First, select the visit you would like to hide by click on the Select visit button. This will open a "Select a visit" popup which contains all of the visits within your study. Select the visit and click "Save". Press "Back" to select a different action type or "Cancel" to go back to the main Automation Engine screen without saving changes.
Add query
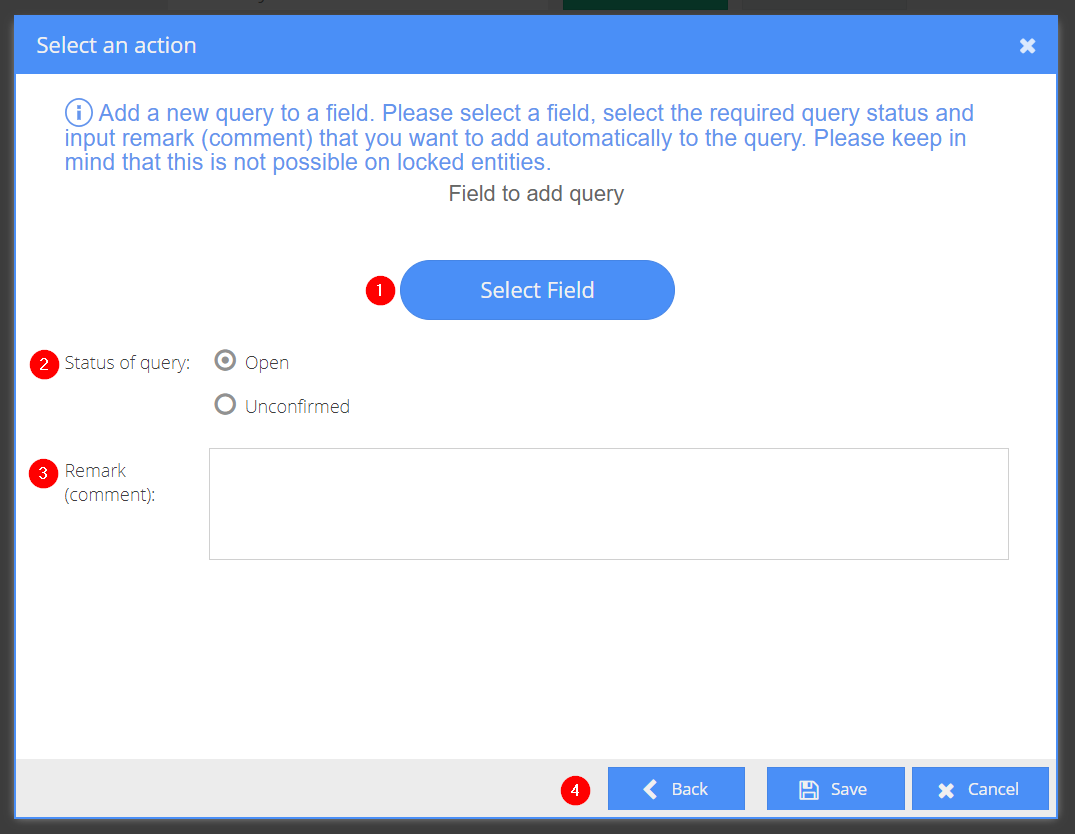
The Add query action will add a specified query to the selected field with the selected status. Currently only the Field Value Updated event can trigger this action. Therefore, once the field is updated to meet the conditions, a query will be added to a field.
- Select Field: Select a field to add a query. This will open a "Select a field" popup which contains all valid fields in your study for selection. Fields that do not support queries (i.e. Repeating Data buttons, hidden calculation fields, etc.) will not appear in this list.
- Status of query: Specify the status of the query, either as "Open" or "Unconfirmed". When the query is created it will have this status.
- Comment: Enter text that will be the body of the query in the input box.
- Back/Save/Cancel: Click "Save" to save your action, "Cancel" to go back to the main Automation Engine screen, or "Back" to select a different action type.
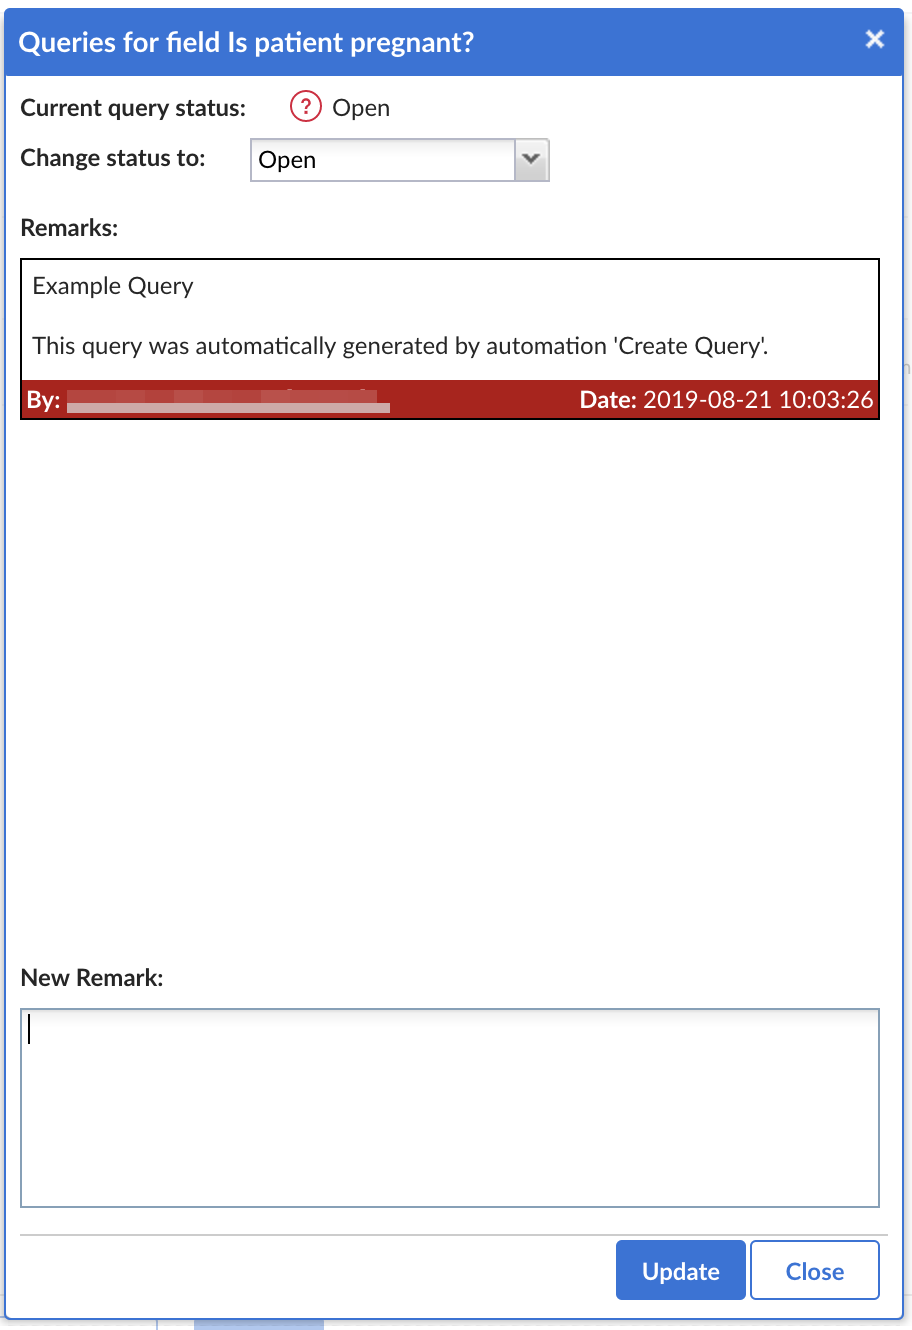
New queries that are created by the automation engine indicate within the comment of the query that it is an automatically generated query. The following text is added: “This query was automatically generated by automation 'Automation Name'.”
Create and send a survey package invitation
This action will create and send a survey package invitation when an email address is added to a participant and the specified conditions are met.
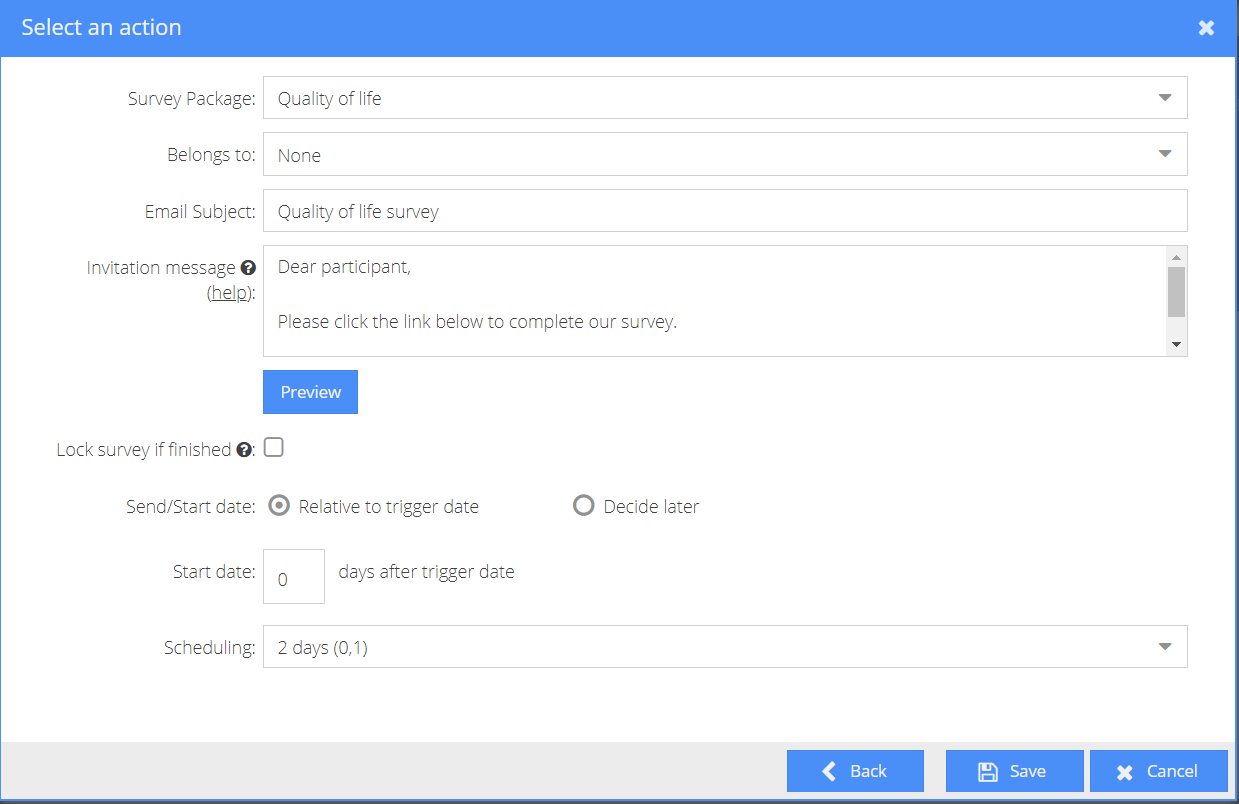
- Survey package: Select the survey package you want to send when an email address is added to a participant. Please note that if you do not have a survey package created in your study, you must go back to your study structure and create a survey package. Once created, please refresh the Automation Engine so that it reloads your study data.
- Belongs to: Select if the survey package will belong to a visit in your study.
- Email Subject: Specify the email subject that the patient receiving the survey will see in their inbox.
- Email text: Specify the email text in the Email text box. This field must contain the {url} tag, which will automatically generate a link to the patient's individual survey.
- Lock survey if finished: Select if you want the survey to be locked upon completion.
- Send/Start date: Select if you want the survey to be sent relative to when the event (email added to participant) is triggered or if you would like to decide later.
- Start date: Select the number of days after the trigger day you would like the sending pattern to begin. If the sending pattern does not exist, the system will send your survey package on the start date you specify.
- Scheduling: Specify the scheduling of the survey. Note that you need a schedule already created for it to appear in the dropdown. If you have not yet created a schedule, you must go back to your study Structure > Survey Packages > Configure Schedules to create one. Once created, please refresh the Automation Engine so that it reloads your study data.
- Back/Save/Cancel: Click Save to save your action, Cancel to go back to the main Automation Engine screen, or Back to select a different action type.
Show/Hide Form
The Show/Hide Form action will hide a form when the condition is true, and show a form when the condition is not true. First, select the form you would like to hide by clicking on the Select Form button. This will open a "Select a form" popup which contains all of the forms within your study. Currently we do not support the hiding of repeating data forms. Please note that if the form you select is the only form in a visit, the visit will disappear as well.
Save your Automation
If you have selected your event, condition(s), and action, it is now time to save your automation! In the main Automation Engine interface, click "Save" located at the bottom right of the screen. If the automation is saved successfully, the appropriate message should appear. You now have the option to close the tab.
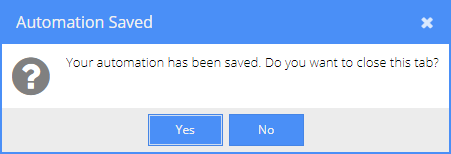
Congratulations! You have successfully created an automation! Now let's get to testing it. Made a mistake when creating your automation? No worries! You can simply edit it.