Lock visits and forms in CDMS
Table of Contents
Locking forms and visits prevents further changes to the data from being made in a form and/or visit. As an admin, you may want to lock a visit/form so no additional changes or entries can be made by other users. Please note that locked visits and forms can still be signed by users with signature rights. To prevent signing, the participant will need to be locked.
Set lock rights
Before locking visits and/or forms, you must have the appropriate rights to lock participants for that site.
- Navigate to the 'Users' tab.
- Click on the cogwheel located in the row with the name of the user that needs to have lock rights.
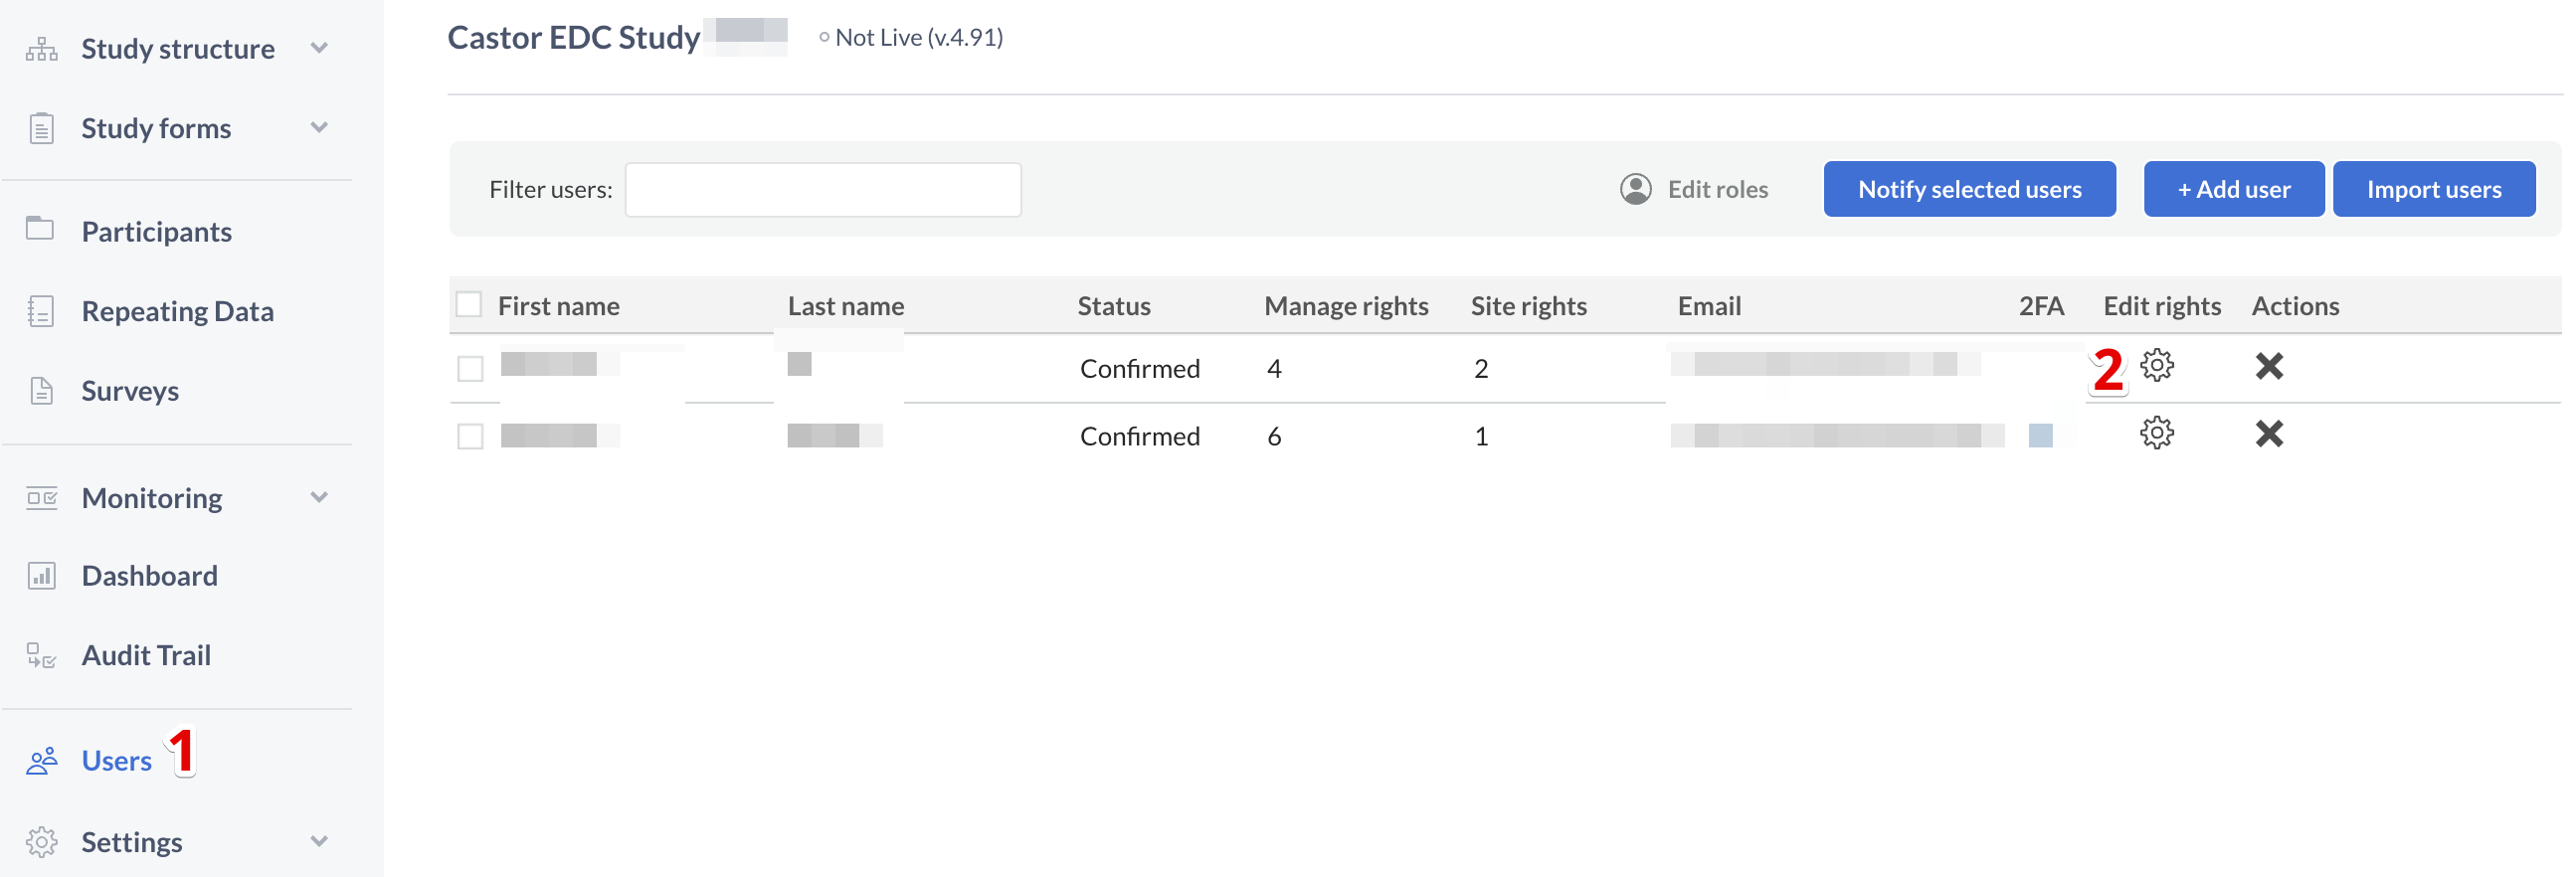
- Ensure that the 'Lock' column is checked for the correct sites. This enables the user to lock and unlock visits and forms for participants belonging to that site.
- Click 'Save' to save your new rights settings and close the dialog window.

For more information of rights, see User Management Rights.
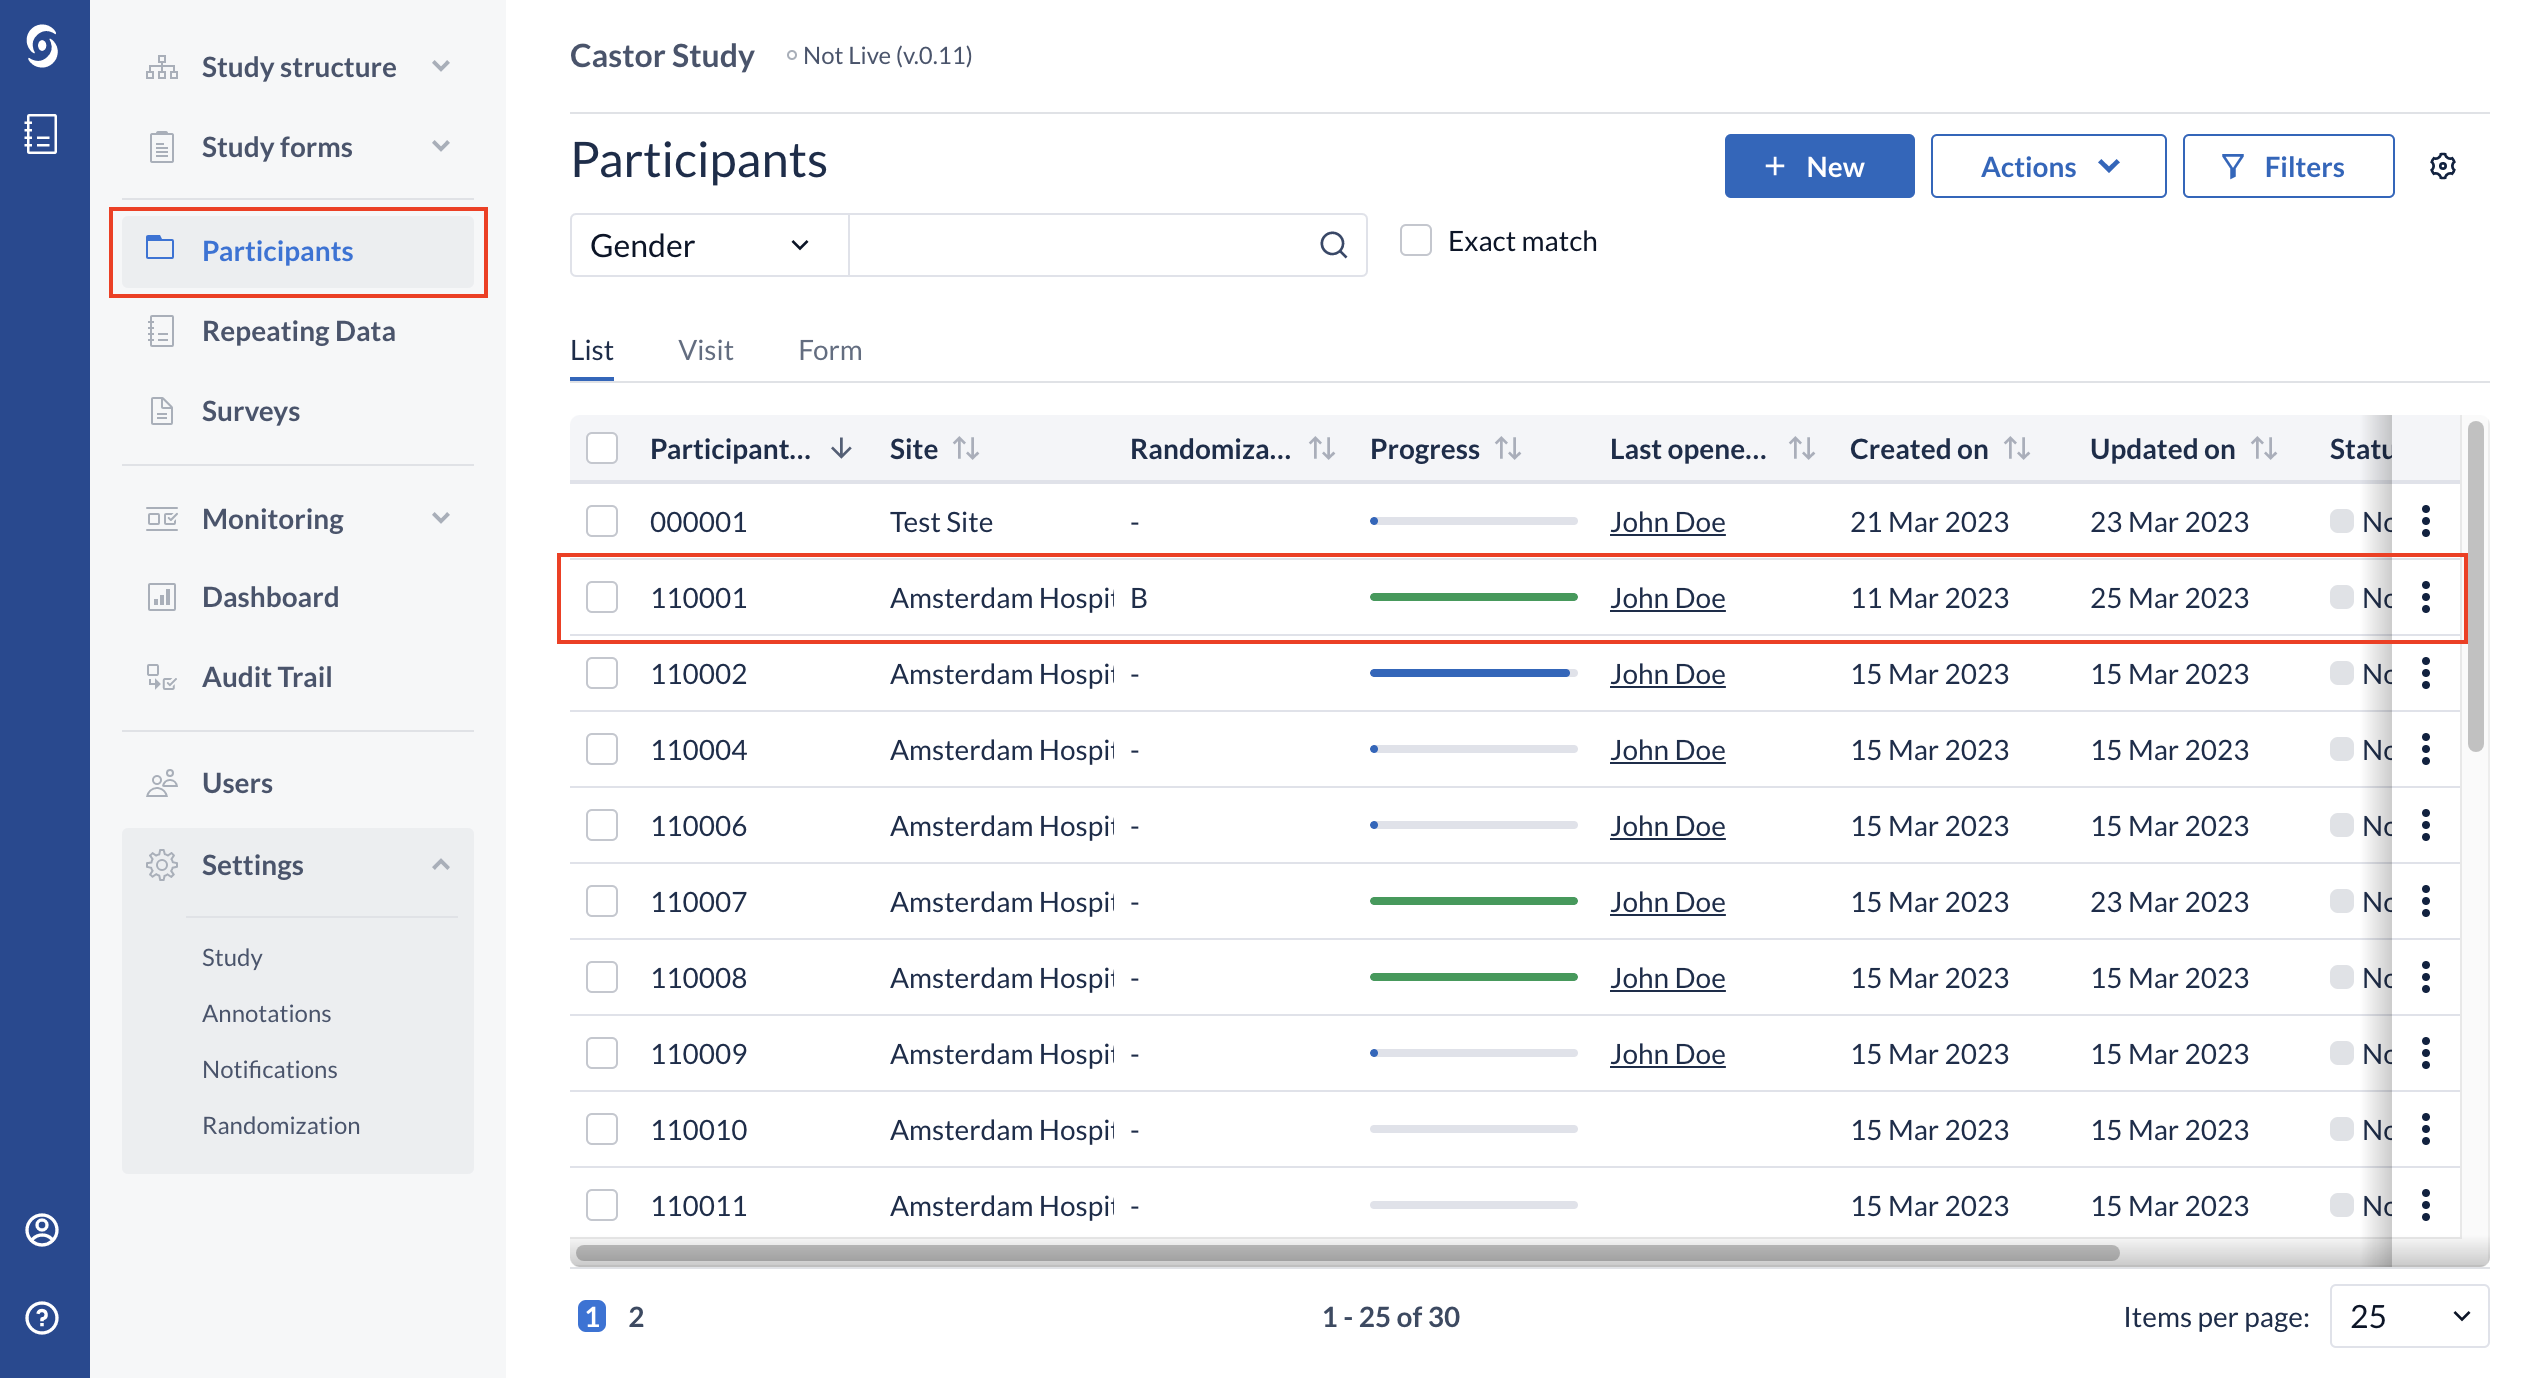
Open a participant
Next, you must open the participant for which you want to lock the visit or form. Open a participant by double clicking on it. You can also hover with your mouse over the participant, and then click on the eye icon. If you don't have any participants, create a new one.
- Navigate to the 'participants' tab.
- Open a participant by double clicking on the participant row.
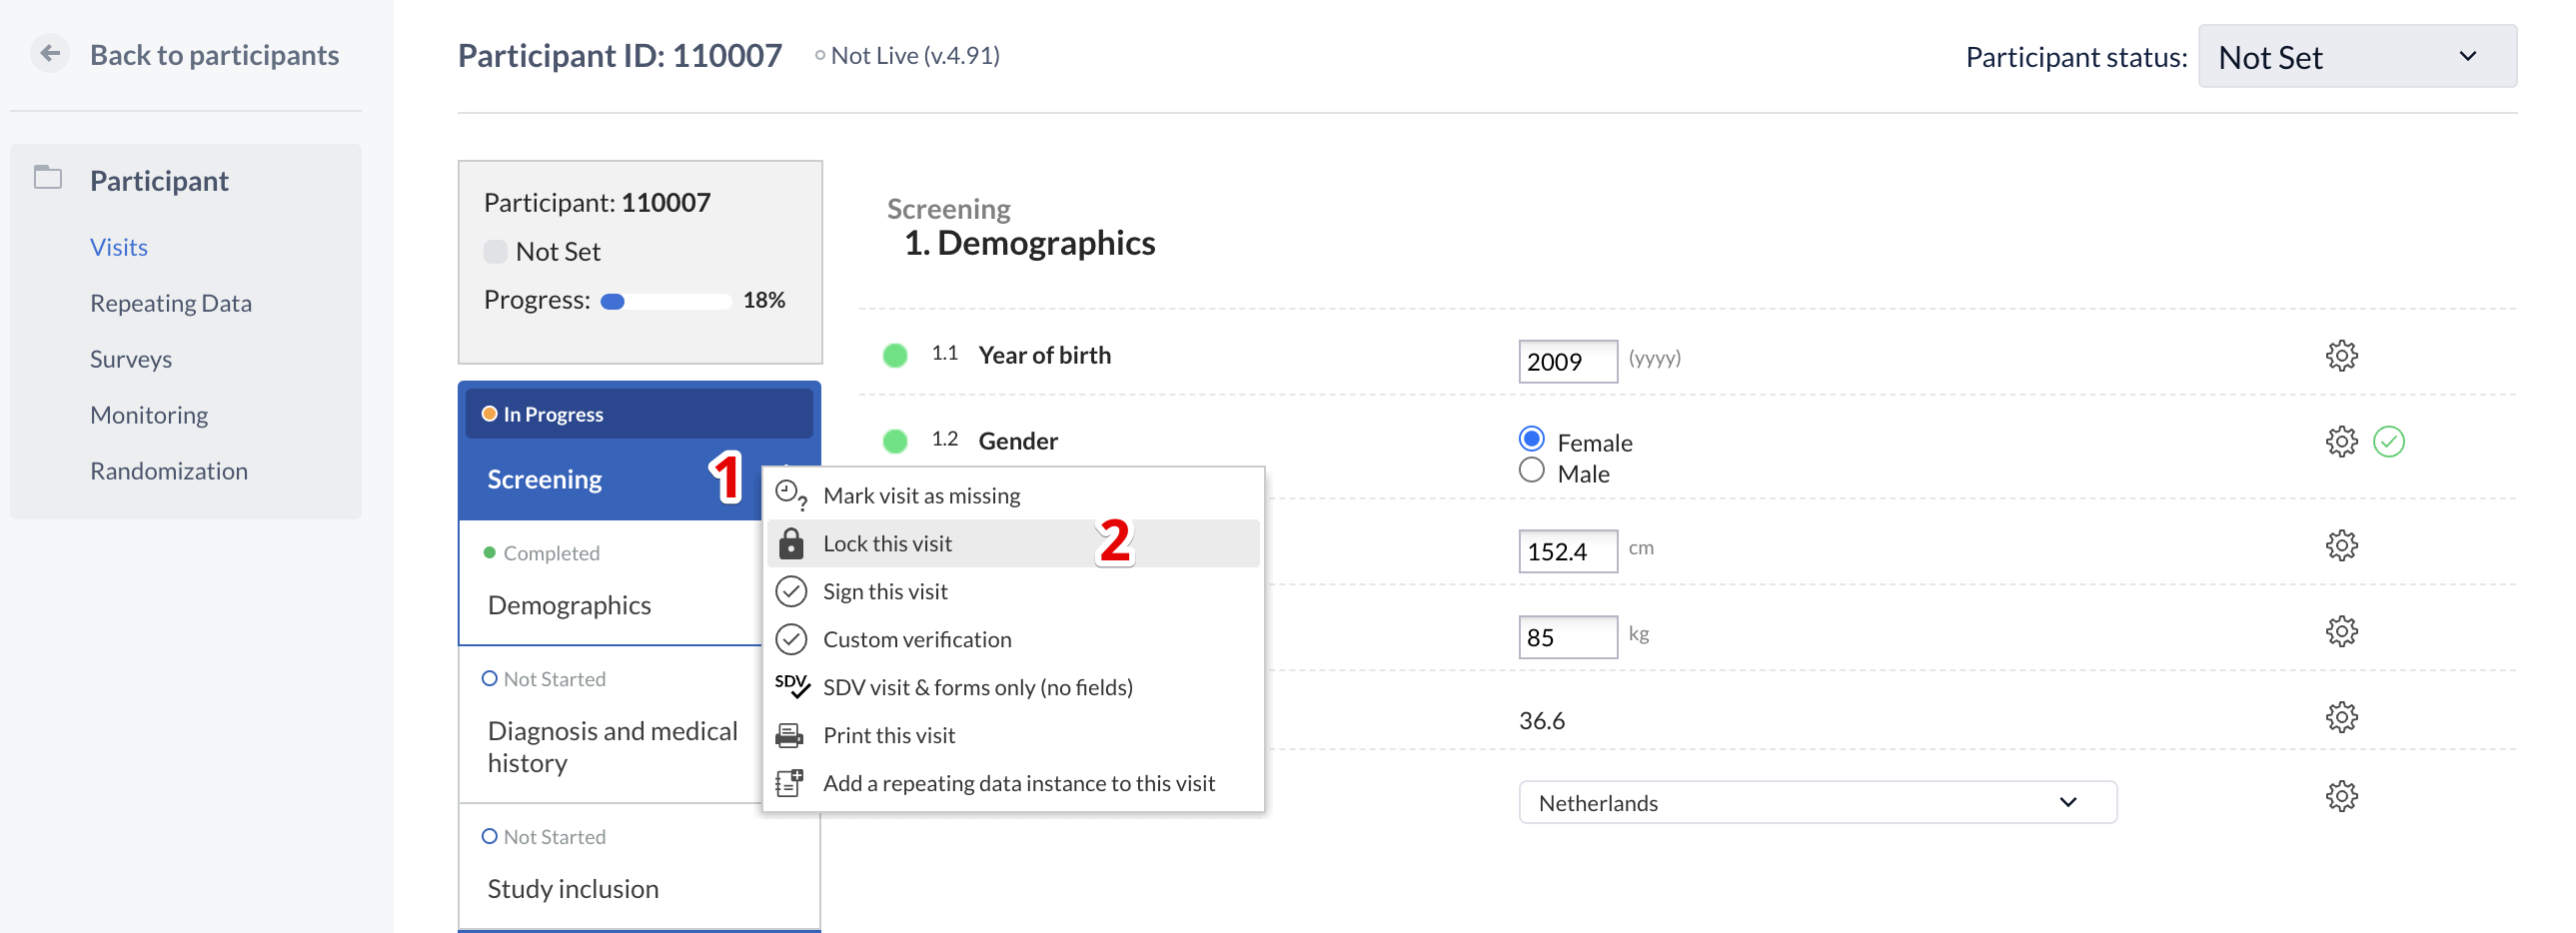
Lock a visit
If you only want to lock a form, scroll down to '4. Lock this form'. After opening a participant, you will automatically be taken to the Study tab. You can lock a visit via the navigator on the left side of the data entry view.
- Click on the three dots next to the visit you wish to lock, this will open the visit menu.
- Click on the option 'Lock this visit'.
Lock a form
You also have the option to lock individual forms. Click on the three dots next to the form you wish to lock, If you have sufficient rights, you can click on the option to 'Lock this form'.
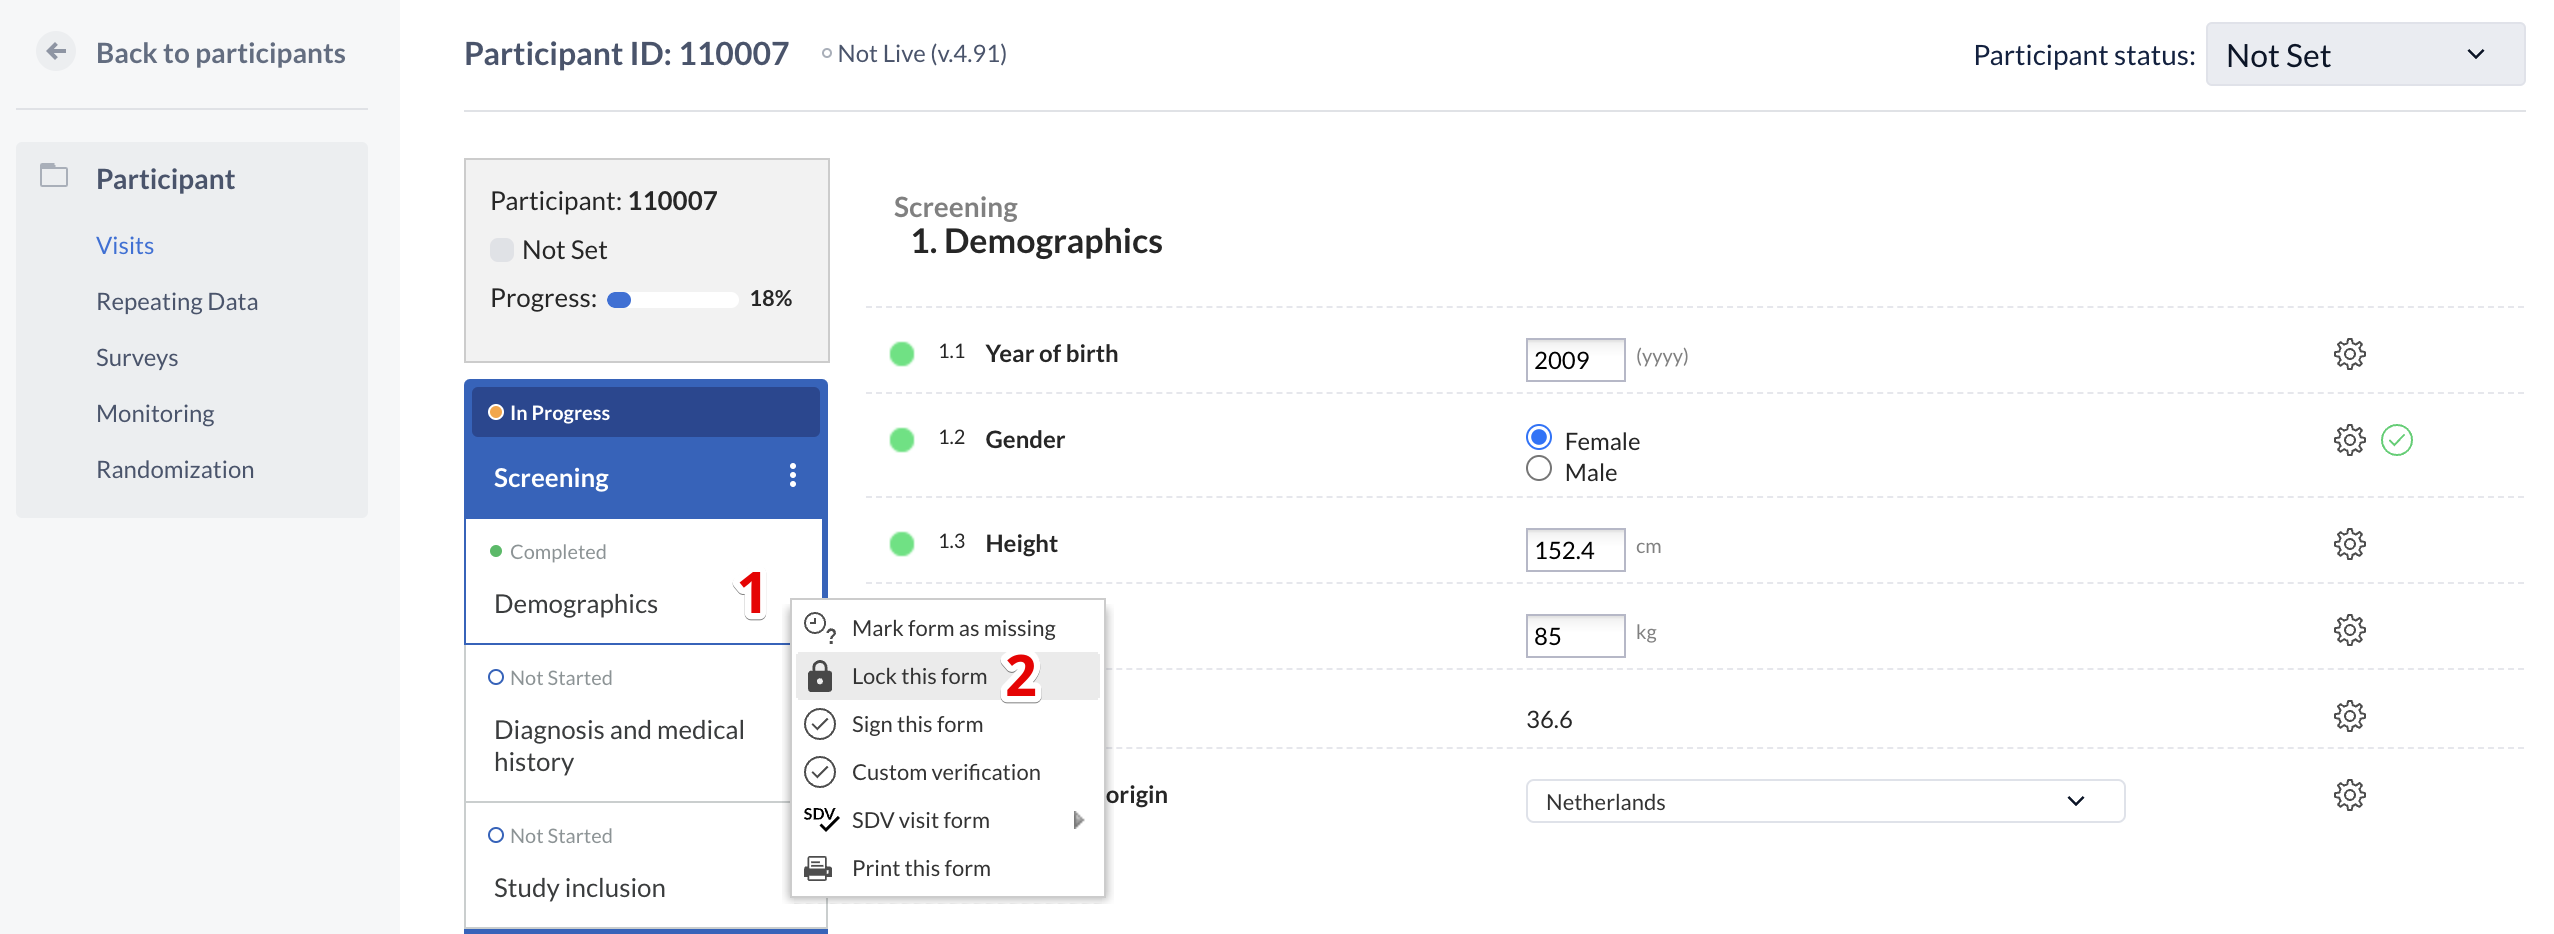
Note: forms, visits or repeating data with pending queries cannot be locked.
Showing locked visits and forms
After you lock the visit or form, entering the participant will display as below:
- In the navigator, the visits and forms will show a small padlock on the right side.
- In the study data entry view, a message will display indicating that the form is locked. It will specify the date and time it was locked as well as the name of the user who locked the form.
- The fields will be faded out and no interaction can be performed, indicating no additional data-entry is possible for this visit.

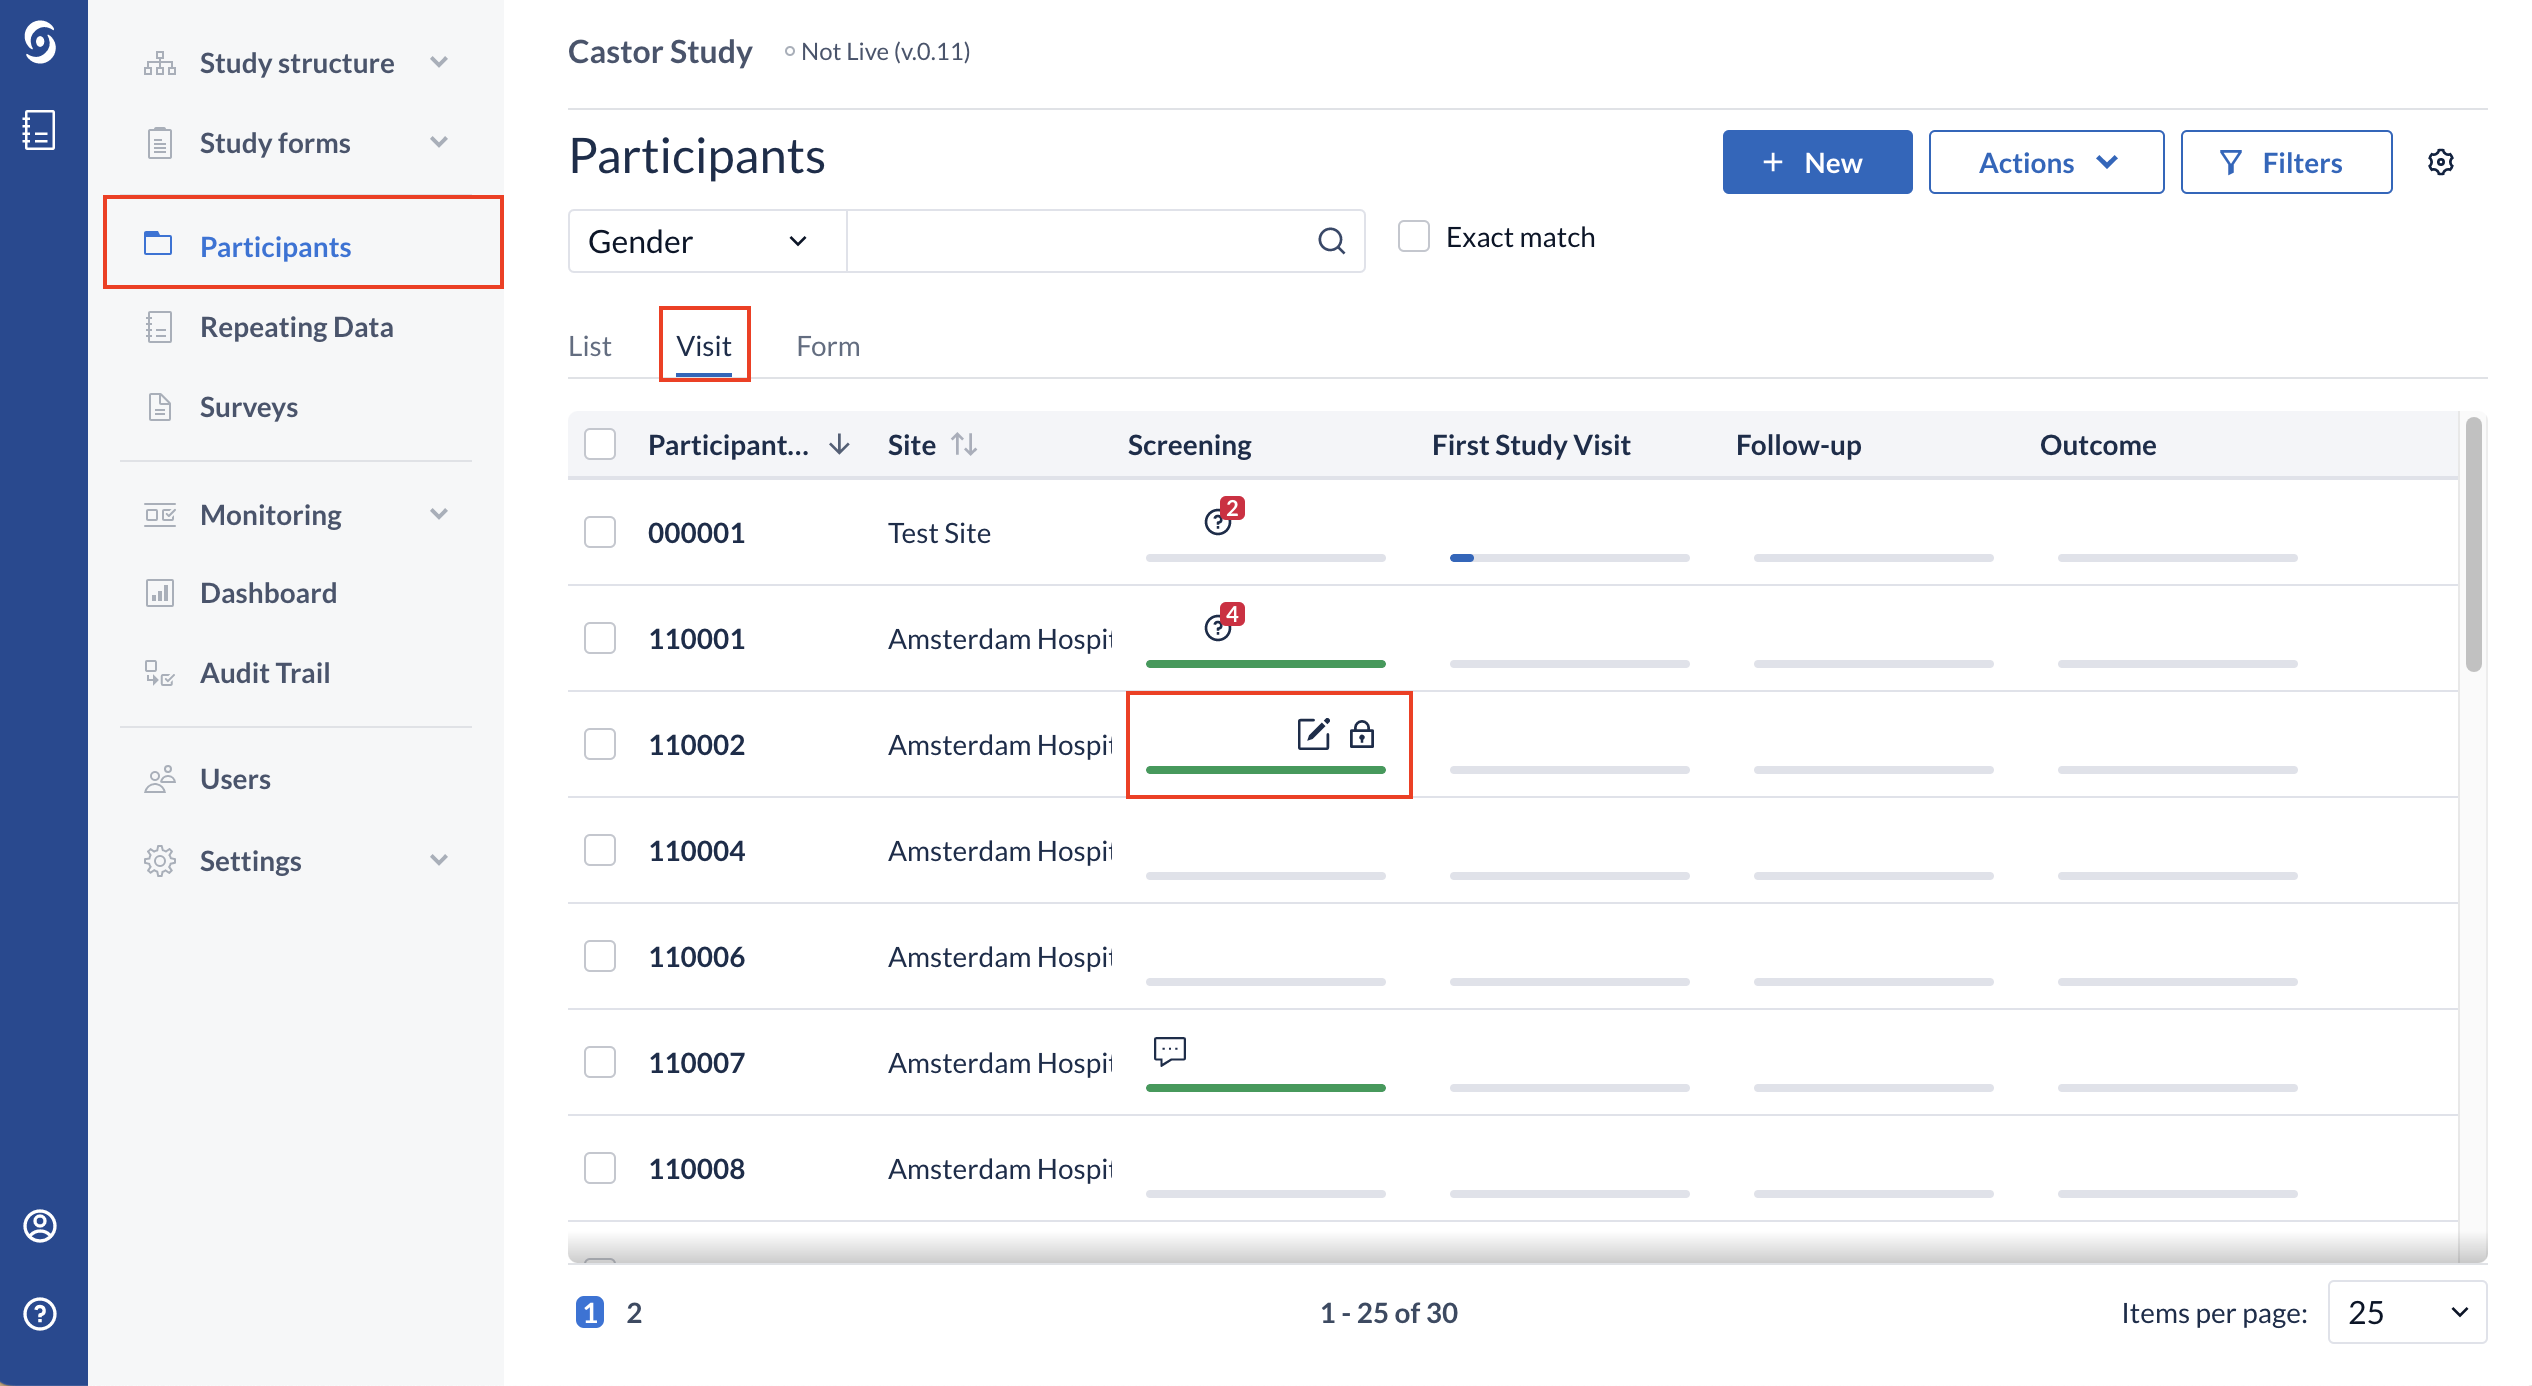
You can also see the locked status of the forms/visits by viewing the participants in different view modes.
- Navigate back to the participant list.
- Change your view mode to 'Visit' or 'View'.
- A padlock symbol will appear for the locked visit(s) or form(s). If only one form of a visit is locked, the visit will not display as locked in the 'Visit' view mode.
Unlock a visit/form
To unlock visits or forms, open the participant again. Unlocking the visit or form will enable data entry and will be logged in the audit trail. There are two ways in which you can unlock a form.
- Click on the three dots next to the locked visit or form in the same way you did when you locked it. Click 'Unlock this visit/form'.
- Alternatively, navigate to the form you want to unlock. Then click on 'Unlock' on the right side of the data entry view.
